Route Planning: A Beginner’s Guide
A good outdoor adventure doesn’t start when you put your boots on.
It starts with a map.
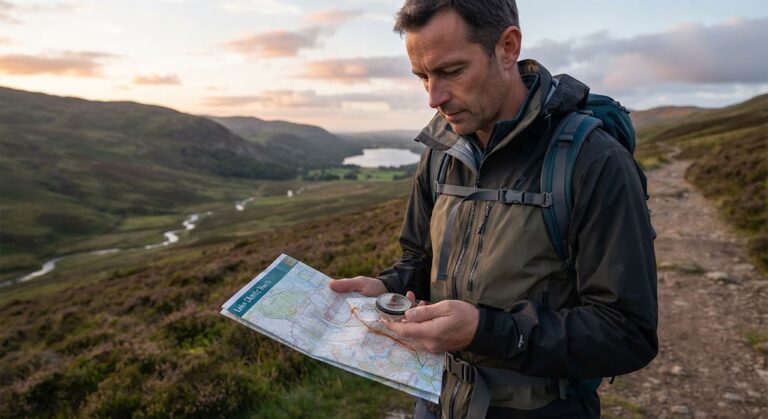
Whether you’re planning a short Scout hike, a countryside walk with friends or your first independent day hike, knowing how to plan your route can make the difference between an enjoyable day and a difficult one.
Route planning isn’t simply about finding the quickest way from A to B.
You need to think about:
- Distance
- Time
- Terrain
- Weather
- Navigation
- Water
- Food
- Equipment
- Fitness
- Escape routes
- Emergency plans
The most important question isn’t:
“Can I complete this route?”
It’s:
“Is this route suitable for me, my group and the conditions?”
Safety First
Always plan a route that matches your experience, fitness, equipment and the conditions.
Check the weather forecast before setting out and reconsider your plans if conditions deteriorate.
Tell someone responsible where you’re going and when you expect to return, particularly when travelling independently.
For Scout activities, follow your leader’s instructions, appropriate risk assessments and current Scouts guidance.
A route can be changed, shortened or abandoned at any time. Reaching the planned destination isn’t more important than staying safe.
1. Start With the Map
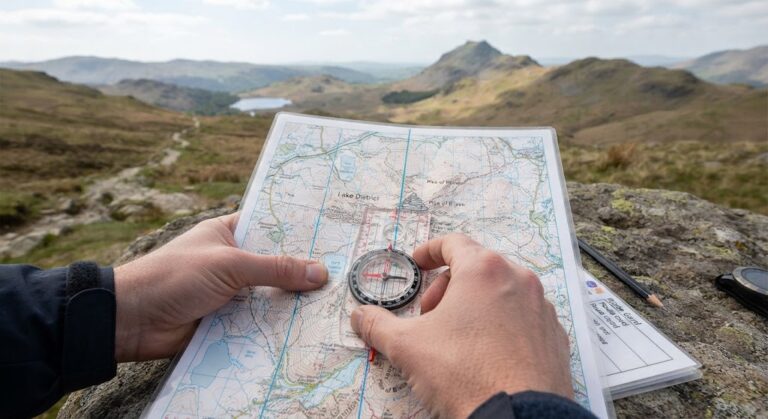
Before choosing your route, look at the area on a suitable map.
Find:
YOUR STARTING POINT
Where will you begin?
YOUR DESTINATION
Where are you trying to reach?
AVAILABLE ROUTES
What paths, tracks, roads or rights of way connect them?
TERRAIN
Are there hills, valleys, steep slopes or difficult ground?
WATER
Are there rivers, streams, lakes or other water features?
USEFUL LOCATIONS
Are there campsites, buildings, shelters or other facilities nearby?
Don’t immediately draw a straight line between your start and finish.
The landscape rarely works that way.
2. Measure the Distance
Once you’ve identified a possible route, work out how far it is.
A route that looks short on the map may be considerably longer on the ground.
Remember that:
Distance isn’t the same as difficulty.
A 5 km flat walk could be easier than a 3 km route involving steep climbs and difficult terrain.
Think about:
Distance + terrain + conditions + your ability
3. Estimate Your Walking Time
Knowing the distance is only half the job.
You also need to estimate how long the route might take.
Your speed can be affected by:
- Fitness
- Age
- Group size
- Terrain
- Hills
- Mud
- Weather
- Navigation stops
- Rest breaks
- Equipment carried
Don’t plan your route based on your fastest possible walking speed.
Build in time for the things that will inevitably slow you down.
4. Add Extra Time
This is one of the most important route-planning habits.
Imagine you calculate:
Route = 3 hours
Don’t plan to arrive exactly three hours after leaving.
You might encounter:
- A difficult section
- A wrong turn
- A closed path
- A slow group member
- Bad weather
- An unexpected break
- Navigation problems
Build in a sensible time margin.
That way, a small delay doesn’t immediately become a major problem.
5. Look at the Terrain
Distance alone doesn’t tell you how difficult a route will be.
Look at the terrain.
Ask:
Are there steep hills?
How much climbing is involved?
Are there exposed sections?
Is the ground likely to be muddy?
Are there rocky or uneven areas?
Are there streams to cross?
Are there narrow paths?
The same distance can feel completely different depending on the terrain.
6. Understand Elevation
Maps can show you how much the land rises and falls.
This is often shown using contour lines.
Closely spaced contour lines generally indicate steeper ground.
Widely spaced contours generally indicate gentler slopes.
When planning a route, look for:
How many significant climbs are there?
A route with several steep climbs may require much more energy than a flatter route of the same distance.
7. Choose Navigation Points
Don’t think of your route as one continuous line.
Break it into sections.
For example:
START
↓
Woodland entrance
↓
Stream
↓
Road crossing
↓
Hill
↓
Campsite
↓
FINISH
These are your navigation checkpoints.
At each point, you should be able to ask:
“Where am I, and how do I know?”
8. Look for Attack Points
An attack point is an obvious feature close to your destination that you can navigate towards before making the final approach.
For example:
Your destination might be a small campsite.
Instead of trying to navigate directly to it, you could navigate first to:
A large bridge
↓
Then follow the path
↓
Then reach the campsite
The bridge is easier to identify and gives you a reliable starting point for the final section.
9. Add Catching Features
A catching feature helps tell you when you’ve gone too far.
For example:
“If we reach the river, we’ve gone too far.”
This gives you an important warning.
When planning your route, ask:
“What feature would tell me that I’ve missed my turn?”
Good catching features might include:
- Rivers
- Roads
- Large paths
- Woodland edges
- Ridges
- Buildings
- Major valleys
10. Check the Weather
Never plan a route independently of the weather.
Check the forecast before setting out.
Look at:
- Temperature
- Rain
- Wind
- Visibility
- Snow or ice
- Thunderstorms
- Weather warnings
Then ask:
“Would I still choose this route if the forecast is correct?”
An exposed hilltop might be perfectly reasonable in calm weather but unsuitable in strong winds and poor visibility.
11. Think About Poor Visibility
What happens if the weather changes?
Imagine your route in:
Fog
Heavy rain
Darkness
Snow
Low cloud
Can you still navigate it?
If not, consider whether you have:
- A suitable map
- Compass
- Headtorch
- Backup navigation
- Alternative route
12. Plan Escape Routes
A really good route plan doesn’t just have a beginning and an end.
It has options.
Ask:
“What if we need to stop halfway?”
Look for possible exit points such as:
- Roads
- Railway stations
- Villages
- Car parks
- Public transport
- Buildings
- Alternative paths
You don’t necessarily need to use them.
But knowing they’re there can make your route much safer.
13. Have a Plan B
Things don’t always go according to plan.
Maybe:
- The weather changes
- Someone becomes tired
- A path is blocked
- You’re running late
- Navigation becomes difficult
- Someone becomes unwell
Have an alternative.
Your original route.
A shorter or easier route.
A safe way to end the activity early.
This is especially useful when planning longer walks.
14. Think About Your Group
A route isn’t suitable simply because you can walk it.
Think about everyone taking part.
Consider:
- Age
- Fitness
- Experience
- Medical needs
- Confidence
- Equipment
- Previous outdoor experience
For Scouts, the leader should make the appropriate decisions about the suitability of the activity and group.
For young adults planning their own walks, be realistic about your experience.
Don’t plan for your strongest member.
Plan for the whole group.
15. Plan Your Equipment
Your route determines what equipment you need.
For a simple walk, you may need:
- Map
- Compass
- Phone
- Water
- Food
- Suitable footwear
- Waterproof clothing
- Warm layers
- Headtorch
- First-aid supplies
- Emergency information
A more challenging route may require additional equipment.
Ask:
“What could this route throw at me?”
Then prepare accordingly.
16. Plan Your Water
Don’t assume you’ll find safe drinking water along the way.
Before leaving, consider:
- How much water you’ll need
- Where you can safely refill
- Whether water sources are reliable
- Whether treatment would be required
For longer routes, identify potential water sources on the map.
But remember:
A stream on a map doesn’t automatically mean you have a safe drinking-water source.
17. Plan Food and Breaks
Food isn’t just about hunger.
Long walks require energy.
Think about:
When will we stop?
Where can we safely take a break?
How much food do we need?
Do we need extra food?
Choose suitable stopping points where possible.
A sheltered location can be particularly valuable in poor weather.
18. Think About Daylight
This is easy to overlook.
A route that is straightforward in daylight may be much more difficult in darkness.
Check:
What time does the sun set?
How long will the route take?
Do we have enough daylight?
Do we have headtorches?
What happens if we’re delayed?
Don’t plan to arrive back exactly at sunset.
Give yourself a sensible margin.
19. Identify Hazards
Before setting out, look at the route and identify potential hazards.
These could include:
- Busy roads
- Railways
- Rivers
- Cliffs
- Steep slopes
- Deep water
- Exposed ground
- Unstable terrain
- Livestock
- Tidal areas
Don’t simply write:
“There might be hazards.”
Identify them specifically.
Then ask:
“What will we do about them?”
20. Tell Someone Your Plan
If you’re going out independently, let someone responsible know:
Where you’re going
Who you’re with
Your planned route
When you expect to return
When they should raise concern if you haven’t returned
For longer or more remote activities, this becomes particularly important.
If you change your route significantly, update the person who has your plans where practical.
Your Route Plan
A simple route plan could look like this:
ROUTE PLAN
Route name: __________________
Date: __________________
Starting point: __________________
Destination: __________________
Distance: __________________
Estimated walking time: __________________
Planned finish time: __________________
Navigation points
1. __________________
2. __________________
3. __________________
4. __________________
Main hazards
1. __________________
2. __________________
3. __________________
Weather considerations
Plan B
Exit points
Emergency information
The Route Planning Process
Here’s the system I’d like Scouts and beginners to remember:
PLAN → CHECK → PREPARE → SHARE → GO
PLAN
Choose a suitable route.
CHECK
Check weather, terrain, distance and conditions.
PREPARE
Take the equipment and supplies you’ll need.
SHARE
Tell someone your plans when appropriate.
GO
Start your adventure — while continuing to monitor conditions.
Your First Route Planning Challenge
Plan a 5 km Walk
Choose a familiar area.
You don’t actually have to walk the route yet.
Your challenge is to plan it properly.
Find:
Then explain your route to someone else.
Can they understand your plan without looking at your map?
Bonus Challenge: The Route Swap
This is a great group activity.
Everyone plans a short route.
Then swap plans with another person.
You now have to review their route.
Look for:
Then ask:
“Would I actually choose to walk this route?”
If not, explain why.
This teaches you to critically assess a route rather than simply draw one.
Explorer Challenge: Plan a Full Day Hike
Now increase the difficulty.
Plan a longer route suitable for your experience.
Your route plan must include:
- Route – Start → checkpoints → destination → return.
- Distance – Total distance.
- Elevation – Major climbs and descents.
- Navigation – Key checkpoints, attack points and catching features.
- Weather – What conditions could affect the route?
- Water – Where will you carry or obtain water?
- Food – Where will you take breaks?
- Daylight – Will you finish before darkness?
- Escape routes – Where could you leave the route early?
- Plan B – What happens if the original route becomes unsuitable?
- Emergency plan – How would you get help?
Then present your route to your group or leader.
What Have You Learned?
You should now understand that route planning is much more than drawing a line on a map.
You’ve learned how to:
And most importantly:
A good route plan gives you options when things don’t go according to plan.
Scout Connection
Route planning brings together many of the navigation and outdoor skills you’ve already been learning.
MAP READING
Understanding the landscape and choosing a route.
COMPASS SKILLS
Maintaining direction and confirming your position.
WEATHER
Understanding how conditions can affect your plans.
HIKING
Choosing a route suitable for your ability.
DECISION-MAKING
Knowing when to continue, change route or turn back.
LEADERSHIP
Planning for the needs of the whole group.
SurvivalGuidesUK is an independent educational resource and isn’t an official Scouts website. Always follow the current Scouts programme requirements and your leader’s instructions.
What’s Next?
Now you’ve learned how to plan a route, build on those skills:
CHOOSING A CAMPSITE
LIGHTING A CAMPFIRE
HOW TO FIND & PURIFY WATER
SurvivalGuidesUK Safety Notice
Route planning should always take into account the experience and abilities of everyone taking part, the terrain, weather, daylight, equipment and other relevant risks.
Conditions can change after a route has been planned.
You do not have to complete the route you planned.
If conditions become unsuitable, change the route, turn around or end the activity.
For Scout activities, follow your leader’s instructions, appropriate risk assessments and current official Scouts safety guidance.
🔒Ready to test your survival skills?
Join Survival Guides UK for free, complete challenges, earn badges and increase your Survival Level.
JOIN FREE →
CRAIG BURR
FOUNDER · SURVIVAL GUIDES UK
I'm Craig, the person behind Survival Guides UK. I created SGUK because I wanted somewhere people could learn real outdoor skills in a practical, straightforward way — from lighting a fire and tying knots to navigation, campcraft and everything in between.
You can read more about the story behind SGUK here as well as our approach here.