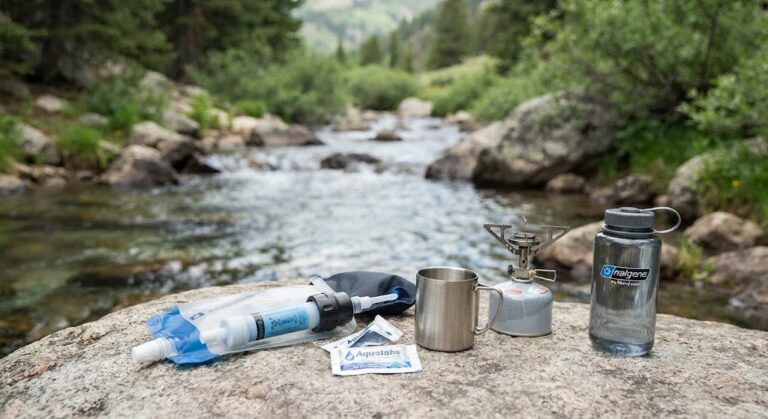
How to Find and Purify Water: A Beginner’s Guide
Affiliate disclosure: This article contains affiliate links. If you purchase something through one of our links, we may earn a commission at no additional cost to you.
Water is one of the most important resources you need when spending time outdoors.
Knowing where to look for water, how to assess a potential source and how to make water safer to drink are valuable outdoor skills.
But there’s an important rule to remember:
Never assume natural water is safe to drink just because it looks clean.
Streams, rivers, lakes, ponds and collected rainwater can contain microorganisms or other contaminants that aren’t visible.
This guide will teach you the basic principles of finding and treating water in an outdoor or survival-skills setting.
Safety First
Untreated natural water should not be assumed to be safe to drink.
Water that looks clear can still contain harmful microorganisms.
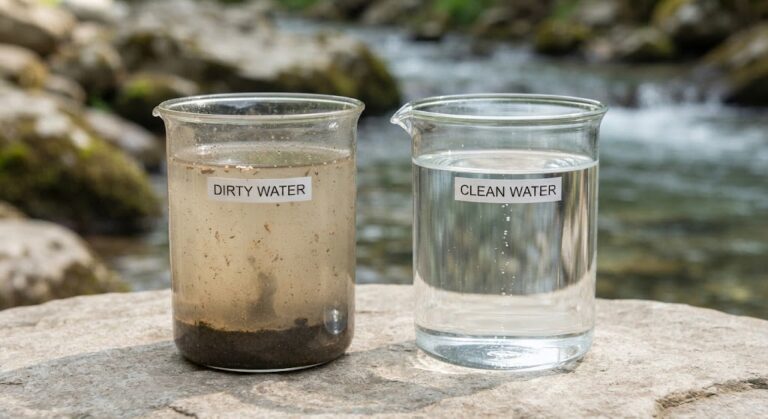
Filtering can remove dirt and sediment, but filtration alone does not necessarily make water safe to drink. Scouts’ own water-filtration activity specifically demonstrates this distinction and tells participants not to drink the filtered water.
For real outdoor trips, your first choice should normally be to carry enough safe drinking water or use an approved drinking-water source.
Water-treatment methods should only be used when appropriate, and you should follow the instructions for the particular treatment equipment or product you’re using.
For Scout activities, follow your leader’s instructions and current Scouts safety guidance.
Why Do We Need Water?
Your body loses water throughout the day through:
- Breathing
- Sweating
- Urination
- Physical activity
This loss increases during hot weather and strenuous exercise.
That means water planning should happen before you set off.
Before an outdoor activity, ask:
How much safe drinking water do we need to take with us?
Don’t rely on finding a natural water source unless you’ve specifically planned how that water will be safely treated.
1. Finding Water
If you’re looking for water outdoors, start by thinking about the landscape.
Water may be found around:
- Streams
- Rivers
- Lakes
- Ponds
- Springs
- Rainwater collection points
- Established water supplies
A map can help you identify potential water sources before you leave.
Use Your Map
Look for symbols representing:
- Water
- Streams
- Lakes
- Water supplies
But remember:
A water symbol on a map tells you that water may be present. It doesn’t tell you that the water is safe to drink.
2. Rainwater
Rain can provide a potential source of water when other sources aren’t available.
However, don’t automatically assume rainwater is safe simply because it came from the sky.
Where it lands and how it is collected matters.
For example, water collected from an appropriate clean surface is very different from water that has passed over:
- Dirty surfaces
- Animal waste
- Contaminated ground
- Polluted areas
Scouts uses rainwater collection and filtration as an educational activity, but makes clear that filtration demonstrations aren’t intended to produce drinking water.
3. Choosing Between Water Sources
If you’re faced with several potential sources, don’t simply choose the closest one.
Look at the surroundings.
Ask:
What is upstream?
Could there be:
Does anything look or smell unusual?
Unusual colour, smell, floating material or obvious pollution should be treated as a warning.
Is livestock nearby?
Animals can affect water quality.
Could the water be contaminated?
Remember that you cannot see all contamination.
4. Water to Avoid
Some sources should immediately make you reconsider.
Avoid water that:
And remember:
Boiling does not remove every possible chemical contaminant.
If you suspect chemical pollution, find another source rather than assuming treatment will make it safe.
Clear Doesn’t Mean Clean
This is one of the most important lessons in water skills.
Imagine you find two water sources.
SOURCE A
Clear, cold-looking stream.
SOURCE B
Muddy-looking stream.
Which one is safer?
You cannot determine that simply by looking.
Source A may contain microorganisms even though it looks perfect.
Source B may contain lots of visible sediment.
That’s why water treatment involves more than simply making water look clean.
6. Filtering Water
Filtration can be useful for removing physical particles.
For example, a filter may remove:
- Mud
- Sand
- Sediment
- Small pieces of debris
This can make water look much clearer.
But here’s the important part:
Clearer does not automatically mean safer.
A simple improvised filter made from materials such as stones, sand and natural materials is an excellent educational experiment, but you should not assume the resulting water is safe to drink.
Scouts demonstrates exactly this principle in its water-filtration activity: participants build filters that remove visible dirt, but are specifically told not to drink the filtered water because microorganisms may remain.
7. Purification vs Filtration
These two words are often confused.
FILTRATION
The aim is to remove physical particles and improve clarity.
PURIFICATION / DISINFECTION
The aim is to reduce or eliminate harmful microorganisms using an appropriate treatment method.
Think of it like this:
Filtration can make water look cleaner. Treatment is what makes it safer from microorganisms.
Depending on the equipment and situation, treatment may involve methods such as:
- Boiling
- Water-purification tablets
- Chemical treatment
- Approved filtration/purification systems
- UV treatment
Different methods have different capabilities.
Always follow the manufacturer’s instructions for commercial treatment equipment or tablets.
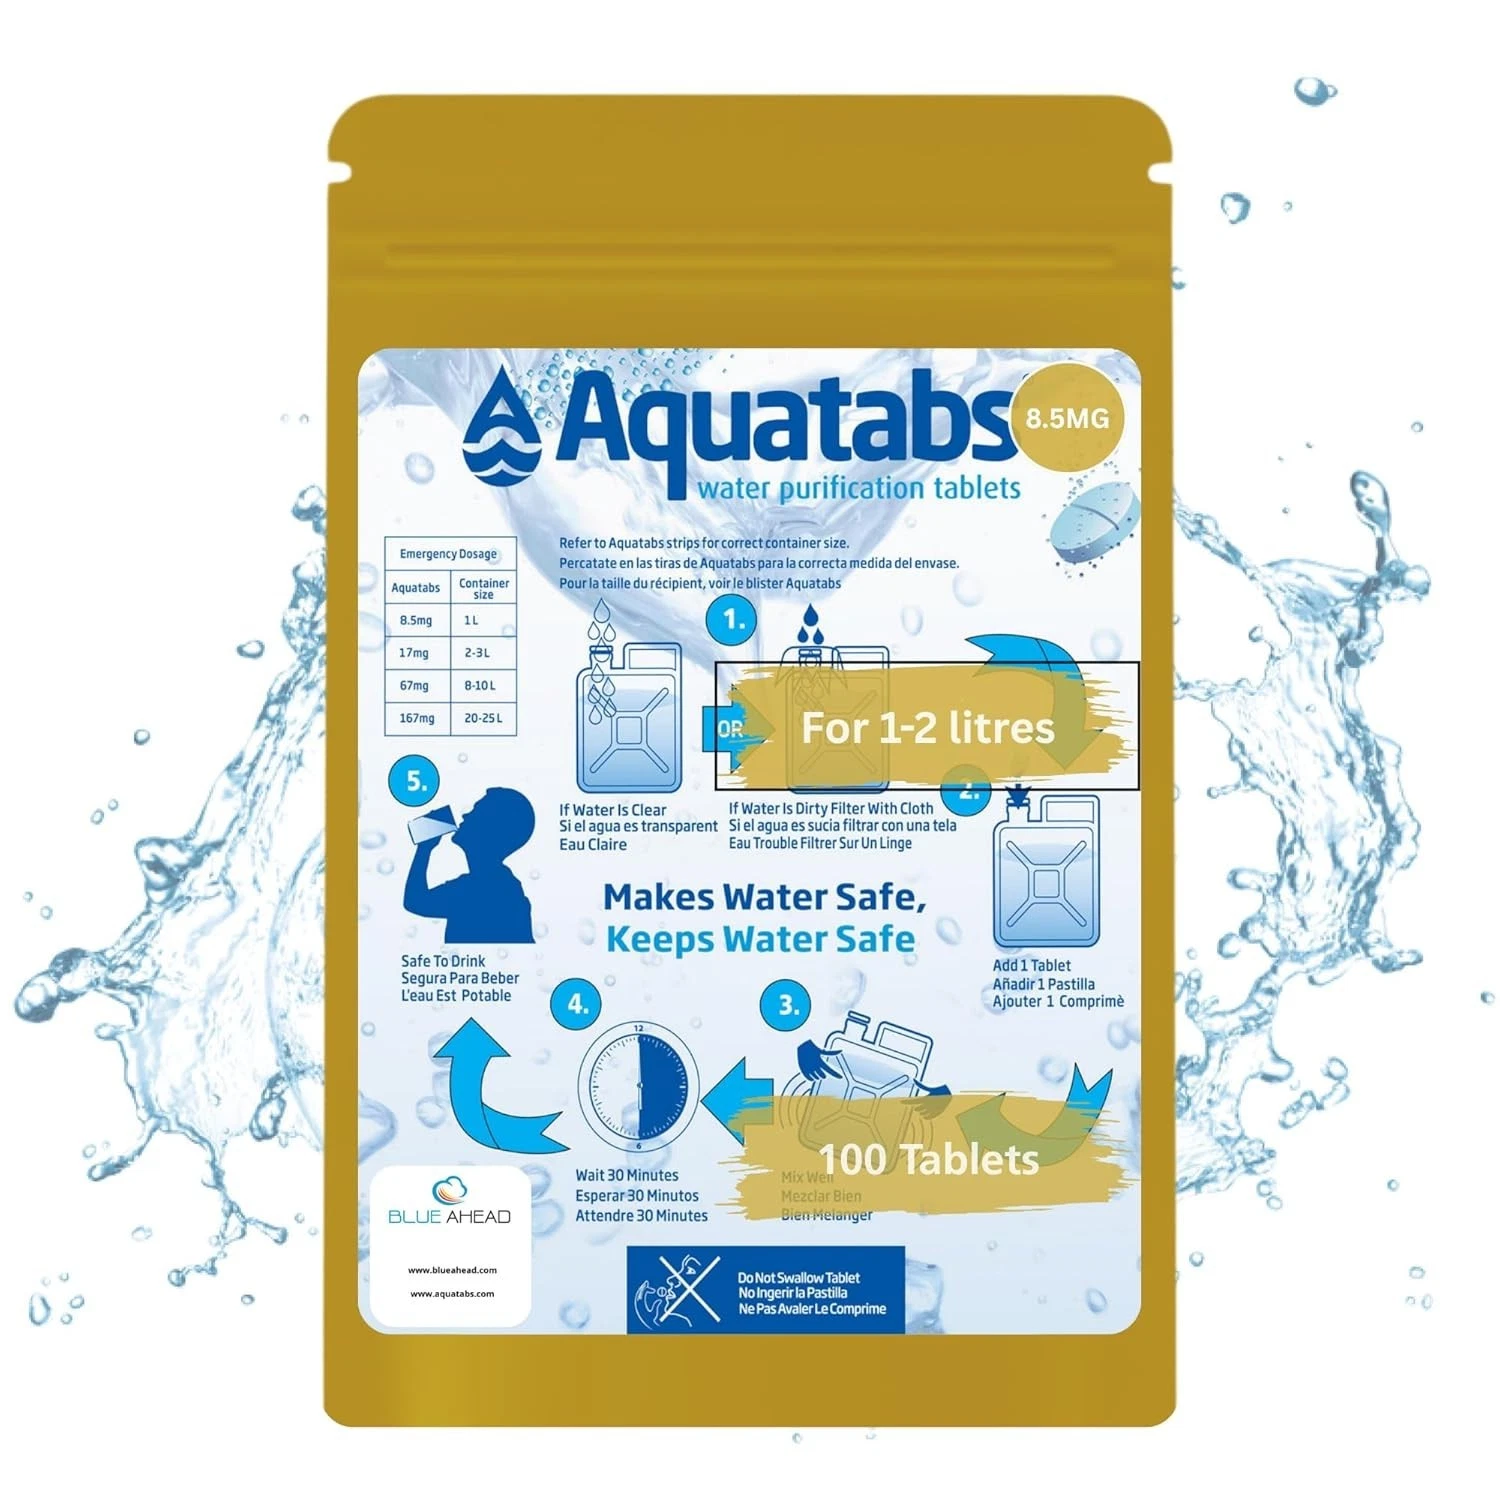
Water Purification Tablets
ONE TABLET TREATS 1 -2 litres of WATER. Get 10 strips of 10 tablets packed in a resealable water-proof uv resistant Mylar Pouch with instructions
When used as recommended they lead to a 99.9999% reduction in bacteria, a 99.99% reduction in viruses and a 99.9% reduction of Cysts (Giardia) 30 minutes after mixing water.
8. Boiling Water
Boiling is a well-established method of treating water for microorganisms.
For Scouts survival activities, their survival-skills material advises filtering/straining dirty water first and then bringing it to a vigorous boil for at least two minutes.
The basic process is:
- Collect the water
- Remove obvious sediment
- Heat the water appropriately
- Bring it to a vigorous boil
- Maintain the required treatment time
- Allow it to cool safely
- Store it in a clean container
The exact treatment guidance you follow should come from your current training, equipment instructions or organisational procedures.
Remember
Boiling water can cause serious burns.
Never allow young people to handle boiling water without appropriate supervision and controls.
9. Water-Purification Tablets
Water-purification tablets can provide another treatment option.
Different products contain different active ingredients and have different instructions.
Always follow the manufacturer’s instructions.
Pay attention to:
- Dosage
- Water volume
- Contact time
- Temperature requirements
- Storage
- Expiry date
- Any restrictions or warnings
Some treatments can leave a noticeable taste.
Don’t guess the dosage.
The instructions on the product you’re using take priority.
10. Using a Water Filter
Commercial outdoor filters can be very useful, but they aren’t all designed to do the same thing.
Before using one, understand:
WHAT DOES IT REMOVE?
Does it primarily remove sediment?
Does it address bacteria?
Does it address viruses?
Does it address protozoa?
Does it address chemicals?
WHAT DOES THE MANUFACTURER SAY?
Look at the specifications and instructions.
Never assume that it has a filter, therefore everything harmful is removed.
Different systems provide different levels of treatment.
The Water Treatment Process
For a simple way to remember the overall process:
FIND → ASSESS → FILTER → TREAT → STORE
FIND
Locate a potential water source.
ASSESS
Look at the source and surrounding area.
FILTER
If necessary, remove visible sediment using an appropriate method.
TREAT
Use an appropriate purification/disinfection method.
STORE
Keep treated water in a clean container and avoid re-contaminating it.
11. Avoid Recontamination
You’ve treated your water.
You’re not finished yet.
Clean water can become contaminated again if:
- A dirty container is used
- Dirty hands touch the drinking opening
- Untreated water is mixed with treated water
- A dirty bottle cap is used
- Water is transferred using contaminated equipment
Keep treated water separate from untreated water.
A useful rule:
Clean container + treated water = safer drinking water.
12. Water Planning When Camping
The best water-treatment strategy is often:
Plan ahead.
Before leaving, establish:
Don’t make finding water your first plan.
Make carrying enough safe water your first plan whenever practical.
The Water Decision
Imagine you’re on an outdoor expedition.
You’ve run low on water.
You discover:
OPTION A
A clear stream.
OPTION B
A muddy pond.
OPTION C
A campsite with an approved drinking-water supply.
OPTION D
Rainwater collected in a clean container.
Which would you choose?
There isn’t necessarily one answer without knowing the circumstances.
You need to consider:
- Source
- Contamination risks
- Available treatments
- Time
- Equipment
- Location
- Weather
- Your group’s needs
Good survival skills aren’t about memorising one answer.
They’re about making a good decision with the information available.
Your First Water Challenge
Can You Find the Best Water Source?
This challenge should be done as an observation and planning exercise, not by drinking from natural water sources.
Find or identify three potential water sources in an appropriate outdoor area.
For example:
Source 1: Stream
Source 2: Pond
Source 3: Approved drinking-water point
For each source, assess:
|
Question |
Source 1 |
Source 2 |
Source 3 |
|---|---|---|---|
|
Is the source obvious? |
✓ / ✗ |
✓ / ✗ |
✓ / ✗ |
|
Is contamination possible? |
✓ / ✗ |
✓ / ✗ |
✓ / ✗ |
|
Is the water visibly clear? |
✓ / ✗ |
✓ / ✗ |
✓ / ✗ |
|
Is it an approved drinking source? |
✓ / ✗ |
✓ / ✗ |
✓ / ✗ |
|
Would treatment be required? |
✓ / ✗ |
✓ / ✗ |
✓ / ✗ |
|
Is it easily accessible? |
✓ / ✗ |
✓ / ✗ |
✓ / ✗ |
Now choose.
Which source would you use?
And most importantly:
Explain why.
Remember:
Never taste-test an unknown water source.
Bonus Challenge: Build a Filter
This is a great Scout activity because you can turn it into an experiment.
Using artificially dirty water, create a simple demonstration filter using safe materials such as:
- Stones
- Sand
- Gravel
- Other suitable materials
Try different arrangements.
Can you make the water visibly clearer?
Then compare your results.
But here’s the challenge:
Would you drink it?
No.
The experiment demonstrates filtration, not proof that the water is safe to drink.
This distinction is also made explicitly in the Scouts water-filtration activity.
Challenge Level: Explorer
Now make it harder.
Imagine you’re planning a 24-hour outdoor expedition.
You have:
- Limited carrying capacity
- A map
- A known water source
- A water filter
- A purification method
- Changing weather
Design your water plan.
You need to decide:
Write down your plan.
Then explain it to someone else.
If they can understand your plan without asking you to explain every step, you’ve done a good job.
Think About the Environment
Finding water doesn’t mean you should damage the area around it.
When collecting water:
Water sources are part of the environment, not simply resources for people to use.
Scout Connection
Water skills are particularly useful for Scouts because they combine:
NAVIGATION
Using maps to identify potential water sources.
OBSERVATION
Assessing the source and surrounding environment.
DECISION-MAKING
Choosing an appropriate course of action.
SCIENCE
Understanding filtration and microorganisms.
PRACTICAL SKILLS
Understanding treatment methods such as boiling.
ENVIRONMENTAL AWARENESS
Understanding the importance of protecting water sources.
Scouts’ current survival-camp material specifically includes purifying water among the possible survival skills activities.
Scouts also has water-filtration activities that can be used as educational exercises, with clear instructions that the resulting filtered water should not be drunk.
SurvivalGuidesUK is an independent educational resource and isn’t an official Scouts website. Always follow the current Scouts programme requirements and your leader’s instructions.
What Have You Learned?
You should now understand that finding water isn’t simply:
“Find a stream and drink it.”
It’s a process:
FIND → ASSESS → FILTER → TREAT → STORE
You’ve learned how to:
That’s the real survival skill.
SurvivalGuidesUK Safety Notice
Never drink untreated water from a natural source unless you have appropriate, reliable information that it is safe.
Water treatment methods have limitations. Boiling, chemical treatment, filtration and other methods do not necessarily address every possible contaminant, so the method must be appropriate for the water and the equipment being used.
Never use an improvised filter as proof that water is safe to drink.
When camping or undertaking an organised activity, follow the instructions of the responsible leader, site rules, current organisational guidance and the manufacturer’s instructions for any water-treatment equipment.
🔒Ready to test your survival skills?
Join Survival Guides UK for free, complete challenges, earn badges and increase your Survival Level.
JOIN FREE →
CRAIG BURR
FOUNDER · SURVIVAL GUIDES UK
I'm Craig, the person behind Survival Guides UK. I created SGUK because I wanted somewhere people could learn real outdoor skills in a practical, straightforward way — from lighting a fire and tying knots to navigation, campcraft and everything in between.
You can read more about the story behind SGUK here as well as our approach here.