How to Build a tarp A-frame
A tarp A-frame shelter is a classic and one of the simplest shelters you can build outdoors. It is a useful skill to learn because the same basic design works with very little equipment. With a tarp, some cordage and a few suitable pegs, you can create a shelter that gives you protection from rain and some cover from the wind.
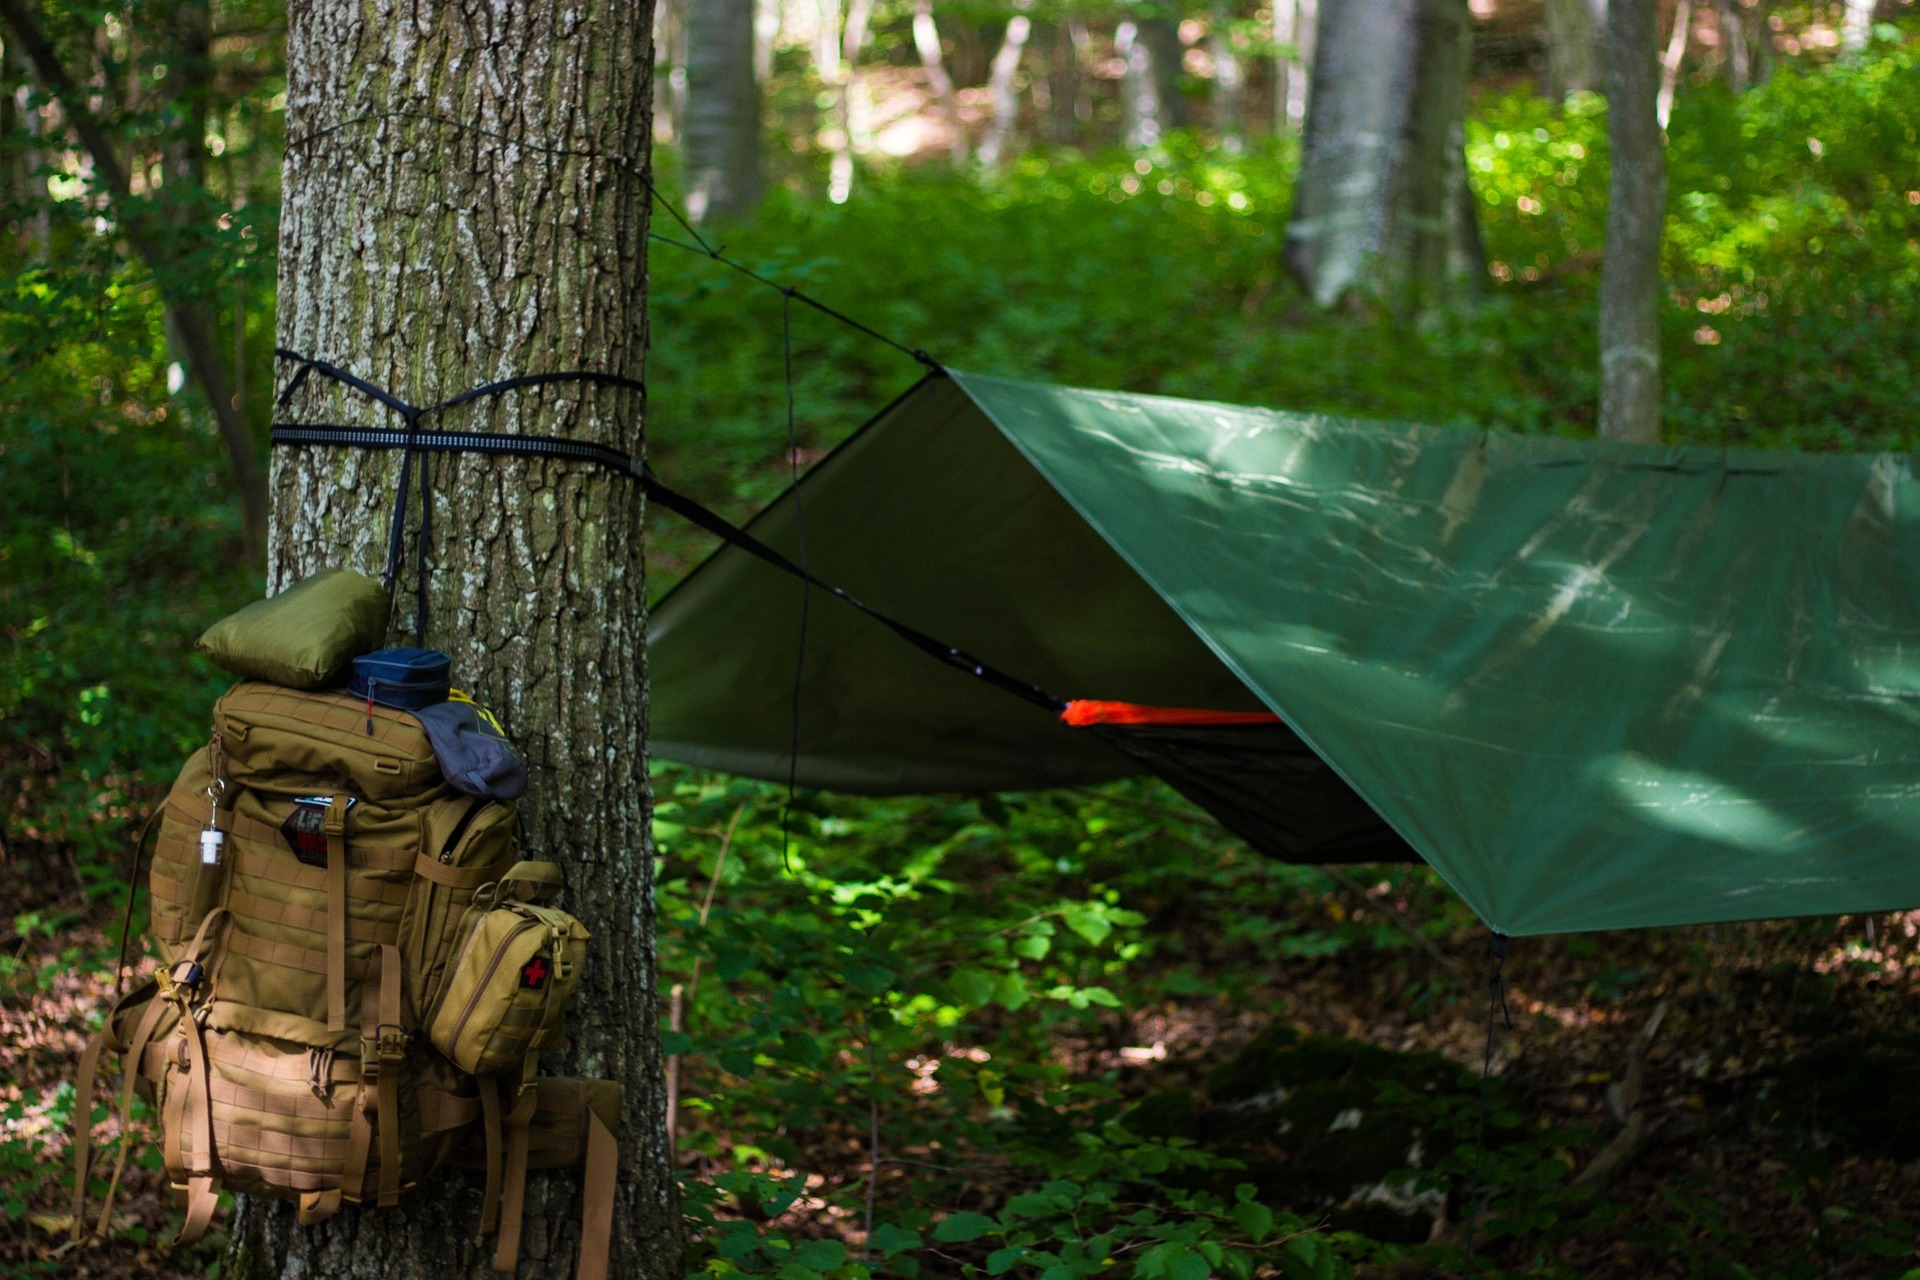
The design is simply a tarp folded over a central ridgeline, with the two sides running down towards the ground. Once you understand how the ridgeline and tension work, you can put one up very quickly.
Choose a Good Location
Start by looking at the ground rather than immediately putting the tarp down. You want somewhere reasonably level, well drained and free from obvious hazards such as dead branches, loose rocks or areas that could collect water.
Think about where rainwater will run if the weather turns wet. A small dip that looks comfortable when the ground is dry can become an unpleasant place to sleep after a few hours of rain.
If you are using trees for your ridgeline, make sure they are healthy, solid trees with suitable branches and no obvious signs of damage. Never rely on a dead tree or damaged branch to support your shelter.
What You Need
A basic A-frame can be made with:
- A tarp
- Strong cordage
- Two suitable trees, or another way of supporting the ridgeline. Even walking poles can be good here.
- Tent pegs or suitable natural anchors
- A mallet or something suitable for driving pegs
The exact amount of cordage you need depends on the size of your tarp and how you are setting it up. It is better to take more than you think you will need, particularly when learning.
Set Up the Ridgeline
The ridgeline is the line that runs along the centre of the shelter and supports the tarp.
Choose two trees far enough apart to allow the tarp to fit comfortably between them. Tie the ridgeline between the trees at roughly the height you want the shelter to be.
If you are expecting strong winds then you want to keep it reasonably low. A lower shelter generally presents less surface area to the wind and can be easier to keep secure.
The ridgeline needs to be tight enough to support the tarp without placing excessive strain on the trees, cordage or knots.
Drape the Tarp Over the Ridgeline
Once the ridgeline is secure, place the tarp over it so that the ridgeline runs through the centre of the tarp.
Try to get the tarp positioned evenly on both sides. If one side is much longer than the other, the shelter will be harder to tension properly and you may end up with an uneven amount of protection.
Take a moment to check the position before pegging anything down. Moving the tarp now is much easier than trying to reposition it once all the corners are secured.
Peg Out the First Side
Start with one side of the tarp. Pull the corner away from the ridgeline and peg it to the ground, keeping the tarp reasonably taut.
Don’t pull it so hard that you distort the fabric. You are aiming for a smooth, controlled shape rather than maximum tension.
Move to the other end and do the same thing. Once both ends are roughly positioned, you can make smaller adjustments to get the edge running straight.
Peg Out the Other Side
Repeat the process on the opposite side.
The finished shelter should have a clear ridge along the centre with the two sides sloping down towards the ground. The lower edges should be close enough to the ground to provide protection from rain without resting directly in puddles or blocking useful ventilation.
If your tarp has multiple pegging points, use them. They can make the shelter considerably more stable, particularly if the weather is unsettled.
Adjust the Tension
This is where a basic tarp shelter can go from looking untidy to working properly.
Walk around the shelter and look at the fabric. If you see large loose sections, adjust the relevant guy line or pegging point. If one corner is pulling the rest of the tarp out of shape, loosen it slightly and work around the shelter again.
You don’t need the tarp to look perfectly flat. Small folds are normal, but you want the main surfaces to be reasonably smooth so rain runs off rather than collecting in large pockets.
Think About the Weather
The direction of the wind matters when choosing how to position your A-frame.
If rain is being driven by wind from one direction, you may want to position the closed end towards the prevailing weather rather than leaving the entrance directly exposed. You can also lower the tarp closer to the ground if conditions become rough.
Remember that an A-frame is an open shelter at both ends, so it isn’t equally protective from every direction. If you need more protection, you may need to alter the layout or choose a different tarp configuration.
Make Sure Water Can Run Off
One of the advantages of the A-frame is that rain can run down both sides rather than collecting on a flat surface.
Check the ground underneath and around the tarp before settling in. You don’t want water running directly underneath your sleeping area.
You can also check the tarp after the first rain. If water is pooling anywhere, adjust the tension or position rather than leaving it to build up.
Use the Shelter Safely
A tarp shelter can provide useful protection, but it isn’t a substitute for proper accommodation in severe weather.
Keep the shelter well away from unsafe trees and branches, and don’t build it in a place where water could collect or suddenly flow through. If you are using a tarp around a campfire or stove, leave plenty of space and make sure the material is not exposed to sparks or flames.
Never assume a tarp is fireproof simply because it is marketed for outdoor use.
Practise the Setup
The first time you build an A-frame, it can take longer than expected. That’s completely normal. As with anything else, the more you practise, the quicker you will become at judging the height of the ridgeline, positioning the tarp and getting the tension right.
Try building one in different conditions and with different tarp sizes. Once you understand the basic design, you can start experimenting with small changes to the pitch to give yourself more room, better wind protection or improved rain coverage.
Keep It Simple
The A-frame works because it doesn’t need a complicated structure. A good ridgeline, a correctly positioned tarp and sensible tension are enough to create a surprisingly useful shelter.
Learn to build the basic version well before worrying about elaborate tarp configurations. Once you can put up a solid A-frame quickly and confidently, you’ll have a useful campcraft skill that can be adapted to all sorts of outdoor situations.
🔒Ready to test your survival skills?
Join Survival Guides UK for free, complete challenges, earn badges and increase your Survival Level.
JOIN FREE →
CRAIG BURR
FOUNDER · SURVIVAL GUIDES UK
I'm Craig, the person behind Survival Guides UK. I created SGUK because I wanted somewhere people could learn real outdoor skills in a practical, straightforward way — from lighting a fire and tying knots to navigation, campcraft and everything in between.
You can read more about the story behind SGUK here as well as our approach here.