5 Survival Shelters Every Scout Should Know
Activity Overview
Difficulty: Intermediate
Time: 1–2 hours
Location: Suitable woodland or outdoor training area
Best for: Scouts, Explorers and outdoor enthusiasts
Skills: Shelter building, pioneering, outdoor survival, site selection, environmental awareness, teamwork
Knowing how to create a basic shelter is an important outdoor skill.
A good shelter helps protect you from wind, rain, cold ground and exposure to the elements. It doesn’t need to be complicated. The best shelter is usually one that can be built quickly from suitable materials and provides effective protection for the conditions.
Five useful shelters for Scouts to learn are:
- Lean-to shelter
- Tarp shelter
- Debris shelter
- Natural shelter
- Emergency windbreak
The key principle is simple:
Choose a safe site → protect yourself from the weather → insulate from the ground → keep the shelter stable → stay dry.
A shelter is not automatically safer simply because it is more elaborate. In an emergency, a simple shelter that can be built quickly may be more useful than an ambitious structure that takes hours to construct.
What You’ll Learn
By the end of this guide, you’ll know how to:
🟡 SAFETY – LOW RISK
Shelter building is generally manageable with sensible supervision, but the activity can involve branches, cordage, uneven ground and working beneath or around natural materials.
Take care to:
- Check the area for dead branches and unstable trees.
- Never build beneath obviously damaged or dead trees.
- Be cautious when moving heavy branches or logs.
- Don’t climb trees to obtain materials.
- Keep sharp tools out of the construction area unless the activity specifically includes their safe use.
- Check that the finished structure is stable.
- Don’t use a shelter during severe weather if the location itself is unsafe.
- Leave the site responsibly when the activity is finished.
A training shelter should be treated as a temporary structure, not as protection from extreme weather.
Equipment
The equipment depends on the shelter.
Useful equipment
- Tarp or lightweight shelter sheet
- Paracord or suitable guyline
- Pegs
- Mallet
- Groundsheet
- Sleeping mat
- Suitable clothing
- Gloves for handling rough natural materials
For natural-material shelters, you may also collect suitable sticks, branches, leaves and other natural materials where this is permitted.
A knife or saw is not required for the basic versions of these shelters.
Prerequisites
Before building a shelter, Scouts should understand basic outdoor safety and how to work as a team.
You should also know how to:
- Inspect an area for obvious hazards.
- Tie a few simple knots if using cordage.
- Work safely around other people.
- Keep equipment organised.
- Leave the area as you found it as far as reasonably possible.
Before collecting natural materials, make sure you have permission to do so.
Instructions
1. Build a Lean-To Shelter
The lean-to is one of the most useful basic shelter designs to learn.
It consists of a sloping roof supported by a ridge or horizontal pole, with the covering angled down towards the ground.
How to build it
- Choose a suitable location away from hazards.
- Position the main support so that the shelter’s open side faces away from the prevailing wind where practical.
- Place several supporting poles at an angle from the ground to the main support.
- Add a suitable covering.
- Secure the covering so it cannot easily blow away.
- Add insulation on the ground inside the shelter.
A tarp makes the construction much faster, but a lean-to can also be demonstrated using suitable natural materials.
Why learn it?
The lean-to is relatively simple and provides useful protection from wind and rain while leaving an open side for access.
It is also an excellent introduction to shelter construction because Scouts can clearly see how support, angle and covering work together.
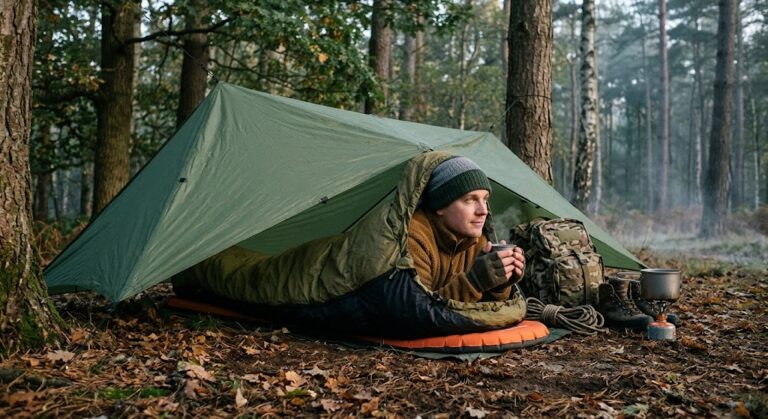
2. Build a Tarp Shelter
A tarp is one of the most versatile pieces of outdoor equipment you can carry.
Unlike a shelter made entirely from natural materials, a tarp can provide effective weather protection very quickly.
How to build it
- Select a safe, reasonably level site.
- Identify suitable anchor points.
- Run a ridgeline between two secure points if the design requires one.
- Drape the tarp over the ridge.
- Peg or guy out the corners.
- Adjust the shape so water can run away rather than collect.
- Add a groundsheet or sleeping mat inside.
Avoid tying cord around unsafe or unstable trees.
Why learn it?
Tarp shelters teach Scouts how to make a shelter quickly and efficiently.
They also demonstrate how the same piece of equipment can be configured differently depending on wind direction, rain and available space.
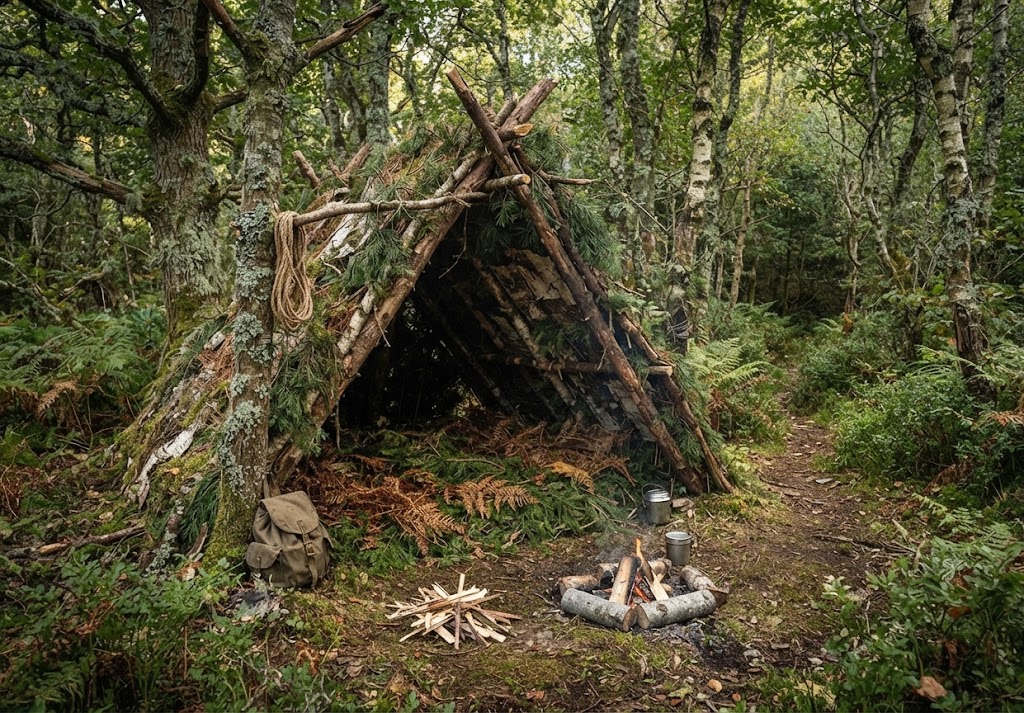
3. Build a Debris Shelter
A debris shelter uses natural materials such as branches and dry leaves to create an insulated enclosure.
It takes considerably more time than a tarp shelter but teaches an important survival principle: insulation matters.
How to build it
- Choose a safe location.
- Create a strong central support.
- Add branches along the sides to form a basic frame.
- Cover the frame with layers of suitable natural material.
- Add plenty of dry insulating material where appropriate.
- Make the covering thick enough to reduce gaps.
- Keep the entrance as small as practical.
The shelter should be large enough for the person using it, but unnecessarily large shelters are harder to insulate.
Why learn it?
A debris shelter demonstrates that a shelter doesn’t have to be made from specialist equipment.
It also teaches Scouts to think about heat loss, insulation and efficient use of natural materials.
Natural materials should only be collected where this is permitted, and living vegetation should not be damaged unnecessarily.
4. Use a Natural Shelter
Sometimes the best shelter is one that already exists.
Natural features such as large rocks, banks or suitable overhangs can provide protection from wind and rain without requiring a major construction project.
How to use one safely
- Inspect the feature carefully.
- Check for loose rocks, unstable branches and signs of flooding.
- Consider where water will flow during rain.
- Check whether the site is exposed to wind.
- Improve the protection with a tarp or other suitable covering if available.
- Insulate yourself from the ground.
Don’t assume that a natural overhang is automatically safe.
Avoid locations beneath unstable rock faces, damaged trees or areas that could become waterlogged.
Why learn it?
Shelter construction isn’t always about building something.
Good outdoor judgement means recognising when the landscape already provides useful protection and using it safely.
5. Build an Emergency Windbreak
A windbreak is a simple shelter designed primarily to reduce exposure to wind.
It doesn’t necessarily provide a fully enclosed sleeping area, but reducing wind can make a significant difference to comfort and heat loss.
How to build it
- Identify the direction of the wind.
- Choose a safe location.
- Create a low frame using suitable poles or available equipment.
- Attach a tarp, groundsheet or other appropriate material.
- Anchor it securely.
- Position yourself on the sheltered side.
- Add insulation beneath you if remaining there for any length of time.
A windbreak can also be incorporated into a larger shelter.
Why learn it?
It is quick to construct and teaches an important lesson:
You don’t always need a complete shelter to improve your situation.
If wind is the main problem, reducing wind exposure may be the quickest useful improvement.
6. Choose the Right Shelter for the Conditions
There isn’t one perfect survival shelter.
Consider:
- Rain: Prioritise a waterproof roof and drainage.
- Wind: Position the shelter carefully and secure it well.
- Cold: Prioritise ground insulation and reducing drafts.
- Heat: Look for shade and allow ventilation.
- Time available: Choose something that can be built quickly.
- Equipment: A tarp dramatically changes what is practical.
- Materials: Don’t spend excessive time collecting materials if conditions are deteriorating.
The shelter should solve the actual problem you have, rather than simply being the most impressive structure you can build.
7. Insulate Yourself From the Ground
One of the easiest mistakes to make is concentrating entirely on the roof.
The ground can conduct heat away from your body, particularly when it is cold or damp.
Use suitable insulation such as:
- A sleeping mat.
- Dry leaves where appropriate.
- Folded clothing.
- Other suitable insulating materials.
Keep insulation dry wherever possible.
A shelter with an excellent roof but no protection from the cold ground may still provide poor protection.
8. Check the Shelter Before Using It
Before settling inside, inspect the finished shelter.
Check:
- The structure is stable.
- The covering is secure.
- Water can drain away.
- There are no obvious sharp hazards.
- No unstable branches are overhead.
- The entrance is accessible.
- There is adequate ventilation.
- Your sleeping area is insulated from the ground.
If something looks unstable, fix it before using the shelter.
9. Practise Building Quickly
Shelter skills improve through repetition.
Start by building one design in good weather.
Then practise again with a time limit.
For example, a group could be challenged to build a usable tarp shelter within a set period while still meeting safety requirements.
The aim isn’t simply speed.
A successful shelter should be:
Safe → Stable → Weather-resistant → Comfortable enough for its purpose.
Speed comes naturally as the team becomes more familiar with the process.
10. Leave No Trace
Once the exercise is complete, dismantle temporary shelters unless they have been deliberately established as part of an authorised activity.
Remove cordage and equipment.
Return natural materials where appropriate without damaging the environment.
Don’t cut living trees or vegetation simply to make a training shelter.
A good Scout should be able to build an effective shelter and leave the site responsibly afterwards.
Final Tip
The best survival shelter is the simplest one that solves the problem.
Learn several designs rather than relying on one. If you can recognise a safe natural shelter, quickly erect a tarp, construct a lean-to and create basic protection from wind and cold ground, you’ll have a much more useful set of outdoor skills than someone who only knows how to build one complicated structure.
🔒Ready to test your survival skills?
Join Survival Guides UK for free, complete challenges, earn badges and increase your Survival Level.
JOIN FREE →
CRAIG BURR
FOUNDER · SURVIVAL GUIDES UK
I'm Craig, the person behind Survival Guides UK. I created SGUK because I wanted somewhere people could learn real outdoor skills in a practical, straightforward way — from lighting a fire and tying knots to navigation, campcraft and everything in between.
You can read more about the story behind SGUK here as well as our approach here.