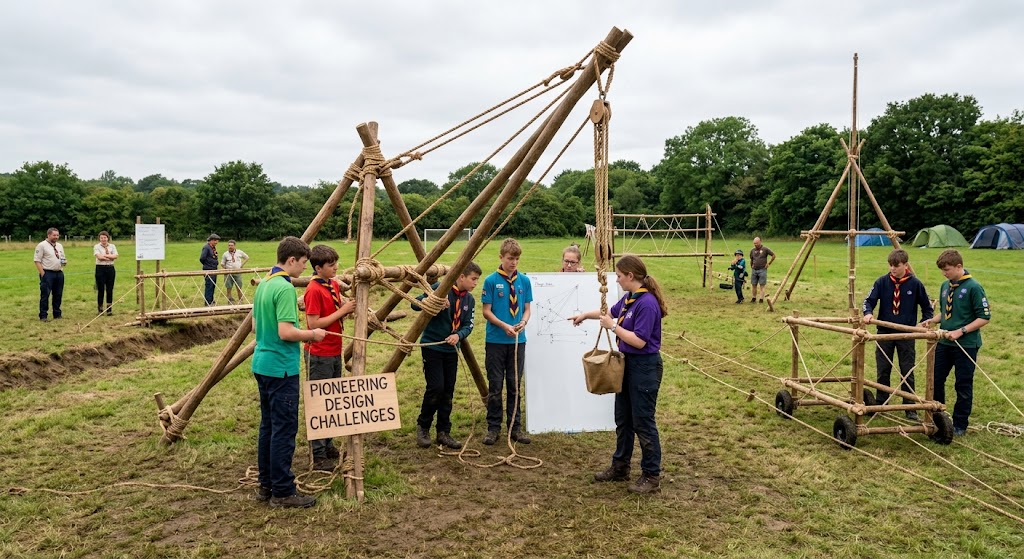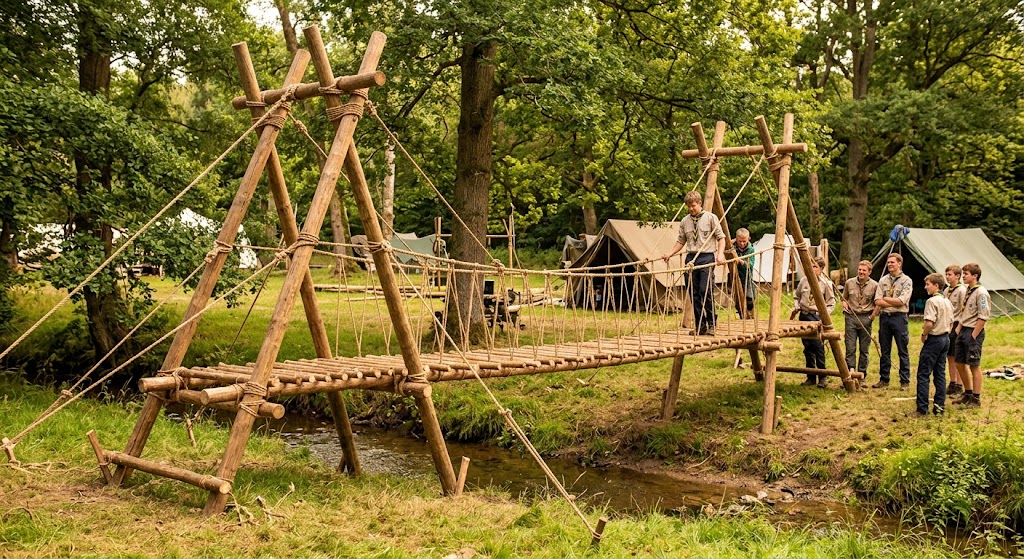
Building a Pioneering Bridge
Activity Overview
Difficulty: Challenging
Time: 2–4 hours
Location: Scout campsites and suitable outdoor activity areas
Best for: Scouts, Explorers, Patrol Leaders and experienced pioneering groups
Skills: Pioneering, knots, lashings, teamwork, planning, ropework and structural awareness
A pioneering bridge is a structure built from poles and rope using traditional knots and lashings.
For a Scout pioneering project, the safest approach is to build a bridge as a supervised construction exercise and not use it for crossing a real drop, river or other hazardous obstacle unless it has been specifically designed, assessed and approved for that purpose by suitably competent people.
A simple ground-level bridge can teach the same core skills while allowing Scouts to practise knots, lashings, planning and teamwork without introducing unnecessary fall or drowning hazards.
What You’ll Learn
You’ll learn how to plan a pioneering bridge, select suitable materials and construct a basic structure using lashings.
You’ll practise square and diagonal lashings, learn how to make the structure stable and understand why careful inspection is essential before anything is placed under load.
🔴 SAFETY – HIGH RISK
Pioneering structures can collapse, poles can move unexpectedly and ropes can fail.
A bridge that looks strong is not necessarily safe to walk across.
For Scout activities, do not construct a bridge over a road, river, steep drop, deep ditch or other hazardous area as a simple campcraft exercise.
Do not allow people to climb on or cross a pioneering structure unless it has been specifically designed and assessed for that purpose.
Use competent adult supervision throughout construction.
Inspect poles, ropes, lashings and the completed structure before use.
Keep people clear of the structure while it is being tensioned or tested.
Equipment
A basic ground-level pioneering bridge can be constructed from suitable pioneering poles and rope.
You’ll need enough poles to create the main supports, cross pieces and handrails or bracing as appropriate to the design.
You will also need suitable rope for the required lashings and guying.
Use equipment that is in good condition and appropriate for pioneering. Don’t substitute damaged poles, unsuitable cord or worn rope simply because it is available.
Prerequisites
Scouts should already be familiar with basic rope handling and common pioneering knots.
A working knowledge of the square lashing, diagonal lashing and clove hitch is useful.
Before starting, inspect the construction area and establish a safe working zone.
Everyone involved should understand that the bridge is a construction project and that nobody climbs onto it until the responsible adult has inspected it.
Instructions
1. Choose a Safe Location
For a training project, build the bridge on relatively level ground.
Avoid areas beside water, steep slopes, roads, unstable ground or other hazards.
A ground-level structure allows Scouts to learn the construction techniques without introducing unnecessary consequences if something fails.
2. Plan the Design
Don’t start by putting poles on the ground and hoping they form a bridge.
Sketch the structure first.
Decide where the main supports will be positioned, where cross pieces will go and how the structure will be braced.
Think about how forces will travel through the structure and where the lashings will be needed.
3. Sort the Poles
Lay out the poles and inspect them.
Look for splits, severe cracks, rot or other damage.
Separate poles according to their intended role.
The strongest and most suitable poles should be used where the design requires them.
4. Establish the Main Supports
Construct the main supporting sections according to your chosen design.
For a simple ground-level bridge, these might consist of paired longitudinal poles connected by cross pieces.
Use appropriate lashings at each joint.
Keep the structure aligned as you build rather than trying to correct a badly positioned frame at the end.
5. Apply the Lashings Correctly
Use the correct lashing for the joint.
A square lashing is commonly used where two poles cross at approximately right angles.
Start with a secure attachment, make the wrapping turns neatly and finish with a firm frapping and appropriate finishing knot.
The lashing should hold the poles together without relying on excessive force.
6. Add Cross Pieces
Attach the cross pieces across the main supports.
Space them consistently and keep them properly aligned.
Each joint should be checked as it is completed rather than waiting until the entire bridge has been built.
7. Add Bracing
A structure that looks solid can still move sideways.
Add appropriate diagonal bracing to reduce unwanted movement.
Use diagonal lashings where the design requires them.
Bracing is particularly important for larger pioneering structures.
8. Add Handrails if Appropriate
If the design includes handrails, attach them securely to suitable upright supports.
Keep them at a sensible height for the intended users.
Remember that a handrail is not a substitute for a properly designed fall-protection system.
For a training bridge, keeping the entire structure close to the ground is preferable.
9. Check Every Joint
Work systematically around the structure.
Check that lashings are tight, properly finished and positioned correctly.
Look for poles that have shifted and joints where the rope has loosened.
If a joint is questionable, rebuild it rather than assuming it will hold.
10. Check the Overall Structure
Stand back and inspect the complete bridge.
Look for obvious movement, leaning, uneven supports or poorly aligned poles.
Check that the structure sits securely on the ground.
Don’t start climbing onto it simply because the individual lashings appear sound.
11. Carry Out a Controlled Test
Testing should be performed by the responsible adult or appropriately competent person.
For a ground-level training bridge, this can initially involve carefully applying small loads while keeping everyone clear of potential failure points.
Never jump on a pioneering structure to “test how strong it is”.
If anything moves unexpectedly, stop and investigate.
12. Establish Rules Before Any Use
If the completed structure is intended to be used as part of a supervised activity, explain exactly how it may be used.
Only allow the number of people and type of activity that the structure has been specifically designed and assessed for.
Don’t allow people to improvise additional uses such as climbing, swinging or hanging from the structure.
13. Monitor the Structure
Pioneering structures can change during use.
Ropes can loosen, poles can move and ground conditions can change.
Inspect the structure periodically during a longer activity.
If the structure becomes unstable, stop using it immediately.
14. Dismantle Carefully
When the project is finished, dismantle the bridge systematically.
Remove loads and loose equipment first.
Keep people clear of sections that may move as lashings are released.
Don’t simply cut all the ropes and allow the structure to collapse.
15. Inspect and Store the Equipment
After dismantling, inspect the poles and rope.
Remove dirt and moisture as appropriate and allow equipment to dry before storage.
Separate damaged equipment so that it isn’t accidentally used on the next pioneering project.
Pioneering Bridge Design
There are many different pioneering bridge designs, from simple ground-level structures to much more advanced projects.
For Scouts learning pioneering, a low-level bridge is an excellent way to practise construction skills without needing to create a high-risk crossing.
More advanced structures require substantially greater knowledge of structural design, loading, anchoring and inspection and should only be undertaken with appropriate competent supervision.
Important Pioneering Terms
Main spars: The primary poles that form the main structure.
Cross pieces: Poles running across the main supports.
Bracing: Diagonal members that help prevent movement.
Lashing: Ropework used to join poles together.
Guying: Ropes used to help stabilise a structure.
Understanding these terms makes it easier for a patrol to communicate while building.
Working as a Patrol
A pioneering bridge is an excellent patrol project because construction can be divided into tasks.
One team can sort poles while another prepares rope lengths. Others can construct sections and check lashings.
The patrol should communicate throughout the build rather than having everyone working on separate parts without a common plan.
A good construction team also knows when to stop and ask for an inspection.
Final Tip
The impressive part of a pioneering bridge isn’t how high it is or how many people can stand on it.
It’s how well it has been planned, constructed and inspected.
For Scout pioneering, start with a low-level design and concentrate on accurate lashings, sound construction and good teamwork. Once those fundamentals are reliable, more advanced pioneering structures can be approached with the appropriate expertise and safety controls.
🔒Ready to test your survival skills?
Join Survival Guides UK for free, complete challenges, earn badges and increase your Survival Level.
JOIN FREE →
CRAIG BURR
FOUNDER · SURVIVAL GUIDES UK
I'm Craig, the person behind Survival Guides UK. I created SGUK because I wanted somewhere people could learn real outdoor skills in a practical, straightforward way — from lighting a fire and tying knots to navigation, campcraft and everything in between.
You can read more about the story behind SGUK here as well as our approach here.