Scouts Survival Skills Badge – Requirements, Activities & How to Complete It
What Is the Scouts Survival Skills Badge?
The Scouts Survival Skills Activity Badge is designed to help Scouts develop practical skills that could be useful when spending time outdoors.
The badge covers a range of subjects, including:
- First aid
- Building shelters
- Fire lighting
- Survival hygiene
- Knife and multitool skills
- Distress signals
- What to do while waiting for rescue
- Personal survival equipment
- Group survival activities
The badge finishes by bringing several of these skills together during a group survival exercise.
Always check the current official Scouts UK requirements with your Scout Leader before starting the badge, as requirements can change.
⚠️ Safety Notice
This guide is for educational purposes and is intended to support supervised Scout and youth-group activities.
Survival activities can involve fire, knives and tools, water, food preparation, uneven ground, weather and other hazards. Always follow the rules of your Scout group, campsite or activity provider and make sure activities are properly risk assessed.
Children and young people should never practise potentially dangerous survival skills without appropriate adult supervision and instruction.
Your Scout Leader or qualified instructor should always make the final decision about whether an activity is suitable and safe for your group.
Survival Skills Badge Requirements
The current badge requirements cover several practical survival skills, followed by the creation of a personal survival kit and a group survival exercise.
Below, we’ve broken the different areas down into practical activities that you can use to learn and practise the skills.
1. Learn Basic First Aid
Knowing what to do when someone is injured is an important survival skill.
When you’re outdoors, you may be further away from immediate help than you would be at home or at your Scout meeting place.
You should understand how to:
Try This Activity
Create a fictional scenario for your patrol.
For example:
One member of your group has fallen and injured their ankle while walking. You’re several kilometres from your meeting point.
Work together to decide:
- What should you do first?
- Who should stay with the injured person?
- Who should get help?
- How will you keep the person warm?
- What information might rescuers need?
Discuss your answers with your Scout Leader.
Remember: This activity is for practising decision-making. It does not replace recognised first-aid training.
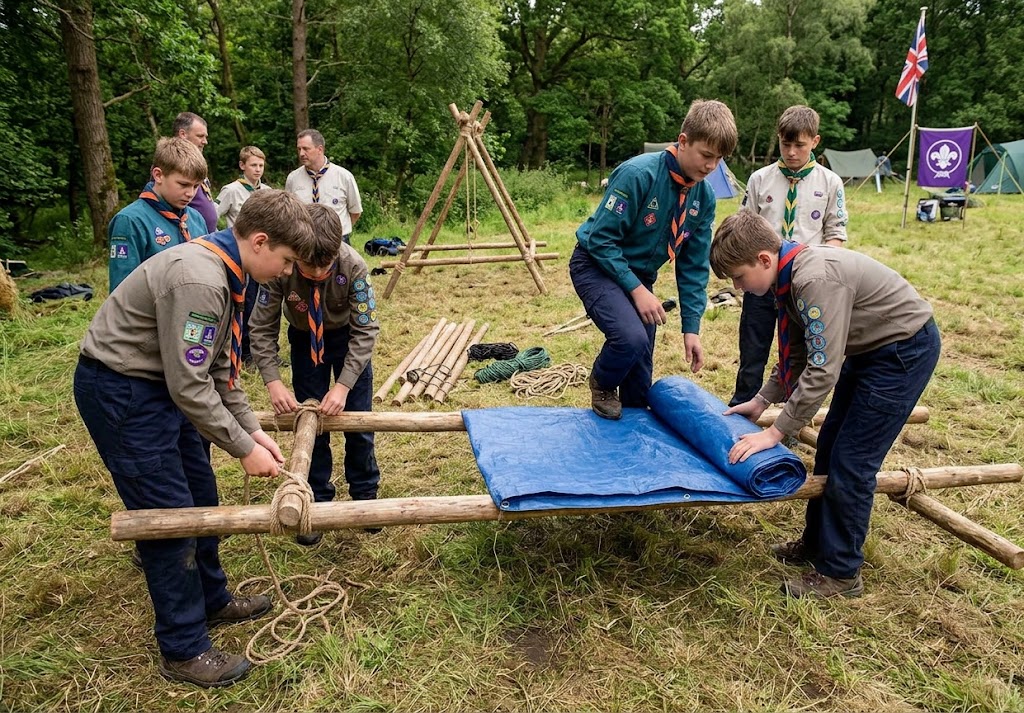
2. Build a Survival Shelter
Shelter is one of the most important considerations when dealing with an outdoor emergency.
Rain, wind and cold can make an otherwise manageable situation much more serious.
There are many different types of survival shelter, including:
- A-frame shelters
- Lean-to shelters
- Tarp shelters
- Natural-material shelters
- Emergency shelters using survival bags or bivvy equipment
Build an A-Frame Shelter
An A-frame is a simple shelter design that can be adapted to different situations.
You may need:
Before starting, inspect the area carefully.
Avoid locations:
Once you’ve selected a safe location, construct the shelter and check that it is stable before anyone uses it.
Shelter Challenge
Can your patrol build a shelter that:
- Fits everyone in the group?
- Provides protection from wind?
- Keeps rain out?
- Can be constructed safely?
- Can be dismantled without damaging the environment?
Related Guides
How to Build a Survival Shelter
Tarp Shelters: A Beginners Guide
3. Learn Safe Fire Lighting
Fire can provide warmth, light and a method of cooking.
However, fire is also potentially dangerous and should only be used where it is permitted and under appropriate supervision.
Before lighting a fire, establish:
Understanding Tinder, Kindling and Fuel
A basic fire normally needs three sizes of material:
TINDER
Small, easily ignited material used to start the fire.
KINDLING
Small dry sticks that help the initial flame grow.
FUEL
Larger pieces of wood that maintain the fire once it is established.
Learning to identify and prepare these materials is an important outdoor skill.
Fire-Lighting Challenge
Under appropriate adult supervision, practise identifying suitable tinder, kindling and fuel.
Then learn how to arrange them into a suitable fire structure using the methods taught by your Scout Leader.
The objective isn’t to build the biggest fire.
The objective is to build a controlled fire that is appropriate for the job.
Related Guide
How to Light a Campfire Safely
4. Understand Survival Hygiene
Good hygiene is still important when you’re camping or taking part in a survival activity.
Poor hygiene can lead to illness and can contaminate food or drinking water.
Think about:
Hygiene Challenge
Imagine your patrol is spending 24 hours outdoors with limited facilities.
Make a list of the hygiene problems you could encounter.
Then discuss how your group could prevent or manage each one.
5. Learn Knife and Multitool Safety
Knives and multitools can be useful pieces of outdoor equipment, but they must always be treated with respect.
The Scouts Survival Skills badge includes basic knife or multitool skills, including safe use, maintenance and sharpening.
Never attempt to learn these skills without appropriate instruction and supervision.
Before using a knife or multitool:
Depending on the equipment and training available, you may learn:
- Safe opening and closing.
- Safe carrying.
- Safe cutting techniques.
- Basic wood preparation.
- Cleaning and maintenance.
- Safe sharpening.
6. Learn Distress Signals
If you become lost or need emergency assistance, knowing how to attract attention can be extremely important.
Common signalling equipment can include:
- Whistles
- Torches
- Mirrors
- Bright markers
- Appropriate ground signals
The Scouts Survival Skills badge includes knowledge of international distress signals.
Whistle Signalling
A whistle can carry much further than a voice, particularly in woodland or poor visibility.
Make sure everyone in your group knows your agreed emergency signal before heading outdoors.
Signalling Challenge
Split into two groups.
One group creates a fictional emergency situation and chooses an appropriate method of attracting attention.
The second group acts as the rescue team.
Can they identify the signal?
Discuss:
- Why was that signal chosen?
- How far away could it be heard or seen?
- Would weather affect it?
- What other method could you use?
7. Know What to Do While Waiting for Rescue
Getting help is only part of an emergency situation.
If you’re waiting for rescuers, you also need to keep your group safe.
Depending on the situation, priorities may include:
- Staying together.
- Finding suitable shelter.
- Keeping everyone warm and dry.
- Looking after anyone who is injured.
- Making your location easier to identify.
- Using appropriate signals.
- Conserving essential resources.
- Following instructions from emergency services.
Scenario Challenge
Imagine your patrol is walking in the countryside when the weather suddenly becomes much worse.
You have:
- A map
- A whistle
- Basic first-aid equipment
- Waterproof clothing
- Some food
- Drinking water
Question:
What are the first five things your group should consider?
Discuss your answers with your patrol and Scout Leader.
There may be more than one correct answer depending on the circumstances.
8. Make a Personal Survival Kit
A survival kit should contain equipment that can help you deal with realistic problems.
The most useful kit isn’t necessarily the biggest.
Instead, think about what each item is actually going to do.
Possible items could include:
- Whistle
- Torch
- Emergency shelter or bag
- Basic first-aid supplies
- Water container
- Cord
- Waterproof notebook and pencil
- Navigation equipment
- Emergency contact information
- Spare batteries where appropriate
Your exact kit should depend on the activity, location, weather and instructions from your Scout Leader.
Survival Kit Challenge
Take your survival kit and imagine three different situations.
You become separated from your group.
Your planned route becomes inaccessible.
You have to remain outdoors for several hours longer than expected.
For each scenario, identify which items could help.
Then ask yourself:
What important problem isn’t covered by my kit?
9. Complete a Group Survival Exercise
The final part of the badge brings your survival skills together.
The current Scouts requirements include taking part in a group survival exercise involving activities such as building a shelter and preparing and cooking food outdoors.
This is your opportunity to use the skills you’ve learned as a team.
Plan Your Survival Exercise
Before starting, divide responsibilities between the group.
Possible roles could include:
- Shelter team
- Fire team
- Cooking team
- Navigation
- First aid and safety
- Team leader
Everyone should understand what is happening, even if they have a particular responsibility.
Stage 1 – Build Your Shelter
Choose a safe location and construct your shelter.
Check that it is:
- Stable
- Suitable for the conditions
- Large enough
- Away from obvious hazards
- Safe to use
Stage 2 – Prepare Your Fire
Prepare and light your fire using the techniques you’ve been taught.
Keep safety as the priority.
Don’t rush simply to complete the challenge.
Stage 3 – Prepare Your Food
Prepare and cook your meal safely.
Think about:
- Food hygiene
- Safe storage
- Safe handling
- Cooking temperatures
- Hot surfaces
- Fire safety
- Keeping your cooking area organised
Stage 4 – Review Your Performance
Once you’ve finished, discuss:
- What worked well?
- What didn’t work?
- Was everyone involved?
- Which equipment was most useful?
- What would you change next time?
- Did you identify any hazards you hadn’t considered?
A good survival exercise isn’t just about completing the tasks.
It’s about learning how to make good decisions as a team.
Survival Skills Challenge Day
Want to turn the badge requirements into a full activity day?
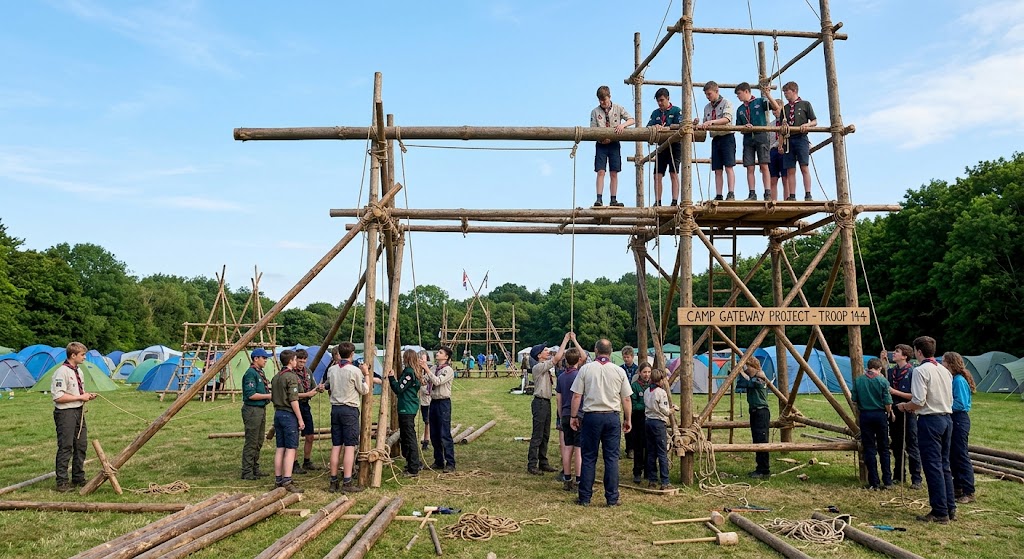
Try running a Scout Survival Challenge Day.
Challenge 1 – Shelter
Build a shelter suitable for the conditions.
Challenge 2 – Fire
Demonstrate safe fire preparation and lighting.
Challenge 3 – Signalling
Demonstrate an appropriate distress signal.
Challenge 4 – Survival Kit
Explain what each item in your survival kit is for.
Challenge 5 – Emergency Scenario
Your leader introduces a new problem.
For example:
“Heavy rain has started.”
Or:
“One member of the group is becoming cold.”
Or:
“Your planned route is blocked.”
Or:
“Help has been delayed.”
Your team must discuss the situation, make a plan and explain what you would do.
The aim isn’t to create a dangerous real-life survival situation.
It’s to practise communication, teamwork, decision-making and problem-solving in a controlled environment.
Survival Skills Badge Checklist
Use this checklist to help you revise the skills you’ve learned.
This checklist is for revision only. Always check the current official badge requirements with your Scout Leader.
Official Badge Information
The official Scouts UK website should always be used as the final reference for the current Survival Skills Activity Badge requirements.
Survival Guides UK is an independent resource and is not affiliated with or endorsed by The Scouts.
Badge requirements and programme information can change, so check the current requirements with Scouts UK and your Scout Leader before completing the badge.
🔒Ready to test your survival skills?
Join Survival Guides UK for free, complete challenges, earn badges and increase your Survival Level.
JOIN FREE →
CRAIG BURR
FOUNDER · SURVIVAL GUIDES UK
I'm Craig, the person behind Survival Guides UK. I created SGUK because I wanted somewhere people could learn real outdoor skills in a practical, straightforward way — from lighting a fire and tying knots to navigation, campcraft and everything in between.
You can read more about the story behind SGUK here as well as our approach here.