How to Pitch a Tent in Wind
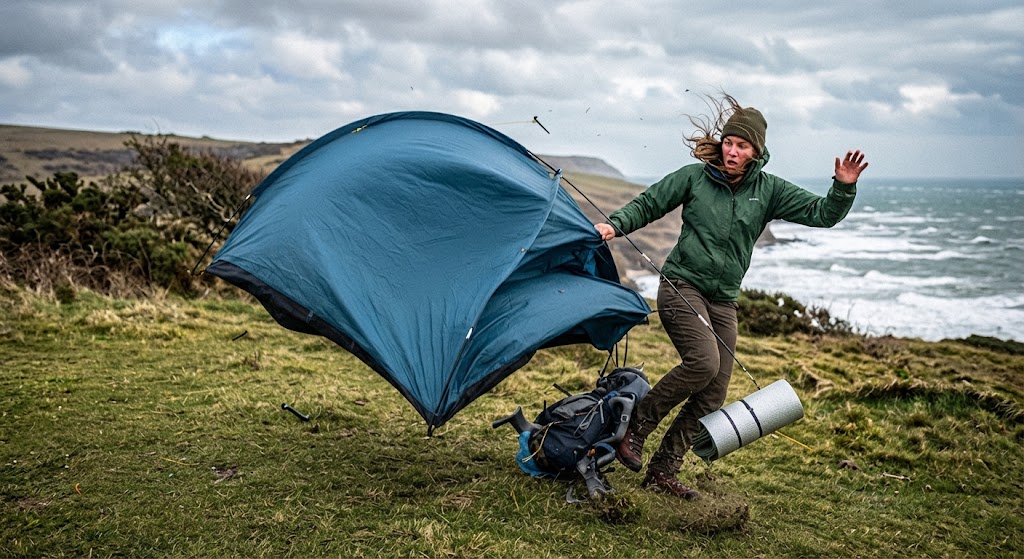
Putting up a tent is usually straightforward when the weather is calm, but strong wind can turn a simple job into a terrible battle. Poles blow around, fabric catches the wind like a sail and anything you put down seems to disappear across the campsite just when you need it.
The key is to work with the wind rather than trying to fight it. Choosing the right place, keeping hold of your equipment and securing the tent as you go will make a huge difference. If the wind is strong enough to make pitching unsafe, though, the right decision may be to find shelter or postpone pitching until conditions improve.
Choose Your Pitching Spot Carefully
Before you unpack your tent, take a moment to look at the area around you. The best pitching spot is one where the ground is reasonably level, drains well and gives you some protection from the wind without putting you underneath a dangerous tree or beside anything that could fall.
Natural features such as hedges, banks or groups of trees can reduce the strength of the wind, but don’t pitch directly underneath trees in strong weather. Dead branches can fall unexpectedly, and wet or saturated ground can make trees less secure.
Also think about where the wind is coming from. You want to avoid exposing the broadest part of the tent directly to the strongest gusts if your tent design gives you an option.
Keep Everything Together
Wind has a habit of turning tent pitching into a game of chase, so don’t spread all your equipment across the ground before you start.
Keep the tent bag, poles, pegs and other equipment together and put something heavy on the tent bag if necessary. If you have a rucksack, it can be useful for weighing down fabric while you are working.
Only take out the parts you need at each stage. This means there is less loose equipment available for the wind to carry away.
Pitch the Tent With the Wind in Mind
If possible, position the tent so that the end designed to take the wind is facing into it. Many tents have a lower, more aerodynamic end and a larger entrance or living area at the other end.
Don’t assume that every tent should be pointed in exactly the same direction, though. Check how your particular tent is designed to handle wind and where its main guy lines are positioned.
Once you’ve chosen the direction, keep the tent under control while you begin securing it.
Peg Down the Tent Before Raising It
For many tents, it is easier to get the basic structure anchored to the ground before you start putting the poles in to place.
Secure the first corners and keep the fabric close to the ground. If the wind is strong, have someone hold the tent while you put in the first few pegs. If you’re alone, work methodically so that there is always something holding the tent down.
Push or hammer the pegs into the ground at the angle recommended by the tent manufacturer. Avoid simply driving them in as far as possible if that leaves the peg in a poor position for holding the tent.
Keep the Tent Low Until You Need to Raise It
A loose sheet of tent fabric can catch a surprising amount of wind. The less time it spends flapping around, the easier the job will be.
Keep the fabric gathered together and avoid unfolding the whole tent until you are ready to secure it. Once the corners are attached, gradually work around the tent rather than allowing a large section to become airborne.
This is particularly useful when pitching a large family tent or tunnel tent, where there can be a lot of fabric for the wind to grab.
Assemble the Poles Carefully
Tent poles can be awkward in windy weather, especially if they are long and flexible. Assemble them close to the ground rather than holding the whole pole section upright.
Make sure the pole sections are properly connected before you try to fit the pole to the tent. A partly assembled pole can bend or whip around unexpectedly when a gust catches it.
If the tent has sleeves, feed the poles through carefully rather than forcing them. If it uses clips, attach them as you go so that the tent and poles remain under control.
Use the Guy Lines
Guy lines become particularly important when the wind picks up. They help spread the load and stop the tent from moving around as much.
Attach the guy lines to the points provided by the manufacturer and peg them securely. Don’t leave them loose, but don’t pull them so tightly that you distort the tent either.
Once everything is pitched, walk around the tent and check each guy line. Make sure the lines are actually helping to support the tent rather than pulling one part of the fabric out of shape.
Use the Right Pegs for the Ground
The best peg for your tent depends on the ground you’re pitching on. A peg that works well in firm soil may be much less effective in loose or sandy ground.
If the ground is soft, choose a peg designed to provide better holding power and position it correctly. In very difficult conditions, you may need to use additional guy lines or alternative anchoring methods suitable for the campsite and your equipment.
Always check the ground before relying on a single small peg to hold a large tent in strong wind.
Keep the Door Closed
Once the tent is taking shape, keep doors and other openings closed whenever possible.
An open tent can allow wind to get inside and push against the inner structure. Closing the doors also stops loose items inside from being blown around while you’re still organising the tent.
If you need to enter the tent during pitching, open the smallest section you can and close it again afterwards.
Check the Tent After the First Strong Gusts
Once the tent is standing, don’t assume the job is finished. Strong wind can loosen pegs and change the tension in the guy lines.
After the first few gusts, walk around the tent and check the corners, poles, guy lines and pegs. If something has moved, fix it before the problem becomes bigger.
It’s much easier to adjust a peg or guy line while the tent is still standing than to deal with a collapsed shelter later.
What to Do If the Wind Gets Stronger
There is a point where pitching a tent stops being a sensible challenge and becomes an unnecessary risk.
If gusts are making it difficult to control the tent, poles or fabric, stop and consider whether you need to pitch at all. If you are already camping and conditions are deteriorating, keep monitoring the situation and be prepared to move to a safer location if necessary.
Don’t try to hold onto a large section of fabric in conditions where you could be knocked over or injured. Your tent is replaceable; you aren’t.
Safety When Pitching in Wind
Strong wind creates several hazards around a campsite. Tent poles can spring unexpectedly, pegs and mallets can cause injuries, and flying equipment can become dangerous.
Keep children away from the immediate pitching area while you are putting the tent up, particularly when handling poles. Be careful around trees and never shelter underneath branches that could fall. If conditions become severe, follow the advice of the campsite or landowner and move to a safer location if instructed.
If thunderstorms, extreme winds or other dangerous weather are developing, don’t stay outside simply to finish pitching the tent.
Practise Before You Need to Do It
Pitching a tent in difficult weather is much easier when you already know how the tent works. Too many people have no idea about their tent until they actually head out and use it for the first time. Practise putting it up at home or in the garden so you know which poles go where, where the guy lines attach and which direction the tent is designed to face.
When you eventually have to pitch it in the wind, you won’t be trying to work out the tent at the same time as fighting the weather.
Work With the Wind
The biggest lesson is to control the tent before the wind gets the chance to control it. Choose your pitch carefully, keep loose fabric and equipment under control, secure the tent as you go and use the guy lines properly.
And remember that there is nothing wrong with deciding that the conditions are too bad to pitch. Good outdoor skills are not just about knowing how to put up a tent; they are also about recognising when the weather has made something unsafe.
🔒Ready to test your survival skills?
Join Survival Guides UK for free, complete challenges, earn badges and increase your Survival Level.
JOIN FREE →
CRAIG BURR
FOUNDER · SURVIVAL GUIDES UK
I'm Craig, the person behind Survival Guides UK. I created SGUK because I wanted somewhere people could learn real outdoor skills in a practical, straightforward way — from lighting a fire and tying knots to navigation, campcraft and everything in between.
You can read more about the story behind SGUK here as well as our approach here.