How to Tie a Taut-Line Hitch | Step-by-Step Guide
The taut-line hitch is an adjustable knot that allows you to change the tension in a rope without completely untying it.
It is particularly useful for guy lines, such as those used with tents and shelters, because the rope can be moved to increase or decrease tension.
The knot grips the standing part of the rope when loaded but can be slid along it when the tension is released.
What You’ll Learn
By the end of this guide, you should be able to:
- Tie a taut-line hitch correctly.
- Adjust the position of the hitch along a rope.
- Recognise a correctly tied hitch.
- Check that the knot grips properly before use.
Equipment
- A length of rope or cord.
- A suitable post, pole or other anchor to practise around.
A tent guy line or similar cord is useful once you are comfortable with the basic knot.
Understanding the Knot
A hitch attaches a rope to an object or another section of rope.
The taut-line hitch is tied around the standing part of the rope, creating an adjustable loop.
The working end is the end used to tie the knot, while the standing part is the longer section leading away from the knot.
The important feature is that the knot has turns around the standing part that grip when the rope is under tension.
How to Tie a Taut-Line Hitch
1. Wrap the rope around an anchor
Pass the rope around a suitable post, pole, peg or other anchor.
Bring the working end back alongside the standing part.
This creates the adjustable section of rope.
2. Pass the working end around the standing part
Take the working end around the standing part.
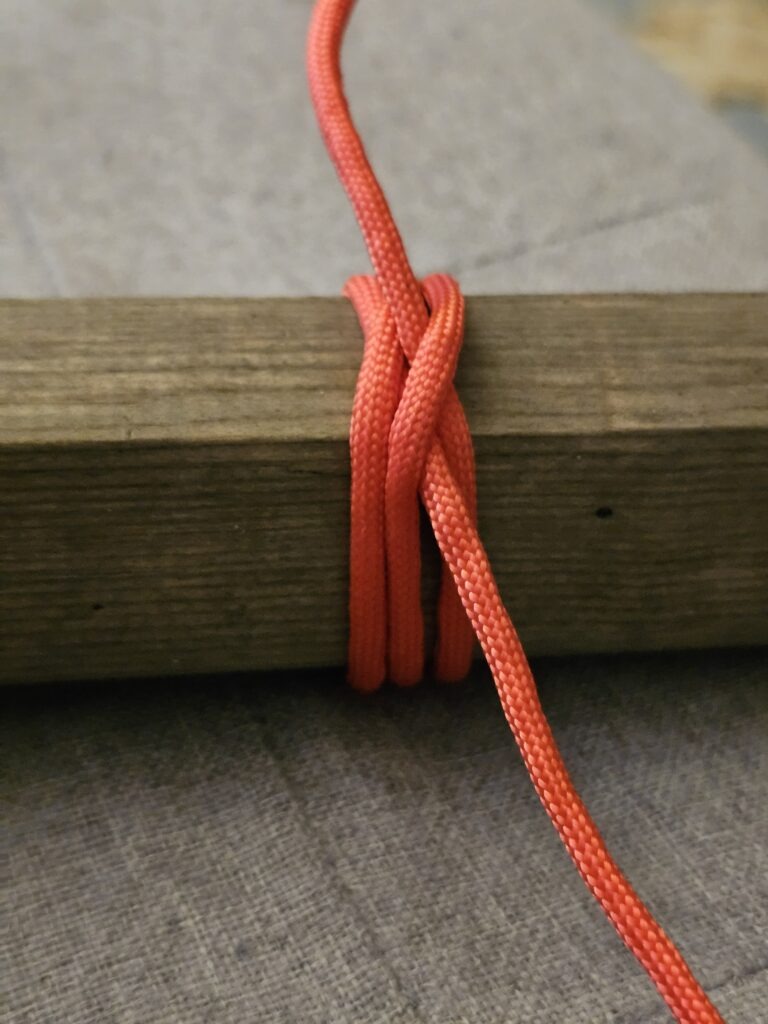
3. Make two turns inside the loop
Bring the working end around the standing part again and make a second turn beside the first.
These two turns should sit neatly together.
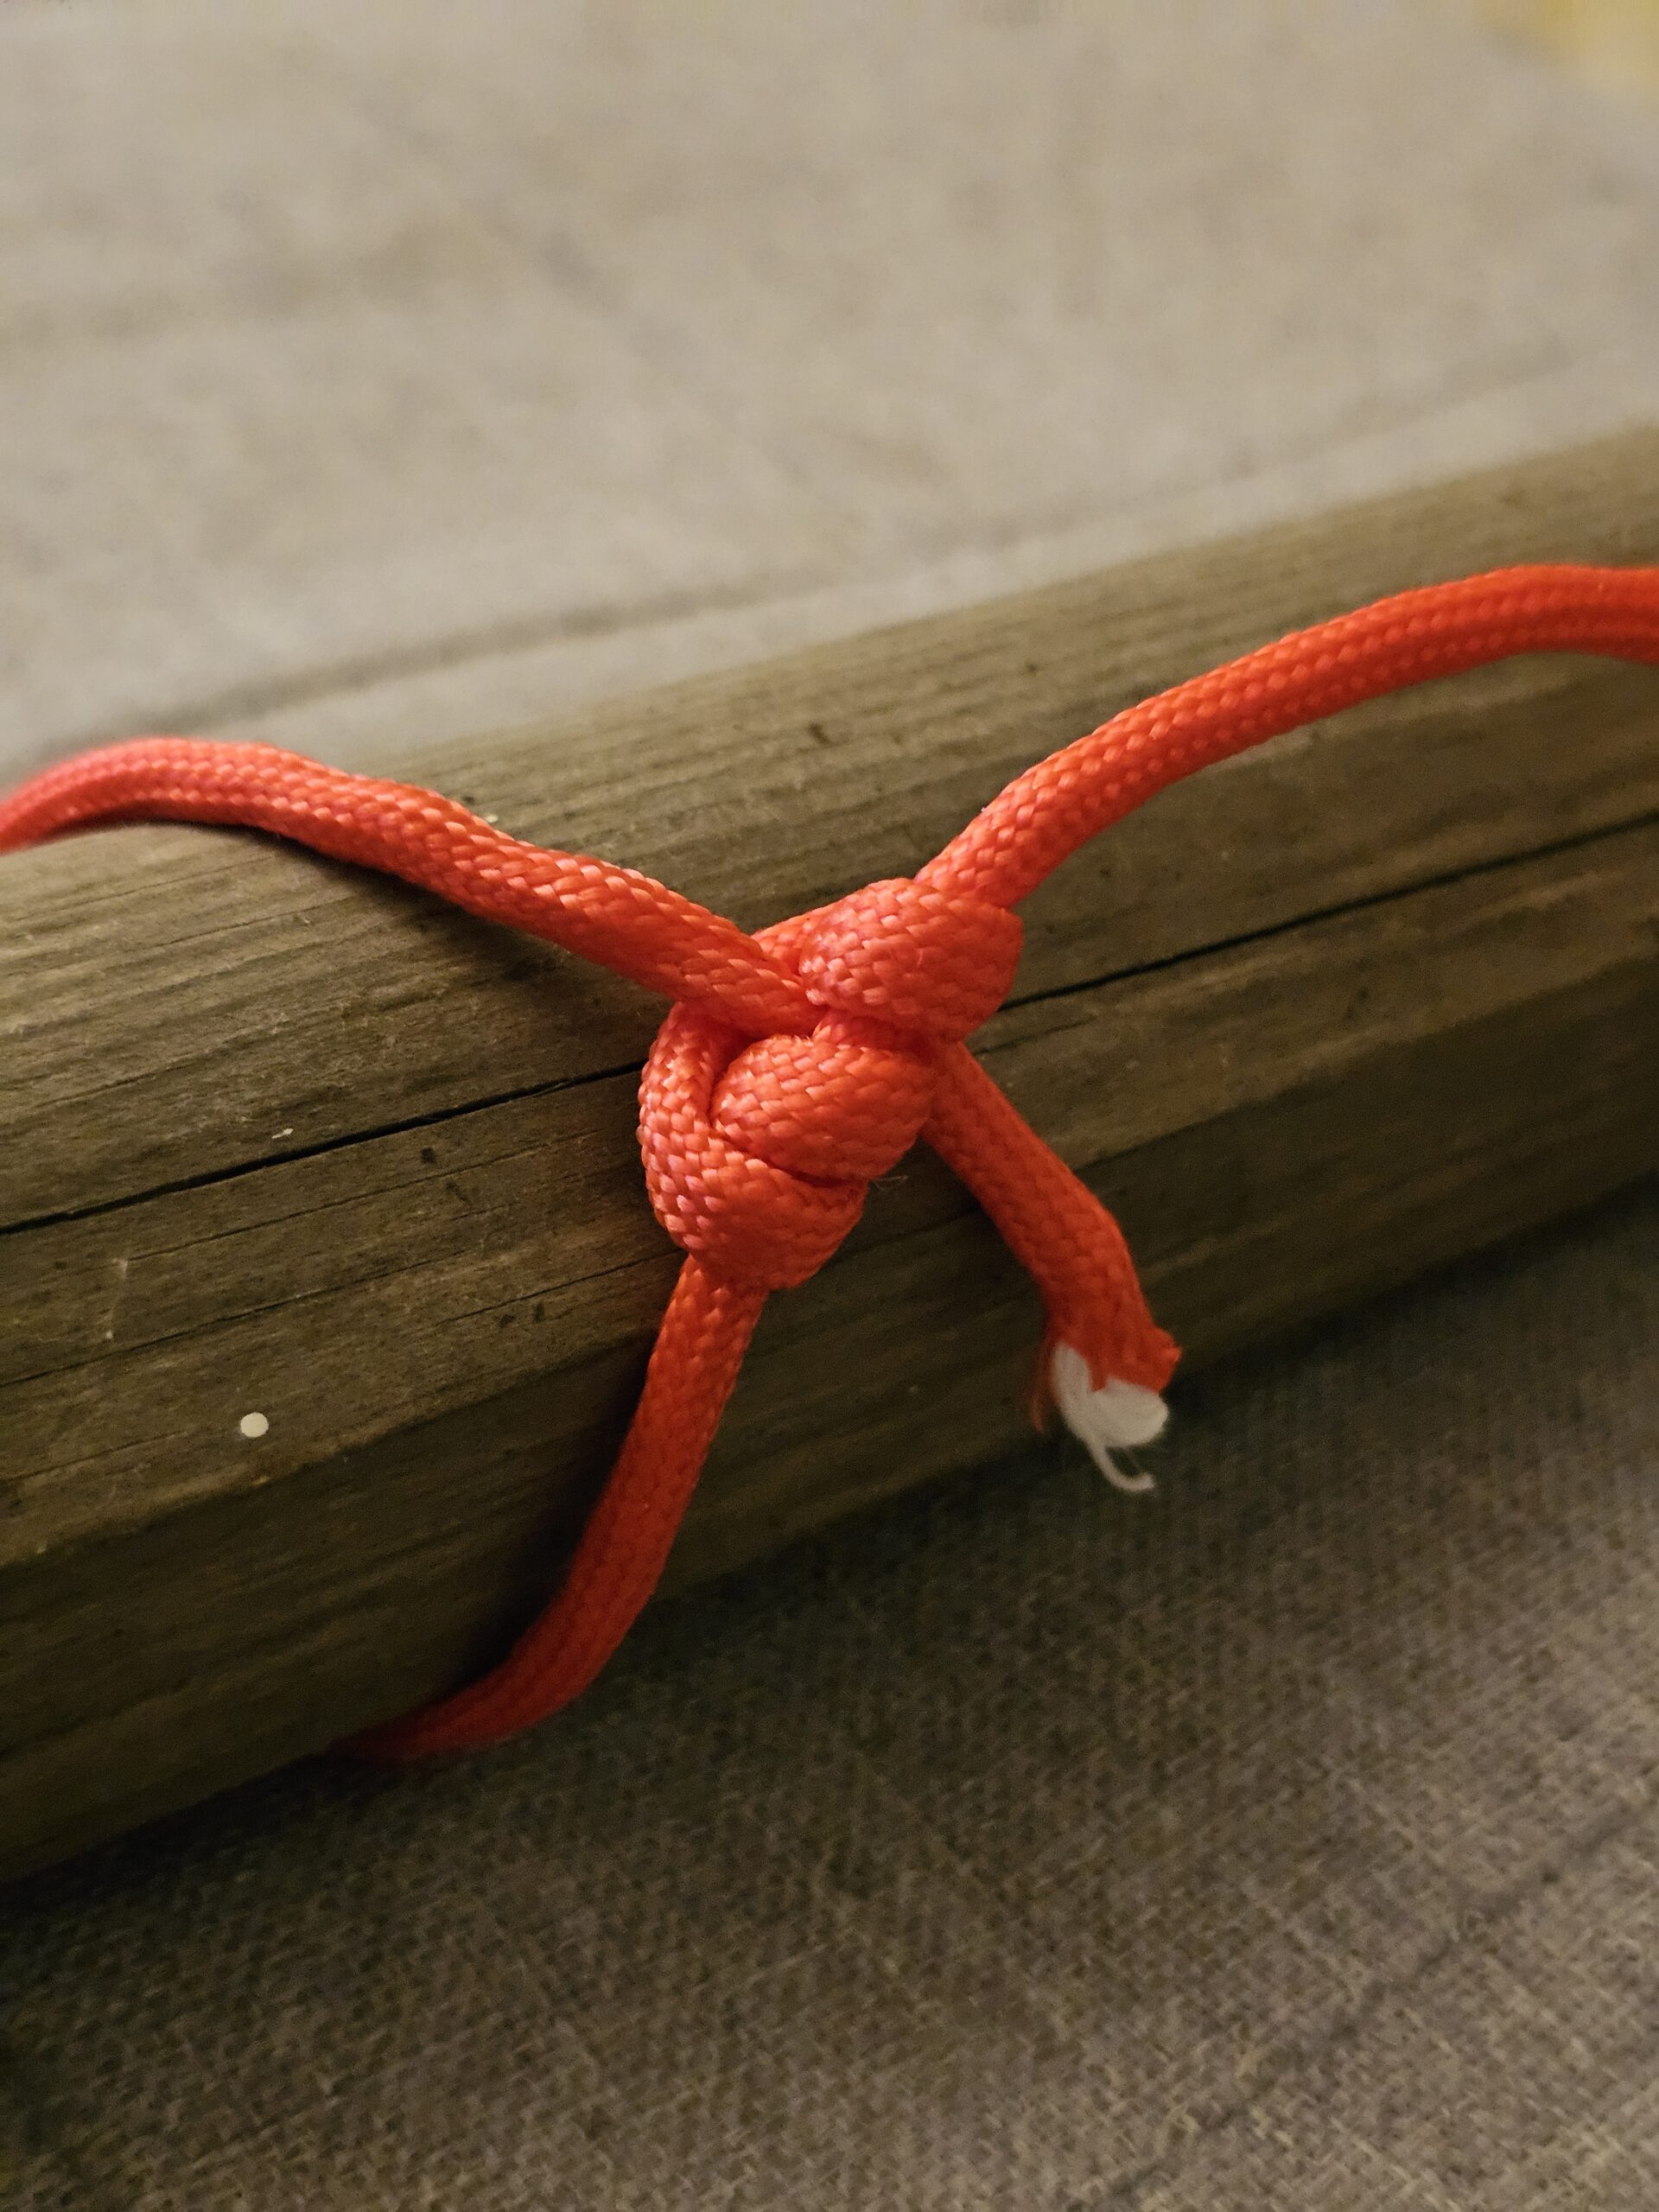
4. Make one turn outside the first two
Now make another turn around the standing part, positioned closer to the end of the rope.
This creates the locking part of the hitch.
5. Pass the working end through the final loop
Bring the working end through the loop formed by the last turn.
Pull the working end to snug the hitch together.
6. Adjust the hitch
Hold the rope and slide the completed hitch along the standing part.
It should move when you deliberately slide it but grip the rope when the standing part is placed under tension.
How to Check Your Taut-Line Hitch
Before relying on the hitch, check that:
- There are two turns together inside the hitch.
- There is a further turn outside them.
- The working end exits neatly from the knot.
- The turns are sitting alongside each other rather than crossed.
- The hitch slides when deliberately adjusted.
- The hitch grips when the standing part is tensioned.
- There is enough rope beyond the knot.
If the hitch slides freely when the rope is under tension, untie it and try again rather than relying on it.
Common Uses
A taut-line hitch is commonly useful for:
- Tent guy lines.
- Shelter guy lines.
- Adjusting tension in temporary rope systems.
- Outdoor campcraft.
- Securing lines where regular adjustment is needed.
It is especially useful when weather or movement means that the tension in a guy line needs to be adjusted regularly.
Important Safety Information
The performance of a taut-line hitch can vary depending on the type, diameter and condition of the rope.
Some modern synthetic cords are very smooth and may not grip as reliably as traditional rope.
Always test the hitch before relying on it. If it slips under the intended load, use a more suitable knot or rope tensioning method.
Do not use a taut-line hitch as part of a climbing, rescue or other life-safety system unless it has been specifically selected and tested for that application.
Final Tip
The key to the taut-line hitch is two turns together, followed by one turn outside them.
Practise sliding the finished hitch backwards and forwards along the rope. When tied correctly, it should adjust easily when unloaded but grip firmly when the line is tensioned.
🔒Ready to test your survival skills?
Join Survival Guides UK for free, complete challenges, earn badges and increase your Survival Level.
JOIN FREE →
CRAIG BURR
FOUNDER · SURVIVAL GUIDES UK
I'm Craig, the person behind Survival Guides UK. I created SGUK because I wanted somewhere people could learn real outdoor skills in a practical, straightforward way — from lighting a fire and tying knots to navigation, campcraft and everything in between.
You can read more about the story behind SGUK here as well as our approach here.