How to Make Cordage From Nettles
Nettles are probably not the first plant you’d choose when looking for something useful to make cord from. They sting, they grow almost everywhere and most people try to avoid brushing against them. They really don’t seem like much good for anything.
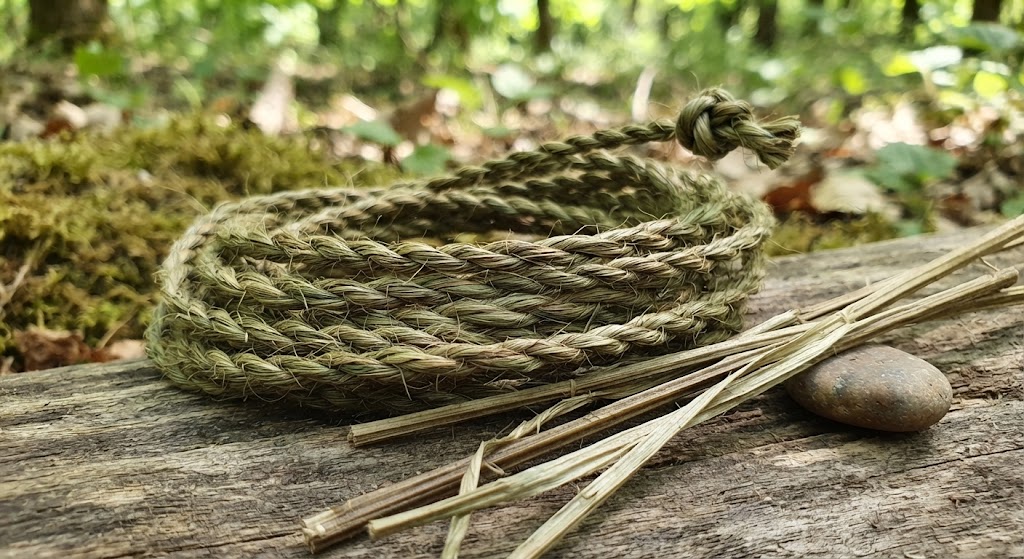
Look a little closer, though, and nettles have a useful fibre running through their stems. Once the outer material has been prepared and the fibres separated, they can be twisted together to make surprisingly strong natural cordage.
It takes a little patience, particularly when you’re learning, but it is a great way to understand how people made useful materials from plants long before modern rope existed.
What You’ll Need
You don’t need much equipment to get started.
- Several mature nettle stems
- Gloves for harvesting
- A knife or scissors
- A flat surface for preparing the stems
- A bowl or container of water
- A sheltered place where the fibres can dry
- A small amount of time and patience
You don’t want to choose small plants. You need to look for reasonably long, healthy stems.
Choose the Right Nettles
The more mature nettles that have long, straight stems are generally easier to work with.
The best time to collect them depends on the plant and local conditions, but late summer and early autumn can provide useful mature stems. Avoid plants that are damaged, mouldy or already beginning to rot.
As with any plant, always be certain you have correctly identified it before harvesting.
Harvest the Stems Carefully
Put on gloves before handling the nettles.
Cut the stems close to the base rather than pulling the whole plant from the ground. This will leave the roots in place and allow the plant to continue growing.
Choose several stems rather than stripping a whole patch. Nettles are valuable plants for wildlife, so there is no reason to clear an area just to make cordage.
Once you’ve collected the stems, carefully remove all of the the leaves as these won’t be needed.
Prepare the Nettle Stems
The useful fibres are inside the stem, beneath the tougher outer material.
Start by crushing or gently bruising the stem along its length. You can do this by rolling it between your hands or carefully pressing it against a hard surface.
You don’t want to damage the stem, you simply want to loosen the material so that the woody inner parts can eventually be separated from the fibres.
Work along the whole length of the stem.
Separate the Fibres
Once the stems have been softened, start opening them lengthways and removing the woody material from inside.
You should gradually end up with long strips of plant fibre.
Don’t worry if they aren’t perfect at first. Some pieces will contain more woody material than others, and the fibres may break while you’re learning.
The longer and cleaner the fibres are, the easier they will be to turn into cordage.
Soak the Fibres
This step is very important and will allow the fibres to become more flexible and easier to work with.
Place them in water and leave them until they become easier to bend without snapping. The exact time will depend on how dry the material is, so check them rather than relying entirely on a fixed soaking time.
If the fibres become very soft or begin to break down, they have been left too long. After a few attempts, you will be able to quickly tell when the fibres are ready.
Dry the Fibres Before Twisting
After soaking, allow the fibres to dry thoroughly.
Spread them somewhere dry with good airflow rather than leaving them in a damp pile. You want the fibres flexible enough to work but not wet when you begin twisting.
This stage can take some time, so don’t rush it.
Start With Two Strands
The simplest way to make cordage is to use a two-ply twist.
Take two roughly equal bundles of fibre and hold them together near one end.
Twist each strand individually in one direction, then twist the two strands together in the opposite direction. This creates a cord in which the tension of the two strands helps hold everything together.
The trick is keeping the tension reasonably even.
Keep Adding Fibre as You Go
Your initial pieces of fibre won’t usually be long enough to make a useful length of cord on their own.
When one strand begins to get short, introduce another piece of fibre alongside it. Overlap the new fibre with the old one before continuing to twist.
Try not to add all your new fibres at exactly the same point. Staggering the joins helps prevent one weak section from forming in the finished cord.
With practice, you can add new material without creating an obvious lump.
Keep the Twist Even
It is easy to concentrate so much on adding fibre that the cord itself becomes uneven.
Every so often, stop and look along its length.
If one section is much thinner than another, add a little more fibre there. If the cord is becoming loose, increase the tension and continue twisting.
You don’t need to make it perfectly uniform. A consistent twist is more important than making it look manufactured.
Test Your Cordage
Once you’ve made a length of cord, give it a gentle test.
Don’t immediately put a heavy load on it. Check whether the fibres are slipping, whether the joins are holding and whether any section feels particularly weak.
If it breaks, look at where it failed. You may find that the fibres were too short, the twist was uneven or a join wasn’t overlapped enough.
That’s useful information for the next attempt.
Make Stronger Cordage With More Plies
Once you’re comfortable making two-ply cordage, you can experiment with thicker cord.
Several lengths can be combined to create stronger cordage, although the basic principle remains the same: individual strands are twisted together in a way that keeps tension through the finished cord.
Start small. Making a consistent two-ply cord is a much better way to learn the technique than immediately trying to produce thick rope.
Safety When Working With Nettles
Wear gloves when harvesting and preparing fresh nettles. The leaves and stems can still sting while you’re working with them.
Use care when cutting or scraping the stems and keep your knife under control.
Wash your hands after handling the plants and avoid touching your face while working.
Only harvest where you have permission to do so, and avoid taking large quantities from a single patch. Nettles are an important food plant for several species of wildlife.
Practise With Different Stems
Your first piece of nettle cordage probably won’t look particularly impressive.
That’s normal.
Try again with stems of different thicknesses and experiment with how much you crush them, how thoroughly you separate the fibres and how tightly you twist them.
You’ll quickly start to notice which fibres produce the longest strands and how the preparation affects the finished cord.
Learn What Nettles Can Do
Making cordage from nettles is more than an interesting bushcraft trick. It teaches you to look at a familiar plant differently.
Instead of seeing nettles as something to avoid, you start to notice the useful fibre hidden inside the stem. The process also teaches several fundamental skills: harvesting, processing natural materials, preparing fibres and creating a useful object from something that would otherwise simply be left growing.
Once you’ve made a decent length of nettle cordage, you’ll have a much better appreciation for just how much useful material can be found in the landscape around you.
🔒Ready to test your survival skills?
Join Survival Guides UK for free, complete challenges, earn badges and increase your Survival Level.
JOIN FREE →
CRAIG BURR
FOUNDER · SURVIVAL GUIDES UK
I'm Craig, the person behind Survival Guides UK. I created SGUK because I wanted somewhere people could learn real outdoor skills in a practical, straightforward way — from lighting a fire and tying knots to navigation, campcraft and everything in between.
You can read more about the story behind SGUK here as well as our approach here.