Grid Reference Treasure Hunt
Activity Overview
Can your team use grid references to find the hidden checkpoints?
👦 Age: 8–18
👥 Group size: 4–30
⏱️ Duration: 45–60 minutes
📍 Location: Outdoors
⭐ Difficulty: 3/5
Grab a map, split into teams and get ready to explore.
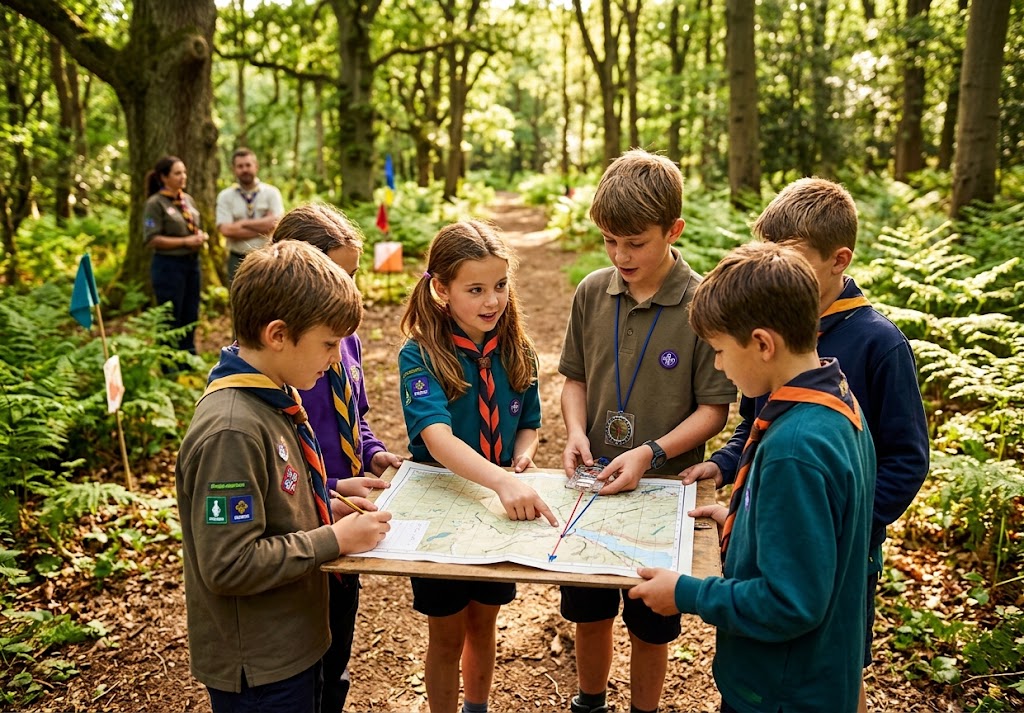
In this navigation activity, teams must use grid references to find a series of hidden checkpoints around an outdoor area.
But there’s more to it than simply finding the right location.
At each checkpoint, the team will discover a question, puzzle or small task. Solve it correctly and you’ll receive the information needed to find the next checkpoint.
It’s a fun way to practise map reading, teamwork, observation and navigation while turning traditional grid-reference practice into an adventure.
🧰 What you’ll need
You’ll need a few simple pieces of equipment to set up the activity.
Equipment
- One map for each team
- Checkpoint cards
- Pens or pencils
- Clipboards if available
- A timer
- Small envelopes or waterproof containers
- Optional compass for each team
- Optional prizes or certificates
You’ll also need to choose a suitable outdoor area where checkpoints can be placed safely.
A campsite, park, woodland or Scout activity area can work well.
🗺️ Prepare your checkpoints
Before the activity begins, place several checkpoint cards around your chosen area.
Each checkpoint should have a six-figure grid reference showing its location on the map.
You can create between five and ten checkpoints depending on the size and age of your group.
Keep the checkpoints in locations that are easy to access safely.
Don’t place them beside roads, steep drops, deep water or other hazards.
Each checkpoint can contain a simple task.
For example:
- Answer a navigation question
- Identify something nearby
- Solve a short code
- Count a particular feature
- Complete a teamwork task
- Find a hidden letter
- Work out a simple puzzle
The answer from one checkpoint can reveal which checkpoint the team should visit next.
🧭 Quick grid-reference refresher
Before sending everyone outside, spend a few minutes practising grid references.
Remind the group of the basic rule:
Along the corridor, then up the stairs.
The first numbers tell you how far across the map to go.
The second numbers tell you how far up the map to go.
Start with some easy examples.
Give everyone a map and call out a grid reference.
Can they point to the correct square?
Then reverse the activity.
Point to a location and ask the group to work out its grid reference.
This gives everyone a chance to practise before the game starts.
🏁 Start the treasure hunt
Split everyone into teams.
Give each team:
- A map
- A pencil
- Their first grid reference
- A checkpoint answer sheet
Explain the rules before they begin.
When you say GO, each team must work out where their first checkpoint is and navigate there.
When they find it, they’ll complete the task.
If they get the answer correct, they receive their next grid reference.
Then it’s back to the map.
The team continues until it has completed all the checkpoints.
🔍 Checkpoint ideas
You can make the checkpoints as simple or complicated as you like.
🔢 Number hunt
Place several numbered objects around the checkpoint.
The team must find a particular number and record it.
🧭 Direction test
Ask the team to identify the direction of a nearby feature.
For example:
Which direction is the building from your checkpoint?
👀 Observation task
Give the team 30 seconds to look around.
Ask them to remember how many windows, trees or other suitable features they can see.
🧩 Puzzle piece
Hide a piece of a simple puzzle at each checkpoint.
The teams collect all the pieces and assemble them at the finish.
🔤 Hidden message
Each checkpoint contains one letter.
Collect all the letters to reveal a final secret message.
🎒 Add a navigation twist
Once the teams understand the basic game, make things more interesting.
Give each team a route choice.
Instead of giving them one checkpoint, give them two possible grid references.
One might be closer but have a harder task.
The other could be further away but easier.
The team has to decide which route makes the most sense.
This adds an element of decision-making to the navigation.
It also means the fastest route isn’t always the best route.
⏱️ The final checkpoint
Make the last checkpoint different from the others.
Instead of giving the team another grid reference, give them a final navigation problem.
For example:
FINAL MISSION
You need to return to Base Camp.
Your map shows three possible routes.
Which route would you choose and why?
Ask the team to explain its decision.
They should think about distance, terrain, obstacles and safety rather than simply choosing the shortest route.
🏆 Score the teams
You can run the activity simply as a race, or introduce a scoring system.
🗺️ Navigation — 20 points
How accurately did the team use its map and grid references?
👀 Observation — 10 points
Did they pay attention to their surroundings?
🧠 Problem-solving — 10 points
How well did they deal with the checkpoint tasks?
🤝 Teamwork — 10 points
Did everyone contribute?
🛡️ Safety — 10 points
Did they make sensible decisions while moving around the area?
Maximum score: 60 points.
Consider giving points for accuracy and teamwork rather than making speed the only way to win.
🔄 Make it harder
Once the group has completed the activity, try some variations.
🕵️ No running
Teams must walk between checkpoints.
This makes them concentrate on navigation rather than speed.
🗺️ Map swap
Give each team another team’s map and ask them to check the route.
Can they spot any mistakes?
🧭 Compass bonus
Add a compass bearing to some checkpoints.
Teams must use both the map and compass to find the location.
🔐 Secret message
Give every checkpoint a letter.
The teams must collect the letters and rearrange them to reveal a final message.
🌙 Night navigation
For older groups and appropriately supervised activities, you could create a low-light version using safe, clearly marked checkpoints.
Only use a location and conditions suitable for the group and activity.
💬 What did you learn?
Bring everyone together after the treasure hunt.
Ask:
- Was it easy to read the grid references?
- Did you ever go to the wrong place?
- What helped you find the checkpoints?
- Did you rely more on the map or other members of your team?
- Which checkpoint was the hardest?
- Did the shortest route always turn out to be the best?
- How could you improve your navigation next time?
Ask each team to share one thing they learned.
♿ Make it accessible
Navigation activities can be adapted in lots of ways.
You don’t have to make teams walk long distances.
Checkpoints can be placed close together or even around a meeting hall, campsite or accessible outdoor space.
Participants can take different roles, including:
- Map reader
- Grid-reference checker
- Navigator
- Checkpoint reader
- Note taker
- Timekeeper
- Team leader
You can also provide enlarged maps or allow participants to work in pairs where appropriate.
The aim is to give everyone a useful role in solving the navigation problems.
🛡️ Safety
Check the activity area before placing your checkpoints.
Keep checkpoints away from roads, unsafe water, steep drops and other hazards.
Set clear boundaries and make sure every participant knows where they are allowed to go.
Teams should remain together rather than splitting up to search independently.
If the activity takes place near public areas, consider visibility, supervision and how other people may interact with the group.
For older groups, don’t introduce night navigation unless the activity has been specifically planned, risk assessed and appropriately supervised.
Participants should never enter an unsafe area simply because a grid reference points towards it.
If a location looks unsafe, stop and tell the activity leader.
🗺️ Your final destination
You’ve followed grid references, solved problems and worked as a team to navigate from checkpoint to checkpoint.
The more you practise, the easier it becomes to turn numbers on a map into a real location on the ground.
Next time you’re out walking, don’t just follow the path.
Take a map.
Pick a destination.
Work out where you are.
Read the map. Find the point. Complete the mission.
🔒Ready to test your survival skills?
Join Survival Guides UK for free, complete challenges, earn badges and increase your Survival Level.
JOIN FREE →
CRAIG BURR
FOUNDER · SURVIVAL GUIDES UK
I'm Craig, the person behind Survival Guides UK. I created SGUK because I wanted somewhere people could learn real outdoor skills in a practical, straightforward way — from lighting a fire and tying knots to navigation, campcraft and everything in between.
You can read more about the story behind SGUK here as well as our approach here.