How to Tie a Sheet Bend | Step-by-Step Guide
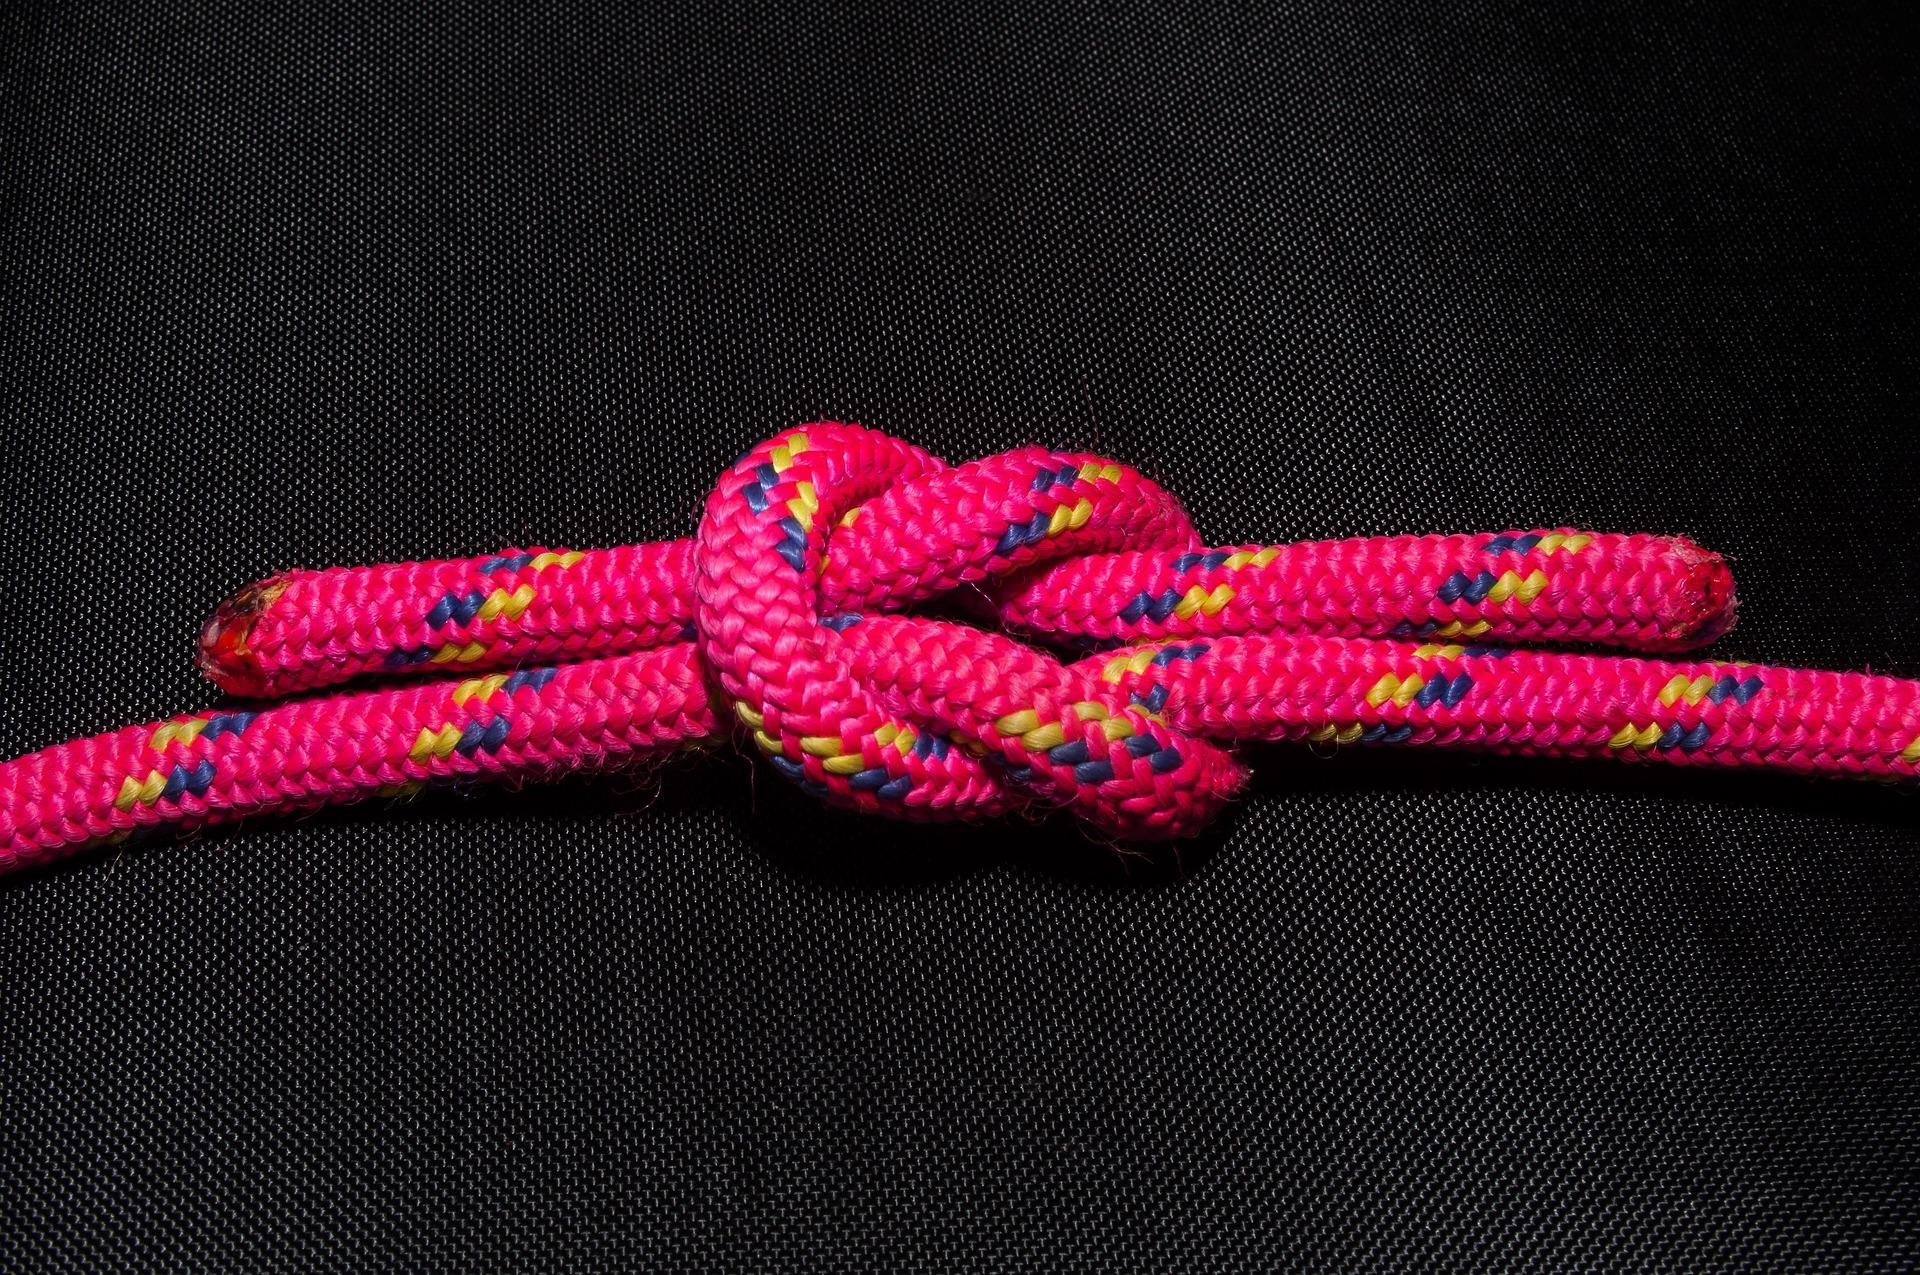
The sheet bend is a useful knot for joining two ropes together, particularly when the ropes are different sizes.
Unlike a reef knot, which is intended for joining similar-sized ropes and can be unreliable when used with significantly different ropes, the sheet bend is designed specifically for joining ropes.
It is simple to tie once you understand which rope forms the loop and which rope passes through it.
What You’ll Learn
By the end of this guide, you should be able to:
- Join two ropes using a sheet bend.
- Understand the different roles of the two rope ends.
- Recognise a correctly tied sheet bend.
- Check the finished knot before putting it under load.
Equipment
- Two lengths of rope or cord.
- Ideally, use different colours or noticeably different sizes while practising.
Using different ropes makes it much easier to see how the knot is constructed.
Understanding the Knot
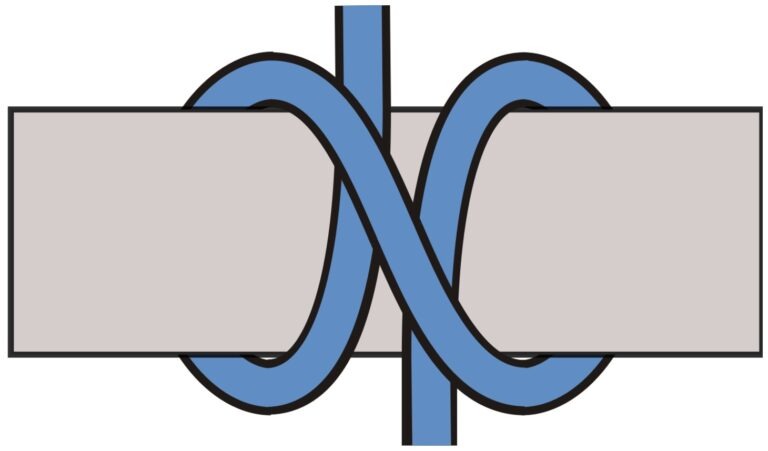
The sheet bend is made by forming a bight in one rope and passing the end of the other rope through and around it.
A bight is simply a section of rope folded back on itself without crossing the rope.
The rope forming the bight stays relatively stationary while the other rope is passed around it.
How to Tie a Sheet Bend
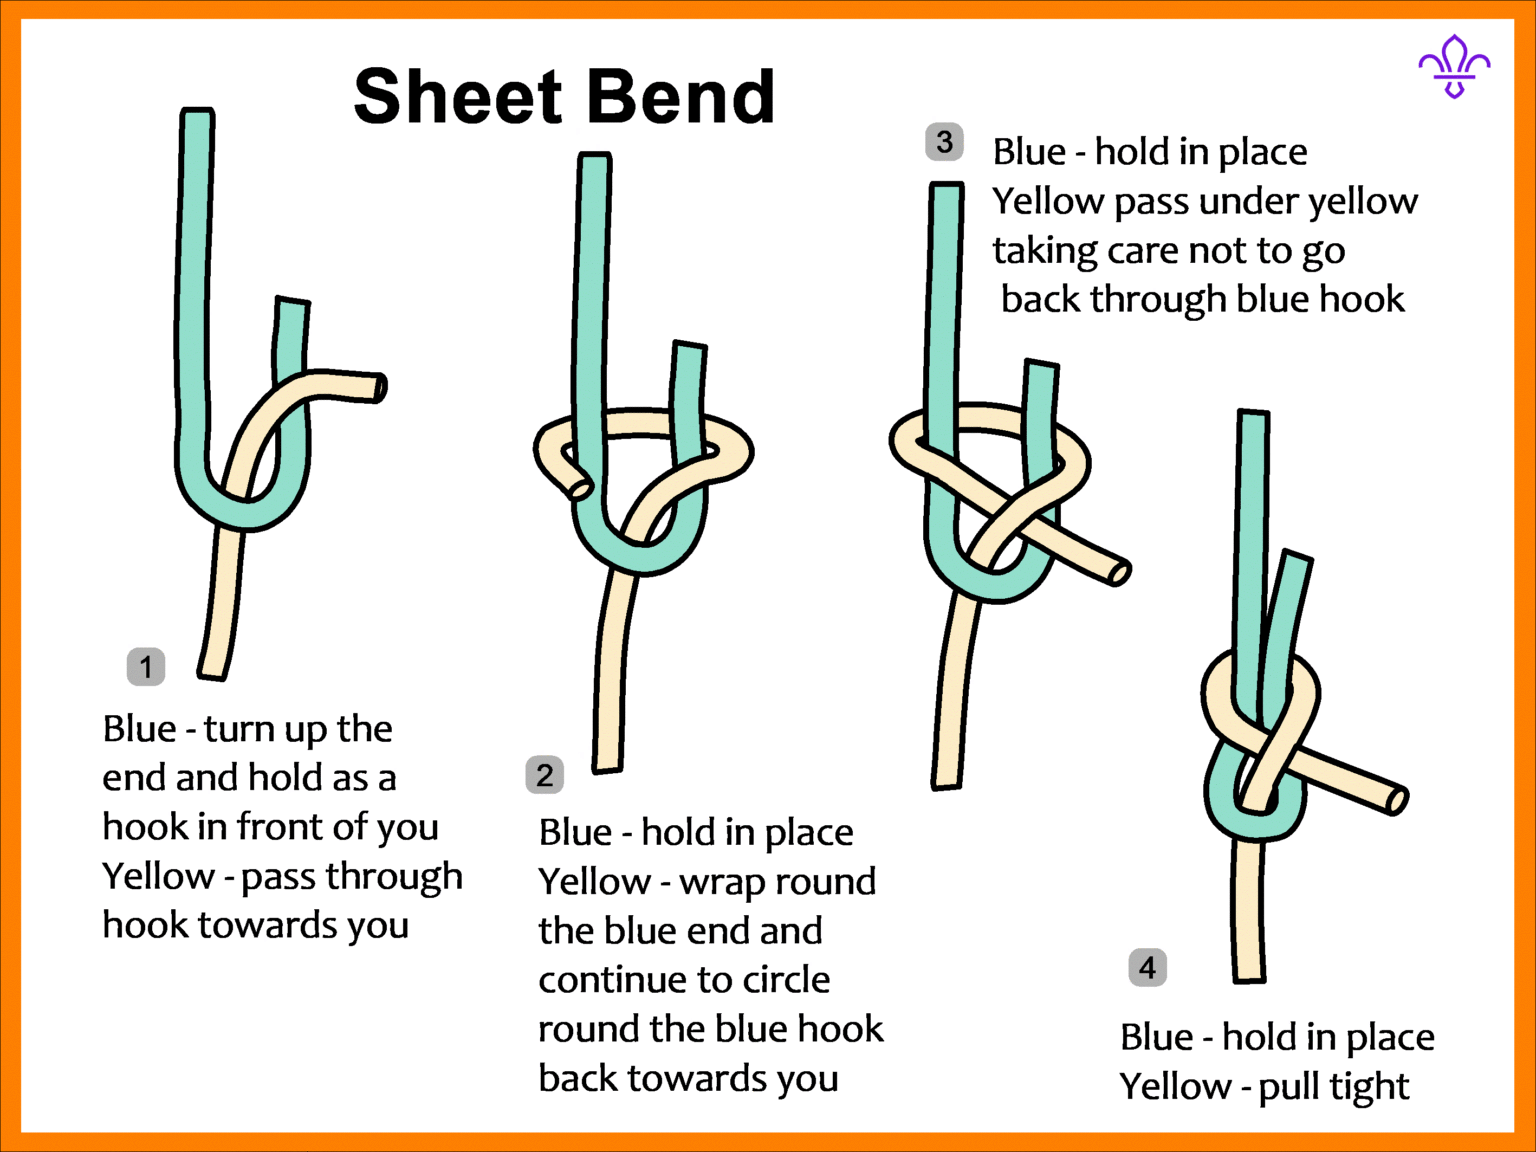
1. Form a bight
Take one rope and fold part of it back on itself to form a bight.
Keep the bight open so you can pass the other rope through it.
2. Pass the second rope through the bight
Take the working end of the second rope and pass it up through the bight from underneath.
Leave enough of the working end sticking through to complete the knot.
3. Take the working end around the bight
Bring the working end around the back of the bight.
It should pass around both sections of the first rope.
4. Tuck the working end underneath itself
Bring the working end underneath the section of the second rope that has just been passed around the bight.
Then bring it back towards the centre of the knot.
5. Tighten the knot
Pull the standing part of the second rope while holding the bight of the first rope.
The knot should draw together neatly.
Avoid pulling only one section of rope excessively, as the knot should be properly dressed before it is loaded.
How to Check Your Sheet Bend
A correctly tied sheet bend should have:
- One rope forming a clear bight.
- The other rope passing through the bight.
- The second rope passing around the back of the bight.
- The working end tucked underneath itself.
- The knot sitting neatly rather than being twisted.
Make sure there is enough rope left beyond the finished knot.
Double Sheet Bend
If the ropes are significantly different in size, or if there is a greater risk of the knot working loose, a double sheet bend can be used.
The double version adds an additional turn around the bight.
It is worth learning the standard sheet bend first so you understand the basic structure before moving on to the double version.
Common Uses
A sheet bend can be useful for:
- Joining two ropes together.
- Joining ropes of different diameters.
- Extending a rope when a longer length is needed.
- General campcraft and outdoor ropework.
- Temporary rope systems where the ropes may need to be separated afterwards.
Important Safety Information
A sheet bend should not automatically be treated as a life-safety knot.
For climbing, rescue, abseiling or other activities where rope failure could cause serious injury, use the knot and rope system specified for that activity.
Always inspect the finished knot before applying a significant load. Check that it is properly dressed, tightened and has sufficient rope beyond the knot.
Final Tip
Practise the sheet bend with two different coloured ropes.
Think of it as:
Make a bight → through the bight → around the bight → underneath itself.
Once you can see that path clearly, tying the knot becomes much easier.
🔒Ready to test your survival skills?
Join Survival Guides UK for free, complete challenges, earn badges and increase your Survival Level.
JOIN FREE →
CRAIG BURR
FOUNDER · SURVIVAL GUIDES UK
I'm Craig, the person behind Survival Guides UK. I created SGUK because I wanted somewhere people could learn real outdoor skills in a practical, straightforward way — from lighting a fire and tying knots to navigation, campcraft and everything in between.
You can read more about the story behind SGUK here as well as our approach here.