How to Tie a Clove Hitch | Step-by-Step Guide
The clove hitch is a useful knot for attaching a rope to a post, pole, tree or other suitable object. It is quick to tie and easy to adjust, making it particularly useful for temporary attachments.
It is important to understand how the rope passes around the object because a clove hitch can look correct while being tied incorrectly.
What You’ll Learn
By the end of this guide, you should be able to:
- Tie a clove hitch around a post or pole.
- Recognise the correct finished knot.
- Understand common uses for the knot.
- Check that the hitch is sitting correctly before using it.
Equipment
- A length of rope or cord.
- A suitable post, pole or other object to practise around.
A smooth, rigid object such as a broom handle works well when learning.
Understanding the Knot
A hitch is a knot used to attach a rope to an object.
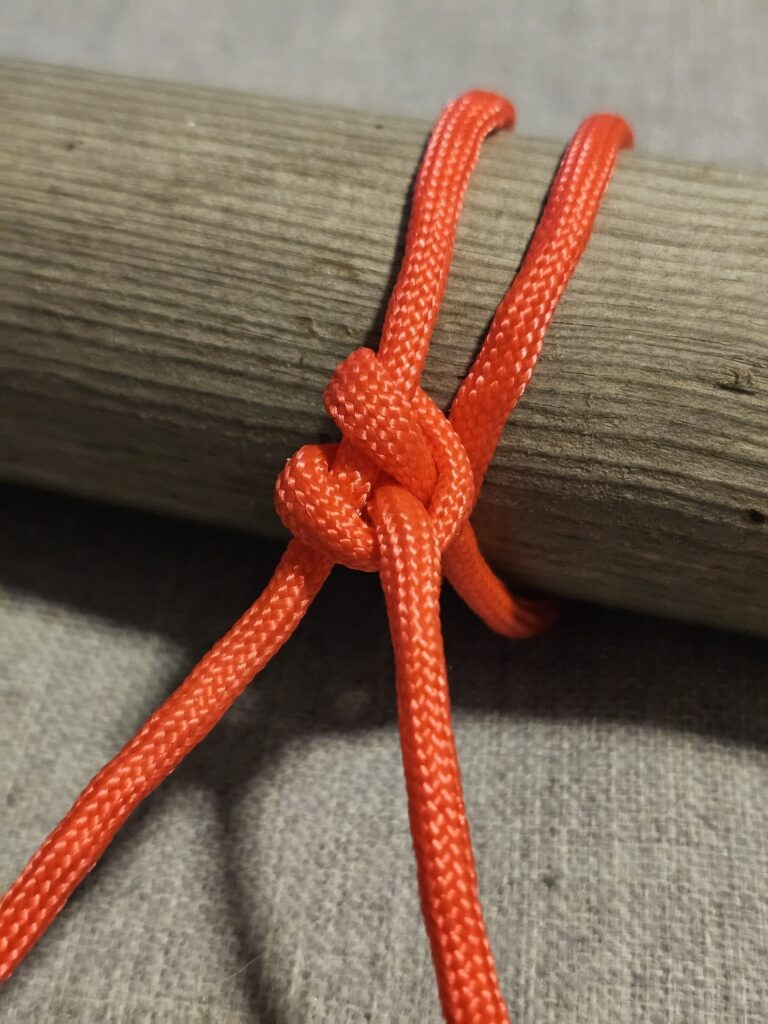
A clove hitch consists of two loops that cross over each other around the object. The working end of the rope is then passed through the second loop.
When tied correctly, the two parts of the knot sit neatly alongside each other.
How to Tie a Clove Hitch
1. Wrap the rope around the object
Take the rope around the post or pole, bringing the working end back across the standing part of the rope.
The working end is the end you are using to tie the knot. The standing part is the rest of the rope leading away from the knot.
2. Cross the working end over the rope
Bring the working end across the standing part so that the ropes cross.
3. Wrap around the object again
Take the working end around the post for a second time, following the same direction as the first wrap.
You should now have two loops around the object.
4. Pass the working end underneath
Bring the working end underneath the second wrap and tuck it through the crossing point between the two loops.
5. Pull the knot tight
Pull the working end and standing part in opposite directions to tighten the hitch.
The two loops should sit neatly against each other around the object.
How to Check Your Clove Hitch
Before using the knot, check that:
- There are two wraps around the object.
- The wraps cross over each other correctly.
- The working end passes underneath the correct section of the second wrap.
- The knot sits neatly rather than being twisted.
- The rope is properly tensioned.
If you are unsure, loosen the knot and tie it again rather than trying to correct a poorly formed hitch.
Common Uses
A clove hitch can be useful for:
- Attaching rope temporarily to a post or pole.
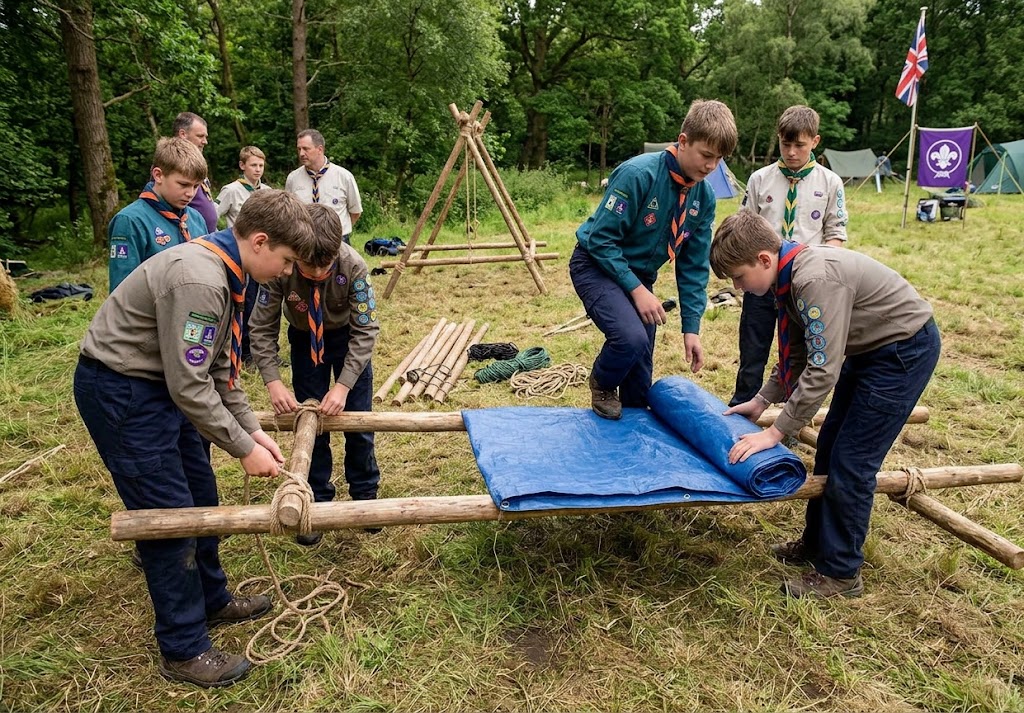
- Holding a rope in position while setting up camp equipment.
- Starting or finishing some lashings.
- Temporary guy lines and similar outdoor tasks.
- Practising pioneering and ropework techniques.
It is particularly useful when you need to adjust the position of the rope along an object.
Important Safety Information
A clove hitch can slip when it is subjected to changing loads, especially on smooth objects or when the rope is repeatedly pulled and released.
Do not rely on a clove hitch alone for climbing, abseiling, rescue systems or other life-safety applications.
Always consider the object you are attaching the rope to. A knot can be tied correctly but still fail if the post, pole or other anchor is unsuitable.
Final Tip
Practise tying the clove hitch around a pole until you can form the two wraps confidently.
A useful way to remember the structure is:
Wrap, cross, wrap, tuck.
Once you can tie it around an object, practise tying the same hitch using the rope in your hands before placing it onto the object.
🔒Ready to test your survival skills?
Join Survival Guides UK for free, complete challenges, earn badges and increase your Survival Level.
JOIN FREE →
CRAIG BURR
FOUNDER · SURVIVAL GUIDES UK
I'm Craig, the person behind Survival Guides UK. I created SGUK because I wanted somewhere people could learn real outdoor skills in a practical, straightforward way — from lighting a fire and tying knots to navigation, campcraft and everything in between.
You can read more about the story behind SGUK here as well as our approach here.