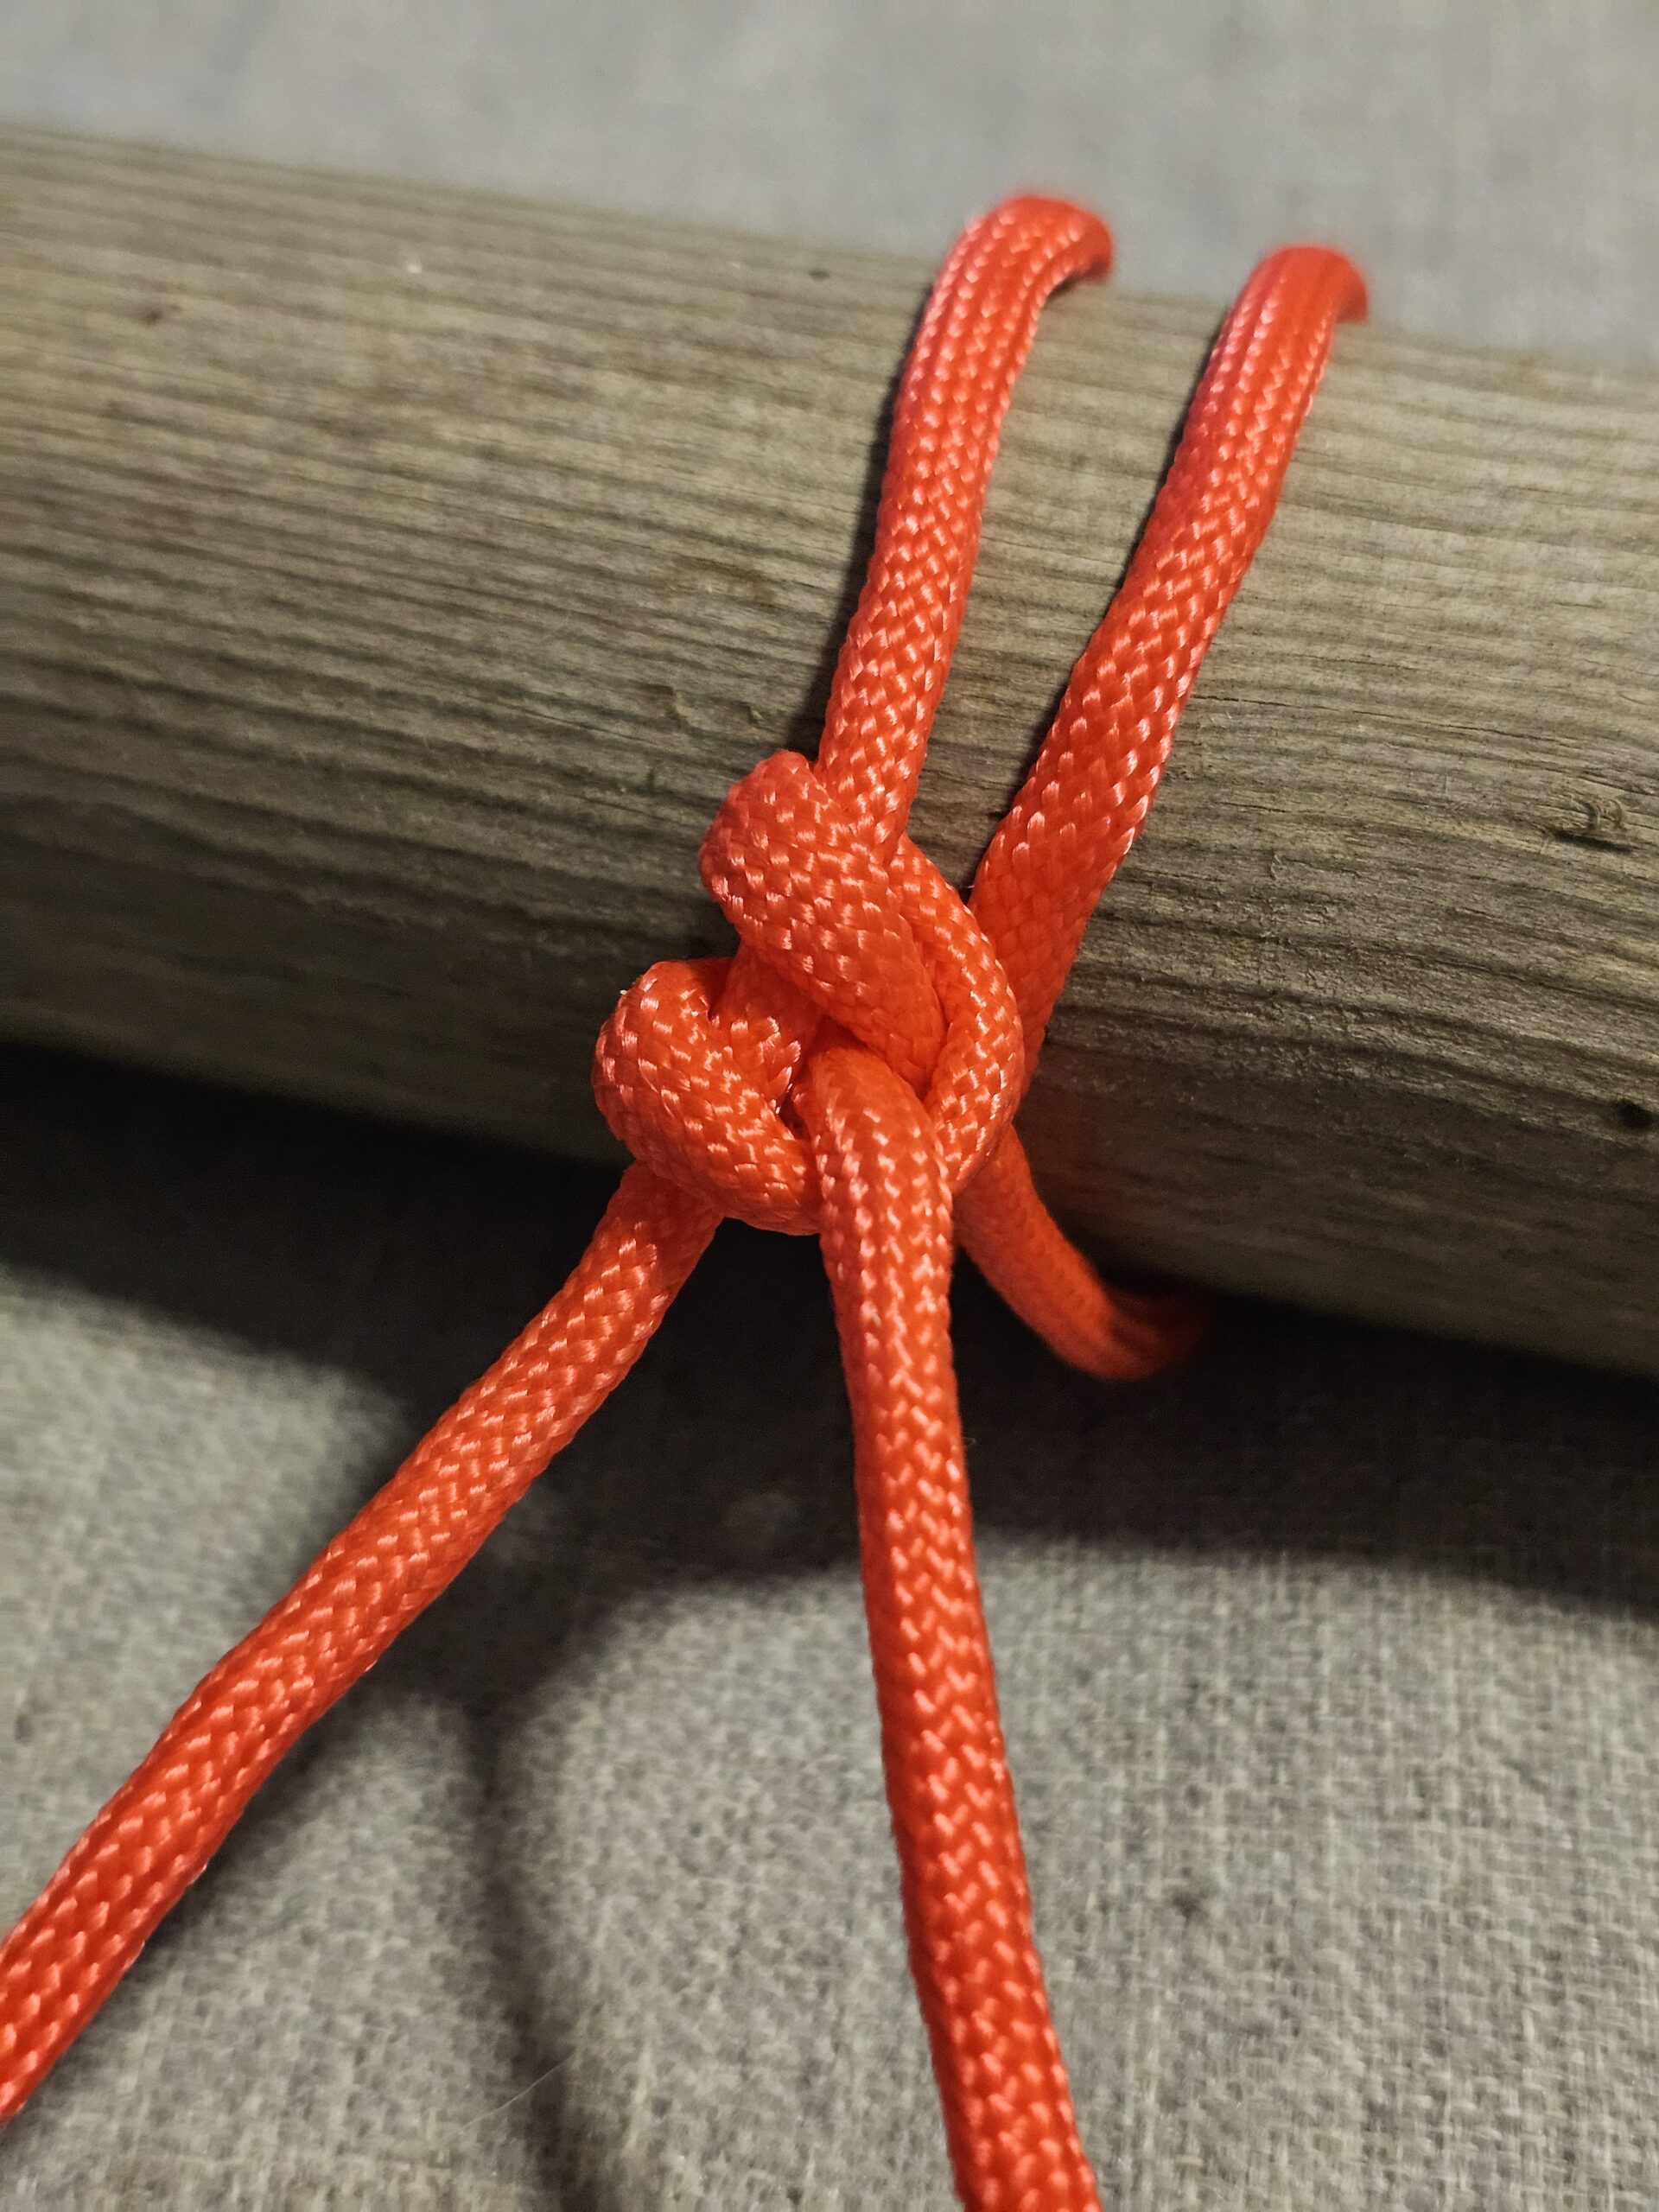
How to Tie a Round Turn and Two Half Hitches
The round turn and two half hitches is a reliable way to attach a rope to a post, tree, ring or other suitable anchor.
The round turn takes the main load around the object, while the two half hitches secure the working end of the rope. This makes it useful when you need to attach a rope securely while still being able to untie it afterwards.
What You’ll Learn
By the end of this guide, you should be able to:
- Tie a round turn and two half hitches.
- Understand what the round turn and half hitches do.
- Recognise a correctly tied finished knot.
- Check the knot before applying a load.
Equipment
- A length of rope or cord.
- A suitable post, pole, tree or ring to practise around.
A firm pole is ideal when learning.
Understanding the Knot
A round turn means taking the rope completely around an object and bringing it back alongside itself.
A half hitch is a simple hitch made by passing the working end around the standing part and through the resulting loop.
This knot combines one round turn with two half hitches.
The working end is the end being used to tie the knot. The standing part is the longer section of rope leading away from the knot.
How to Tie a Round Turn and Two Half Hitches
1. Pass the rope around the object
Take the working end of the rope around the post, pole, tree or other suitable object.
2. Make a complete second pass
Take the rope around the object again in the same direction.
You should now have a round turn, with two sections of rope wrapped around the object.
Bring the working end back alongside the standing part.
3. Tie the first half hitch
Take the working end around the standing part of the rope.
Pass the working end through the loop you have just created.
Pull it snug against the round turn.
4. Tie the second half hitch
Repeat the same process immediately beside the first half hitch.
Take the working end around the standing part, pass it through the new loop and pull it snug.
5. Tighten and dress the knot
Pull the standing part to take up the load and snug the two half hitches.
The finished knot should sit neatly against the round turn.
How to Check Your Knot
Before using it, check that:
- The rope has made a complete round turn around the object.
- The two wraps sit neatly together.
- There are two clearly formed half hitches.
- The half hitches are positioned against each other.
- The knot is snug and properly dressed.
- There is enough rope remaining beyond the final hitch.
The round turn should take the main strain, with the two half hitches securing the working end.
Common Uses
This knot is useful for:
- Securing a rope to a post or pole.
- Attaching guy lines.
- Securing temporary camp equipment.
- Mooring or securing applications where appropriate.
- General outdoor ropework.
- Situations where the rope may need to be adjusted or untied later.
Important Safety Information
Always make sure the object you are attaching the rope to is strong enough for the intended load.
Do not rely on this knot alone for climbing, rescue, abseiling or other life-safety applications unless it is part of a system specifically designed and approved for that purpose.
Check the knot after applying tension. Changing loads, movement and rope characteristics can affect how a knot behaves.
Final Tip
Remember the name — it tells you exactly what to tie:
Round turn + half hitch + half hitch.
Practise making the round turn first, then add the two half hitches. Once you can recognise each part separately, the complete knot becomes much easier to tie correctly.
🔒Ready to test your survival skills?
Join Survival Guides UK for free, complete challenges, earn badges and increase your Survival Level.
JOIN FREE →
CRAIG BURR
FOUNDER · SURVIVAL GUIDES UK
I'm Craig, the person behind Survival Guides UK. I created SGUK because I wanted somewhere people could learn real outdoor skills in a practical, straightforward way — from lighting a fire and tying knots to navigation, campcraft and everything in between.
You can read more about the story behind SGUK here as well as our approach here.