Basic Knots: A Beginner’s Guide to Essential Outdoor Knots
Why Learn Basic Knots?
You don’t need to become an expert sailor or climber to benefit from knowing a few knots.
A handful of useful knots can help with:
- Tarp shelters
- Tent guy lines
- Securing equipment
- Bundling items
- Camping
- Scouting activities
- Outdoor projects
- Temporary repairs
- Lashing
- Hanging equipment
Knots are particularly useful because they allow you to join, secure, tension and adjust cordage without needing complicated equipment.
Unlike a tent, a tarp usually doesn’t have a built-in floor or enclosed walls. Instead, you use cordage, trees, poles or pegs to create a shelter suited to the conditions.
SURVIVAL PRINCIPLE
You don’t need to know hundreds of knots.
Learn a small number of useful knots and learn to tie them correctly.
⚠️ SAFETY FIRST
Knots are useful outdoor skills, but a knot is only as reliable as the rope, cordage, anchor and way it has been tied.
Always check your knots before relying on them to support equipment or people.
Never use ordinary camping cordage or improvised knots for climbing, abseiling, rescue or other life-support applications. Those activities require appropriate equipment and specialist training.
When using knots around children, supervise the activity and take care with loose cordage, which can present a strangulation or trip hazard.
Understanding Rope and Cordage
Before learning knots, it helps to understand what you’re working with.
Different types of cord behave differently.
You might encounter:
- Paracord
- Nylon rope
- Polyester cord
- Natural-fibre rope
- Guy line
- Utility cord
- Climbing rope
Some materials stretch.
Some are slippery.
Some become stiff when wet.
Some are designed for specific specialist applications.
Never assume that because two pieces of cord look similar, they have the same strength or characteristics.
The Parts of a Rope
A few basic terms make knot instructions easier to understand.
Working End
The end you’re using to tie the knot.
Standing Part
The main length of rope that isn’t being actively manipulated.
Bight
A section of rope formed into a U-shaped loop without crossing the rope.
Loop
A circular or crossing section formed in the rope.
Tail
The loose end left after the knot has been tied.
KNOT TIP
When learning from diagrams, pay attention to which end is moving. Many knots look similar but work very differently.
How to Learn Knots
Don’t try to memorise a knot from a picture alone.
Use a piece of rope or cord that’s easy to handle.
Then:
- Look at the finished knot.
- Learn what the knot is designed to do.
- Tie it slowly.
- Untie it.
- Repeat.
- Try tying it without instructions.
- Test it with a sensible load.
- Learn how to untie it again.
Eventually, your hands will begin to remember the movements.
PRACTICE TIP
Tie it, untie it and tie it again.
A knot you can only tie while looking at instructions isn’t yet a knot you’ve truly learned.
1. The Overhand Knot
The overhand knot is one of the simplest knots.
It’s essentially the basic knot most people learn instinctively.
It can be useful for:
- Stopping a rope from passing through an opening
- Temporary securing
- Creating a simple stopper
- Learning the fundamentals of knot tying
It’s not normally the best choice when you need a knot that is easy to untie after being heavily loaded.
BEGINNER TIP
The overhand knot is simple, but don’t underestimate its usefulness as a building block for learning more complicated knots.
2. The Figure-Eight Knot
The figure-eight is another excellent basic knot.
It creates a larger stopper than a simple overhand knot and is commonly used in rope work.
It can be useful for:
- Preventing rope ends from passing through fittings
- Creating a stopper
- Learning rope-handling skills
The figure-eight is particularly useful because it’s easy to recognise when tied correctly.

KNOT CHECK
Learn to recognise the finished shape.
A correctly tied knot should look neat rather than tangled.
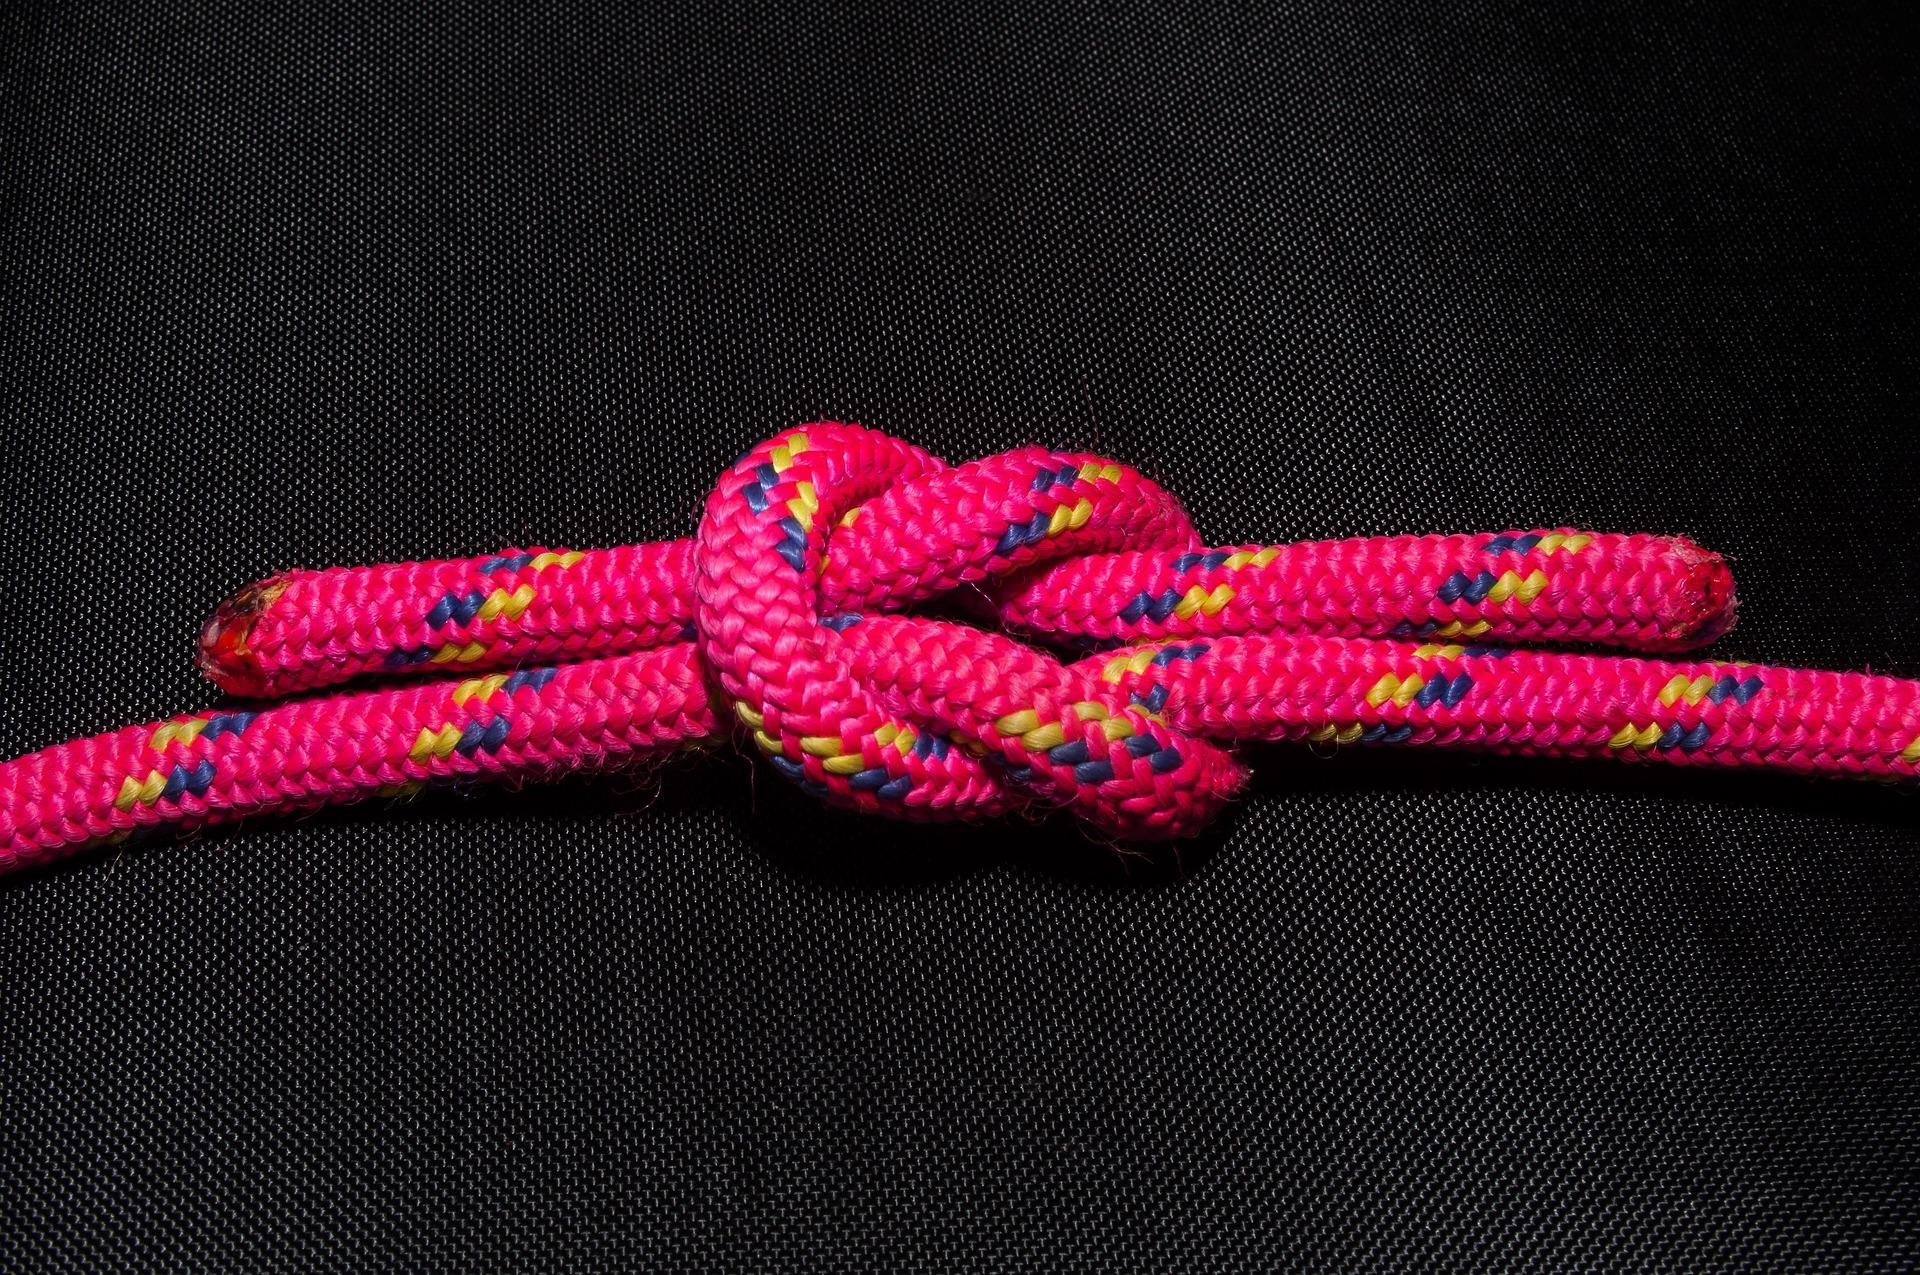
3. The Reef Knot
The reef knot, also called the square knot, is used for joining two ends of similar rope or cord when the load is appropriate.
It’s commonly used for:
- Bundling
- Tying packages
- Simple camping tasks
- Certain Scout activities
The basic sequence is often remembered as:
Right over left, left over right.
Or:
Right over left and under, then left over right and under.

Important Safety Point
A reef knot should not be treated as a general-purpose method for joining ropes under heavy or critical loads.
It can capsize or fail when misused.
REMEMBER
A reef knot is not a climbing knot.
Use it for appropriate light-duty applications rather than critical loads.
4. The Clove Hitch
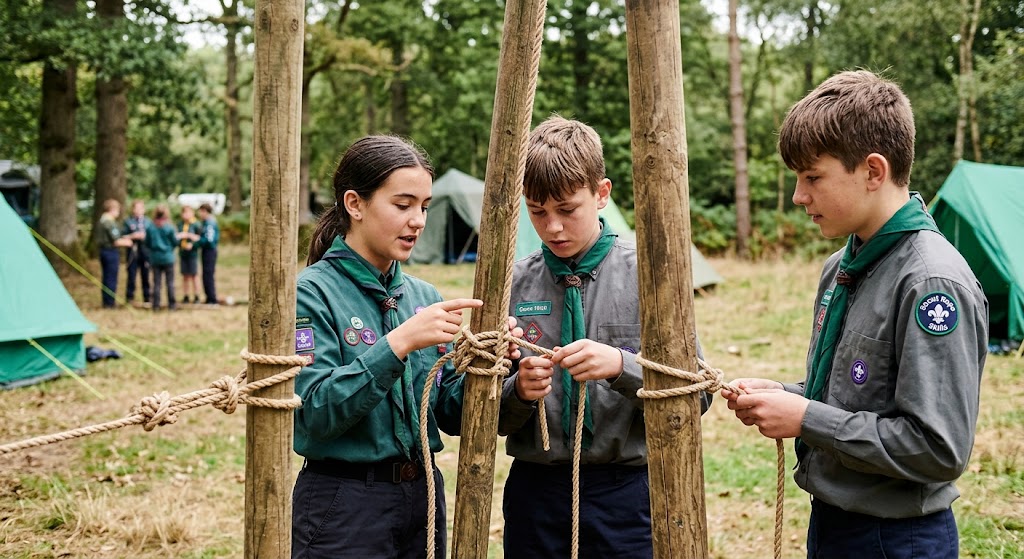
The clove hitch is one of the most useful knots for outdoor activities.
It can be used to attach a rope to a suitable post, pole or other anchor.
It’s particularly useful for:
- Tarp shelters
- Pioneering
- Lashings
- Temporary attachments
- Scout activities

The clove hitch is quick to tie and easy to adjust.
However, it isn’t suitable for every situation.
Its behaviour can vary depending on the type of rope and how the load is applied.
KNOT TIP
Don’t simply ask:
“Can I tie this knot?”
Ask:
“Is this the right knot for this job?”
5. The Bowline
The bowline is one of the most famous knots in the world.
It creates a fixed loop at the end of a rope.
The loop generally doesn’t tighten in the same way as a simple slip loop when loaded.
It’s useful for:
- Creating attachment loops
- Outdoor activities
- Tarp systems
- General rope work

The bowline has many variations and methods of tying.
For beginners, concentrate on learning one reliable method first.
MEMORY TIP
A traditional way of remembering the bowline involves imagining a small loop and the working end travelling through and around it before returning through the loop.
Practise the movement rather than relying entirely on the story.
6. The Taut-Line Hitch
The taut-line hitch is particularly useful for camping.
It creates an adjustable attachment that can be moved along a rope to change tension.
This makes it useful for:
- Tent guy lines
- Tarp shelters
- Adjustable lines
- Camping setups

This is one of the knots worth practising because you can use it regularly outdoors.
CAMPING TIP
If you regularly use guy lines, an adjustable knot can save you repeatedly having to untie and retie the entire system.
7. Two Half Hitches
Two half hitches provide a useful way of securing a rope around a suitable anchor.
They’re straightforward to learn and can be useful for:
- Securing lines
- Camping
- General outdoor work
- Temporary attachments

As with all knots, the application matters.
Make sure the anchor is suitable and check the finished knot before putting it under load.
8. The Round Turn and Two Half Hitches
This knot is useful when you need to secure a rope around a suitable object.
The round turn gives you more contact around the anchor before the half hitches are added.
It can be useful for:
- Securing lines
- Camping
- General outdoor tasks
- Temporary setups

It’s a good example of how combining simple elements can create a very practical knot.
9. The Sheet Bend
The sheet bend is designed for joining two ropes, particularly when they are different sizes.
It’s useful when you need to extend a line or join cordage.

There are variations of the sheet bend, including a double sheet bend.
For beginners, learn the standard version first.
ROPE TIP
When joining two ropes, consider their:
- Size
- Material
- Condition
- Intended load
Don’t assume any knot makes two unsuitable ropes safe to use together.
10. The Timber Hitch
The timber hitch is useful for temporarily attaching a rope around a log, branch or similar object.
It can be particularly useful for:
- Pioneering
- Moving timber
- Camp projects
- Scout activities
- Lashing systems

The knot relies on the rope wrapping around itself appropriately.
It should be checked regularly when being used.
11. The Trucker’s Hitch
The trucker’s hitch is a useful way of creating a mechanical advantage when tensioning a line.
This can be particularly useful for:
- Securing loads
- Tarp ridgelines
- Tightening guy lines
- Camping equipment

The exact method can vary, but the basic idea is to create a loop that allows you to pull the line tight before securing it.
SAFETY NOTE
Mechanical advantage can allow you to generate much more tension than you might expect.
Don’t overtighten lines to the point that you damage the tarp, rope, tree or attachment point.
Which Knots Should a Beginner Learn First?
You don’t need to learn all eleven immediately.
I’d recommend starting with:
|
Knot |
Main Use |
|---|---|
|
Overhand |
Simple stopper |
|
Figure Eight |
Stopper |
|
Reef Knot |
Joining/bundling light loads |
|
Clove Hitch |
Attaching to poles/posts |
|
Bowline |
Fixed loop |
|
Taut-Line Hitch |
Adjustable guy lines |
|
Two Half Hitches |
Securing a line |
|
Sheet Bend |
Joining two ropes |
|
Timber Hitch |
Attaching to logs/branches |
|
Trucker’s Hitch |
Tensioning lines |
If you’re particularly interested in tarp shelters, prioritise:
Bowline → Clove Hitch → Taut-Line Hitch → Trucker’s Hitch → Two Half Hitches
These give you a useful starting toolkit for many camping situations.
Knots for Tarp Shelters
If you’ve read our Tarp Shelters guide, you’ll know that cordage is an important part of creating a stable shelter.
A basic tarp setup may involve:
- A ridgeline
- Guy lines
- Attachment points
- Pegs
- Adjustable tension
Different knots can perform different jobs.
For example:
Bowline: Create a fixed loop.
Clove Hitch: Attach to a suitable pole or anchor.
Taut-Line Hitch: Adjust guy-line tension.
Trucker’s Hitch: Apply additional tension where appropriate.
Two Half Hitches: Secure a line.
SHELTER TIP
Practise these knots with the same type of cordage you actually use for camping.
Different ropes can feel surprisingly different.
Knots and Tree Safety
If you’re using trees to support a tarp, don’t forget that the tree is part of the shelter system.
Choose healthy, stable trees.
Don’t use:
Avoid damaging living trees.
Where appropriate, use tree-friendly webbing or attachment methods rather than repeatedly tightening thin cord directly around bark.
Always follow campsite and landowner rules.
Knots and Load
One of the biggest misconceptions about knots is:
“If the knot looks secure, it’s secure.”
Not necessarily.
A knot can behave differently depending on:
- Rope material
- Rope diameter
- Wetness
- Friction
- Direction of pull
- Load
- Number of bends
- How neatly it was tied
That’s why you should always test a knot in a safe situation before relying on it.
Dress Your Knots
A good knot should generally be neat and properly dressed.
“Dressing” a knot means arranging the rope so that the knot forms correctly rather than becoming twisted or randomly tangled.
Compare:
Neat knot: predictable shape and rope paths.
Poorly dressed knot: crossed, twisted or difficult to inspect.
A neatly dressed knot is usually easier to check and understand.
KNOT RULE
Tie it neatly. Pull it tight. Check it.
Leave Enough Tail
Don’t tie a knot right at the very end of a rope.
Leave an appropriate amount of tail beyond the knot.
The amount needed varies with the knot, rope and application.
A tiny tail can make a knot more vulnerable to coming undone.
BEGINNER TIP
When learning, leave yourself plenty of rope.
It makes the knot easier to see and inspect.
Check Your Knots
Before relying on a knot, ask:
Is this the correct knot for the job?
Is it tied correctly?
Is it dressed properly?
Is there enough tail?
Is the rope suitable?
Is the anchor secure?
Is the load appropriate?
If you’re using several knots together, check the whole system, not just individual knots.
Don’t Trust a Knot Just Because You Know Its Name
Knowing that a bowline exists doesn’t mean you know how to use one safely.
Likewise, knowing the name of a clove hitch doesn’t tell you whether it’s appropriate for the particular anchor and load.
The important skill is understanding:
What does this knot do?
When should I use it?
When shouldn’t I use it?
That distinction becomes increasingly important as you move from simple camping activities into more technical rope work.
Knots You Shouldn’t Use for Climbing
This is worth making very clear.
The knots in this article are intended for general outdoor, camping, Scout and utility applications.
They should not be used as a substitute for specialist climbing knowledge.
Climbing, abseiling, rescue and other life-support systems require:
- Appropriate rope
- Appropriate hardware
- Correct knots
- Correct techniques
- Proper inspection
- Specialist training
Don’t improvise a life-support system from a camping guide.
Common Beginner Mistakes
Tying the Wrong Knot
Not every knot is suitable for every job.
Getting the Rope Paths Wrong
One crossing in the wrong place can completely change a knot.
Not Dressing the Knot
A tangled knot can be difficult to inspect.
Leaving Too Little Tail
This can increase the chance of the knot coming undone.
Overloading the Knot
A camping knot isn’t automatically suitable for heavy loads.
Using Damaged Rope
Frayed or damaged cord should be assessed carefully and replaced where appropriate.
Ignoring the Anchor
A perfect knot attached to a weak anchor is still an unsafe system.
Forgetting to Check It
Always inspect your knots before relying on them.
How to Practise Knots
You don’t need a forest or campsite to learn.
Take a short length of rope and practise at home.
Try this routine:
Day 1
Learn the:
- Overhand
- Figure eight
- Reef knot
Day 2
Learn the:
- Clove hitch
- Two half hitches
Day 3
Learn the:
- Bowline
- Taut-line hitch
Day 4
Learn the:
- Sheet bend
- Timber hitch
Day 5
Learn the:
- Trucker’s hitch
Then practise tying each one without looking at instructions.
The Blindfold Test
You don’t actually need to blindfold yourself.
Instead, close your eyes once you’ve learned the basic movement.
Can you tell what your hands are doing?
This can help develop muscle memory.
It’s particularly useful for Scout activities because knots may eventually need to be tied in:
- Low light
- Rain
- Cold weather
- Gloves
- Awkward positions
Don’t practise with your eyes closed when there’s a risk of injury or when using a loaded rope system.
Knot Challenge for Scouts
Give each Scout or small group a piece of rope.
Ask them to learn five knots:
- Bowline
- Clove hitch
- Reef knot
- Taut-line hitch
- Sheet bend
Then give them simple challenges.
Challenge 1: Create a fixed loop.
Challenge 2: Attach the rope to a pole.
Challenge 3: Join two pieces of cord.
Challenge 4: Create an adjustable guy line.
Challenge 5: Explain when each knot should not be used.
That last challenge is important.
SCOUT TIP
Knowing the limitations of a knot is just as valuable as knowing how to tie it.
For organised Scout activities, always follow current Scouts guidance and your leader’s risk assessment.
Basic Knots Quick Reference
Keep this table handy:
|
Knot |
What It Does |
Good For |
|---|---|---|
|
Overhand |
Simple stopper |
Basic rope work |
|
Figure Eight |
Large stopper |
Rope handling |
|
Reef Knot |
Joins suitable ends |
Bundling |
|
Clove Hitch |
Attaches to an anchor |
Poles, pioneering |
|
Bowline |
Creates fixed loop |
General outdoor use |
|
Taut-Line Hitch |
Adjustable attachment |
Guy lines |
|
Two Half Hitches |
secures a line |
Camping |
|
Sheet Bend |
Joins two ropes |
Extending cordage |
|
Timber Hitch |
Attaches around an object |
Pioneering |
|
Trucker’s Hitch |
Tensions a line |
Loads, tarps |
Basic Knots Checklist
Before heading outdoors, see if you can confidently:
Final Thoughts
Knots are one of those outdoor skills that look complicated until you understand the basics.
You don’t need to memorise hundreds of them.
Learn a handful of useful knots.
Understand what each one does.
Practise until you can tie them confidently.
And, most importantly, understand their limitations.
A bowline can give you a useful fixed loop.
A clove hitch can attach cord to a suitable anchor.
A taut-line hitch can help adjust a guy line.
A trucker’s hitch can help tension a line.
Together, these simple skills can make setting up a tarp shelter, securing equipment or carrying out a Scout pioneering activity much easier.
THE GOLDEN RULE OF KNOTS
Right knot. Right rope. Right job. Check it before you trust it.
⚠️ SurvivalGuidesUK Safety Notice
This article is intended for general camping, Scouting and outdoor education.
Knots used for climbing, rescue, abseiling, mountaineering or other life-support applications require specialist equipment and training and should not be improvised from this guide.
Always check ropes, cordage, anchors and knots before use, and never rely on a knot simply because it looks secure.
Practise your knots in a safe environment — so you know what you’re doing when you actually need them.
🔒Ready to test your survival skills?
Join Survival Guides UK for free, complete challenges, earn badges and increase your Survival Level.
JOIN FREE →
CRAIG BURR
FOUNDER · SURVIVAL GUIDES UK
I'm Craig, the person behind Survival Guides UK. I created SGUK because I wanted somewhere people could learn real outdoor skills in a practical, straightforward way — from lighting a fire and tying knots to navigation, campcraft and everything in between.
You can read more about the story behind SGUK here as well as our approach here.