Emergency Signalling: Scout Outdoor Skills Guide
Activity Overview
Difficulty: Moderate
Time: 30–45 minutes
Location: Campsites, woodland, open countryside and suitable outdoor training areas
Best for: Scouts, Explorers, Patrol Leaders and adult leaders
Skills: Emergency communication, signalling, navigation, situational awareness and emergency planning
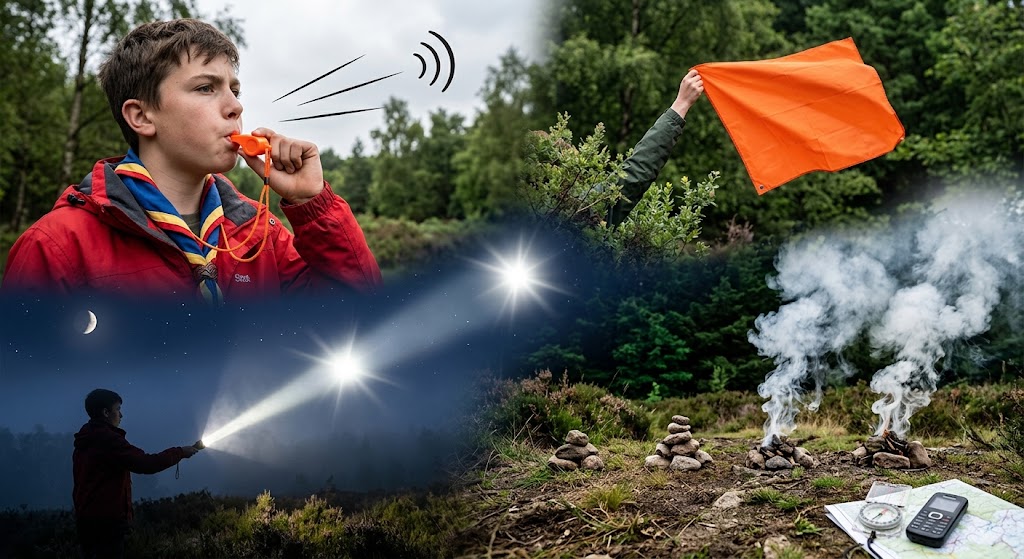
Emergency signalling is about getting attention, communicating that you need help and making your location easier to find.
The best method depends on the situation. A mobile phone may be the quickest way to contact emergency services, while a whistle, torch or visual signal can attract attention when communication isn’t possible.
Before an outdoor activity, know what communication methods are available and have a plan for what to do if the primary method fails.
What You’ll Learn
You’ll learn how to attract attention when something goes wrong outdoors.
You’ll also learn how to use simple signalling equipment, communicate your location and provide useful information to rescuers.
🔴 SAFETY – HIGH RISK
Emergency signalling should support a wider emergency plan rather than replace it.
If there is an immediate threat to life or serious injury, contact the emergency services as soon as possible.
In the UK, 999 or 112 can be used to contact emergency services.
Don’t send Scouts away alone to find help unless the emergency plan specifically requires it and it is safe to do so.
Remain in a safe location where possible and avoid creating additional hazards while attempting to signal.
Equipment
A whistle is one of the simplest emergency signalling tools.
A charged mobile phone can provide direct communication where there is sufficient signal.
A torch can provide a useful night-time signalling method.
A map and compass can help establish and communicate your location.
For appropriate activities, additional equipment such as a power bank, emergency shelter or dedicated communication device may be useful.
Prerequisites
Scouts should know the group’s emergency procedure before an expedition or outdoor activity begins.
Everyone should know where the emergency equipment is kept and who is responsible for contacting help.
Scouts should also understand basic map reading so they can describe their location.
Instructions
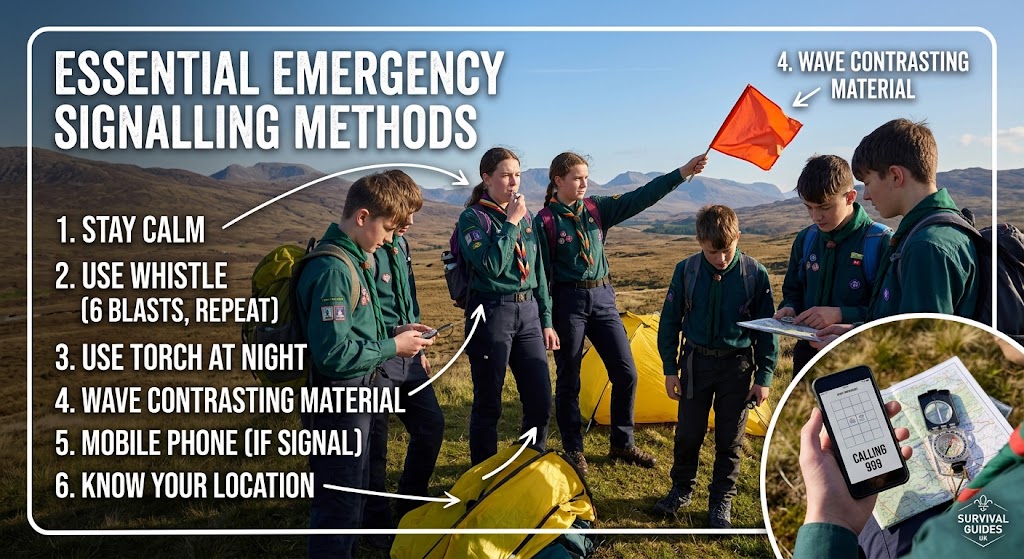
1. Stay Calm
An emergency can make communication difficult.
Stop, assess the situation and follow the group’s emergency plan.
Avoid everyone attempting to solve the problem at once.
2. Assess the Situation
Establish what has happened and whether anyone is injured or in immediate danger.
Move to a safer location if necessary, but don’t wander away from the group without a clear reason.
3. Use a Mobile Phone if Available
If there is sufficient signal, call the emergency services when appropriate.
Explain:
Stay on the call and follow the operator’s instructions.
4. Communicate Your Location
A useful location description can include a grid reference, named feature, trail or road, campsite, landmark and direction of travel.
A phone’s location information can also be useful where available.
Don’t rely solely on an electronic location reading—know how to describe where you are using the surrounding landscape and your map.
5. Use a Whistle
A whistle can carry much further than a human voice and requires less energy.
A commonly taught distress signal is six whistle blasts, followed by a pause, repeated as necessary.
If you’re teaching a particular signalling system, make sure everyone knows exactly which signal your group uses.
Don’t use the emergency signal casually or as a game.
6. Listen for a Response
After making a signal, stop and listen.
Rescuers or other people nearby may respond.
Continue signalling at appropriate intervals rather than constantly producing noise.
7. Use a Torch at Night
A torch can be used to attract attention when visibility is poor.
Use controlled flashes rather than simply leaving the torch switched on.
Preserve battery power in case signalling needs to continue for an extended period.
8. Use Visual Signals
During daylight, a bright or contrasting object can help make your position more visible.
Wave a suitable item from a safe location if doing so is appropriate.
Don’t create additional hazards by climbing trees, structures or unstable ground to make a signal more visible.
9. Use Sound
If you don’t have a whistle, your voice can be used to attract attention.
Shouting repeatedly can quickly become tiring, so use deliberate calls followed by periods of listening.
Other appropriate noise-making methods may also attract attention, but avoid creating confusion with ordinary campsite sounds.
10. Make Yourself Visible
If you’re in an open area and it is safe to remain there, make your position easy to spot.
Stay together where possible.
Bright clothing, torches and other visible equipment can help rescuers locate a group.
11. Don’t Move Without a Reason
Once help has been contacted, moving unnecessarily can make you harder to locate.
If you need to move because the location is unsafe, communicate the change if possible.
Follow instructions from emergency services.
12. Conserve Resources
If you may be waiting for assistance, manage batteries, food, water and warm clothing sensibly.
Use signalling equipment deliberately rather than continuously.
Stay sheltered where appropriate.
13. Use Multiple Methods
If one signalling method isn’t working, consider another.
For example, a group might use a mobile phone to contact emergency services while also using a whistle or torch to help rescuers locate them.
Using several appropriate methods can increase the chance of being noticed.
14. Respond to Searchers
If you hear or see a search party, respond with your agreed signal.
Stay in a safe location and make your presence obvious.
Don’t assume that rescuers have already seen you.
15. Confirm When Help Is No Longer Needed
Once the emergency has been resolved, make sure anyone who has been alerted understands that assistance is no longer required.
This is particularly important if an emergency call or organised search has been initiated.
The Whistle Distress Signal
The six-blast whistle signal is commonly taught for distress in the countryside in the UK.
The pattern is:
6 blasts → pause → repeat
The important part is consistency.
If your group has been taught a different emergency signal for a particular activity, follow that established procedure.
Signalling With a Torch
At night, a torch can make an effective signalling device.
Flash deliberately and periodically rather than wasting the battery.
If the situation permits, use the torch from a location where it is visible without exposing yourself to unnecessary danger.
Signalling From the Countryside
In open countryside, think about what makes your position identifiable.
A hilltop may make you more visible, but moving to one may be unsafe.
A path, road junction, distinctive building or other landmark can help describe your location to emergency services.
Your map and compass are therefore important parts of emergency signalling, even though they don’t actually produce a signal.
Emergency Signalling Practice for Scouts
A useful training exercise is to give each patrol a fictional emergency scenario.
Ask them to identify their location, decide which signalling methods are available and explain how they would attract attention.
They can then practise using a whistle or torch without pretending that a real emergency exists.
The exercise should finish with a discussion about why staying put, communicating clearly and conserving resources can be important.
What Not to Do
Don’t use distress signals as jokes or challenges.
Don’t repeatedly call emergency services as a practice exercise.
Don’t send multiple people in different directions without a clear plan.
Don’t climb dangerous terrain to improve visibility.
Don’t create a fire or other hazard solely to attract attention unless this is specifically part of an established emergency procedure and can be done safely.
Final Tip
The most effective emergency signal is the one that gets help to the right place quickly.
For Scouts, practise using a whistle, torch and map, but put equal emphasis on communicating a clear location and following the group’s emergency plan.
If there is a serious emergency, contact the emergency services and follow their instructions rather than relying on improvised signalling alone.
🔒Ready to test your survival skills?
Join Survival Guides UK for free, complete challenges, earn badges and increase your Survival Level.
JOIN FREE →
CRAIG BURR
FOUNDER · SURVIVAL GUIDES UK
I'm Craig, the person behind Survival Guides UK. I created SGUK because I wanted somewhere people could learn real outdoor skills in a practical, straightforward way — from lighting a fire and tying knots to navigation, campcraft and everything in between.
You can read more about the story behind SGUK here as well as our approach here.