60-Minute Activity Plan: Campfire Challenge – Build, Light and Manage
A practical outdoor session that introduces young people to the basics of building and managing a small campfire. Rather than simply seeing who can light a fire fastest, this activity focuses on preparation, safe decision-making, teamwork and understanding how a fire behaves.
It works particularly well as a supervised outdoor session and can be made more challenging for older Scouts without changing the basic structure.
Activity Overview
Time: 60 minutes
Group size: 6–24 young people
Suitable for: Cubs and Scouts, with a simplified version for Beavers
Location: Suitable outdoor fire area
Main skills: Fire safety, preparation, teamwork, observation and practical problem-solving
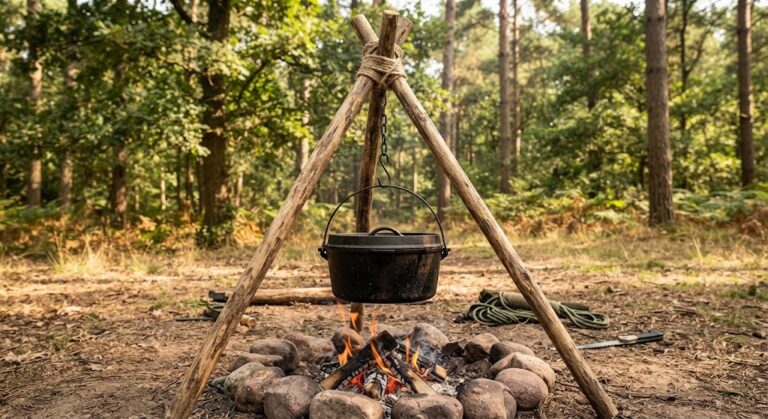
The session is divided into short stages. Young people first learn what makes a fire safe and effective, then prepare materials and construct a simple fire lay before moving on to the supervised lighting and management stage.
The emphasis throughout is on doing things correctly rather than quickly.
Before You Start
This activity should only be carried out where fires are permitted and with appropriate adult supervision, equipment and local procedures in place.
Prepare a safe, established fire area before the session. Check the weather and ground conditions, ensure suitable water or other means of extinguishing the fire are immediately available, and make sure the leader running the activity is confident with fire safety.
For a larger group, divide the young people into small teams and give each team its own clearly defined working area. You can prepare bundles of suitable dry tinder, kindling and fuel beforehand.
Don’t allow young people to collect random materials from the surrounding area without checking them first.
Safety
Fire must be treated as a supervised activity throughout.
Young people should remain outside the designated fire area unless specifically invited forward by the leader. Establish a clear boundary before anything is lit.
Only the leader, or young people who are appropriately prepared and directly supervised according to your group’s procedures, should handle the ignition and fire-management tasks.
Tie back long hair and secure loose clothing. Keep water available throughout the activity, not just when the fire is being extinguished.
Never leave a lit fire unattended. At the end of the session, extinguish it thoroughly and check that it is completely out before leaving the area.
If conditions become unsuitable, particularly because of strong wind or dry vegetation, abandon the lighting stage and run the preparation and fire-management elements as a demonstration instead.
0–10 Minutes: What Makes a Good Fire?
Start by gathering everyone away from the fire area.
Show the group several examples of fire materials: tinder, small kindling and larger fuel.
Ask:
“Which one do you think would be easiest to light?”
Then ask:
“Could you light a large log with a match?”
Use their answers to introduce the basic idea that a fire needs the right combination of fuel, heat and oxygen.
Explain that successful fire lighting isn’t about having the biggest flame. A well-prepared small fire is much easier to control than a badly prepared large one.
Introduce the fire-area rules at this stage and make sure everyone understands the boundary.
10–20 Minutes: The Fire-Building Challenge
Give each team a prepared collection of materials.
Their challenge is to arrange them into a simple fire lay without lighting anything.
Ask them to think about how the fire would develop from the smallest material to the larger fuel.
Walk around the teams and ask questions rather than immediately correcting them.
“Where would the first flame go?”
“What happens when the small material catches?”
“Can air get into your fire lay?”
This gives young people a chance to reason about the design before seeing the result.
For Cubs, keep the construction simple and focus on recognising different sizes of fuel.
Scouts can be asked to explain why they chose their particular arrangement.
20–30 Minutes: Fire Lay Inspection
Now introduce a little competition.
Each team gets a few minutes to inspect another team’s fire lay.
Their job isn’t to criticise it, but to identify one thing that looks good and one thing that could be improved.
Bring the teams back together and discuss some of the observations.
This is an excellent point to reinforce the idea that preparation is part of fire safety.
A fire that is difficult to light often isn’t a problem with the match. It may be a problem with the preparation.
30–45 Minutes: Supervised Lighting
Move to the practical fire-lighting stage.
The leader should control the pace and decide which young people can participate directly based on their age, experience and your group’s procedures.
Each team can take a turn attempting to get its prepared fire lay established.
The objective is not to create the largest fire.
Instead, challenge them to get a small, controlled flame established and then demonstrate that they understand how to manage it.
Ask them to observe what happens when more fuel is added and how the fire responds to changes in airflow.
Keep this stage calm. If a fire doesn’t establish properly, don’t rush to intervene. Use it as a learning opportunity and ask the team what they think is missing.
45–53 Minutes: Fire Management Challenge
Once the practical work is complete, give the teams a short scenario.
For example:
“Your group is cooking beside the fire and the flames have become larger than you expected. What would you do?”
Or:
“The fire keeps going out whenever you add fuel. What might be causing the problem?”
Let teams discuss their answers.
For older Scouts, introduce a few additional situations involving wind, changing fuel or needing to safely reduce the fire.
The emphasis should be on thinking before acting.
53–60 Minutes: Extinguish and Review
Finish by demonstrating the correct procedure for extinguishing the fire according to your group’s established practice.
Make sure everyone understands that a fire isn’t finished just because there are no visible flames.
Once the fire has been safely extinguished, bring everyone together for a quick review.
Ask:
“What made the fire easier to manage?”
“What would have made it harder?”
“Why is preparation important?”
Finish by reminding the group that responsible fire skills are about control, preparation and safety—not simply getting something to burn.
Adapting for Different Ages
Beavers
For Beavers, concentrate on recognising fire materials, understanding the fire-area boundary and observing a leader demonstration.
They can help sort safe, prepared materials into different sizes without being responsible for lighting or managing the fire.
Keep the session focused on what fires need and how we stay safe around them.
Cubs
Cubs can take part in constructing simple fire lays and, where appropriate and permitted by your procedures, participate in supervised practical tasks.
Give them clear roles within their team so everyone contributes.
The challenge should be about getting a controlled fire started rather than speed.
Scouts
Scouts can take greater responsibility for planning their fire lay and explaining the reasoning behind it.
Introduce scenarios involving changing conditions and ask them to make decisions about fuel, airflow and safely reducing the fire.
You can also challenge them to explain the difference between a fire that is burning efficiently and one that is simply producing a lot of smoke.
Leader Notes
Avoid turning this into a competition to see which team can produce the biggest flame. That encourages exactly the wrong behaviour.
Instead, reward good preparation, controlled flames, sensible decisions and teamwork.
It can also be useful to deliberately include a poorly prepared fire lay for demonstration. Ask the group to diagnose the problem before changing anything. This reinforces the idea that fire lighting is a process rather than a trick.
If conditions aren’t suitable for a real fire, the session can still work. Build the fire lays, discuss the principles and use photographs or a leader demonstration instead of lighting them.
The same activity can also lead naturally into later sessions on outdoor cooking, campcraft or emergency fire safety.
Learning Outcomes
By the end of the session, young people should have had opportunities to:
Final Thought for Leaders
Fire lighting is one of those outdoor skills where patience is often more useful than speed.
A young person who understands why a fire works, how to prepare it and how to keep it under control has learned something much more valuable than simply learning how to strike a match.
Keep the activity calm, well supervised and focused on good habits, and even a small fire can become a memorable campcraft lesson.
🔒Ready to test your survival skills?
Join Survival Guides UK for free, complete challenges, earn badges and increase your Survival Level.
JOIN FREE →
CRAIG BURR
FOUNDER · SURVIVAL GUIDES UK
I'm Craig, the person behind Survival Guides UK. I created SGUK because I wanted somewhere people could learn real outdoor skills in a practical, straightforward way — from lighting a fire and tying knots to navigation, campcraft and everything in between.
You can read more about the story behind SGUK here as well as our approach here.