Tarp Shelter Equipment Checklist for Scouts
A tarp shelter can be built with surprisingly little equipment, but having the right kit makes a big difference.
For Scouts, choosing and organising shelter equipment is about more than simply carrying as much as possible. The aim is to have a simple, reliable and manageable shelter kit that can be used safely in the conditions expected.
This guide covers the basic equipment needed for tarp shelters, what each item is used for and what Scouts should check before heading outdoors.
The Tarp
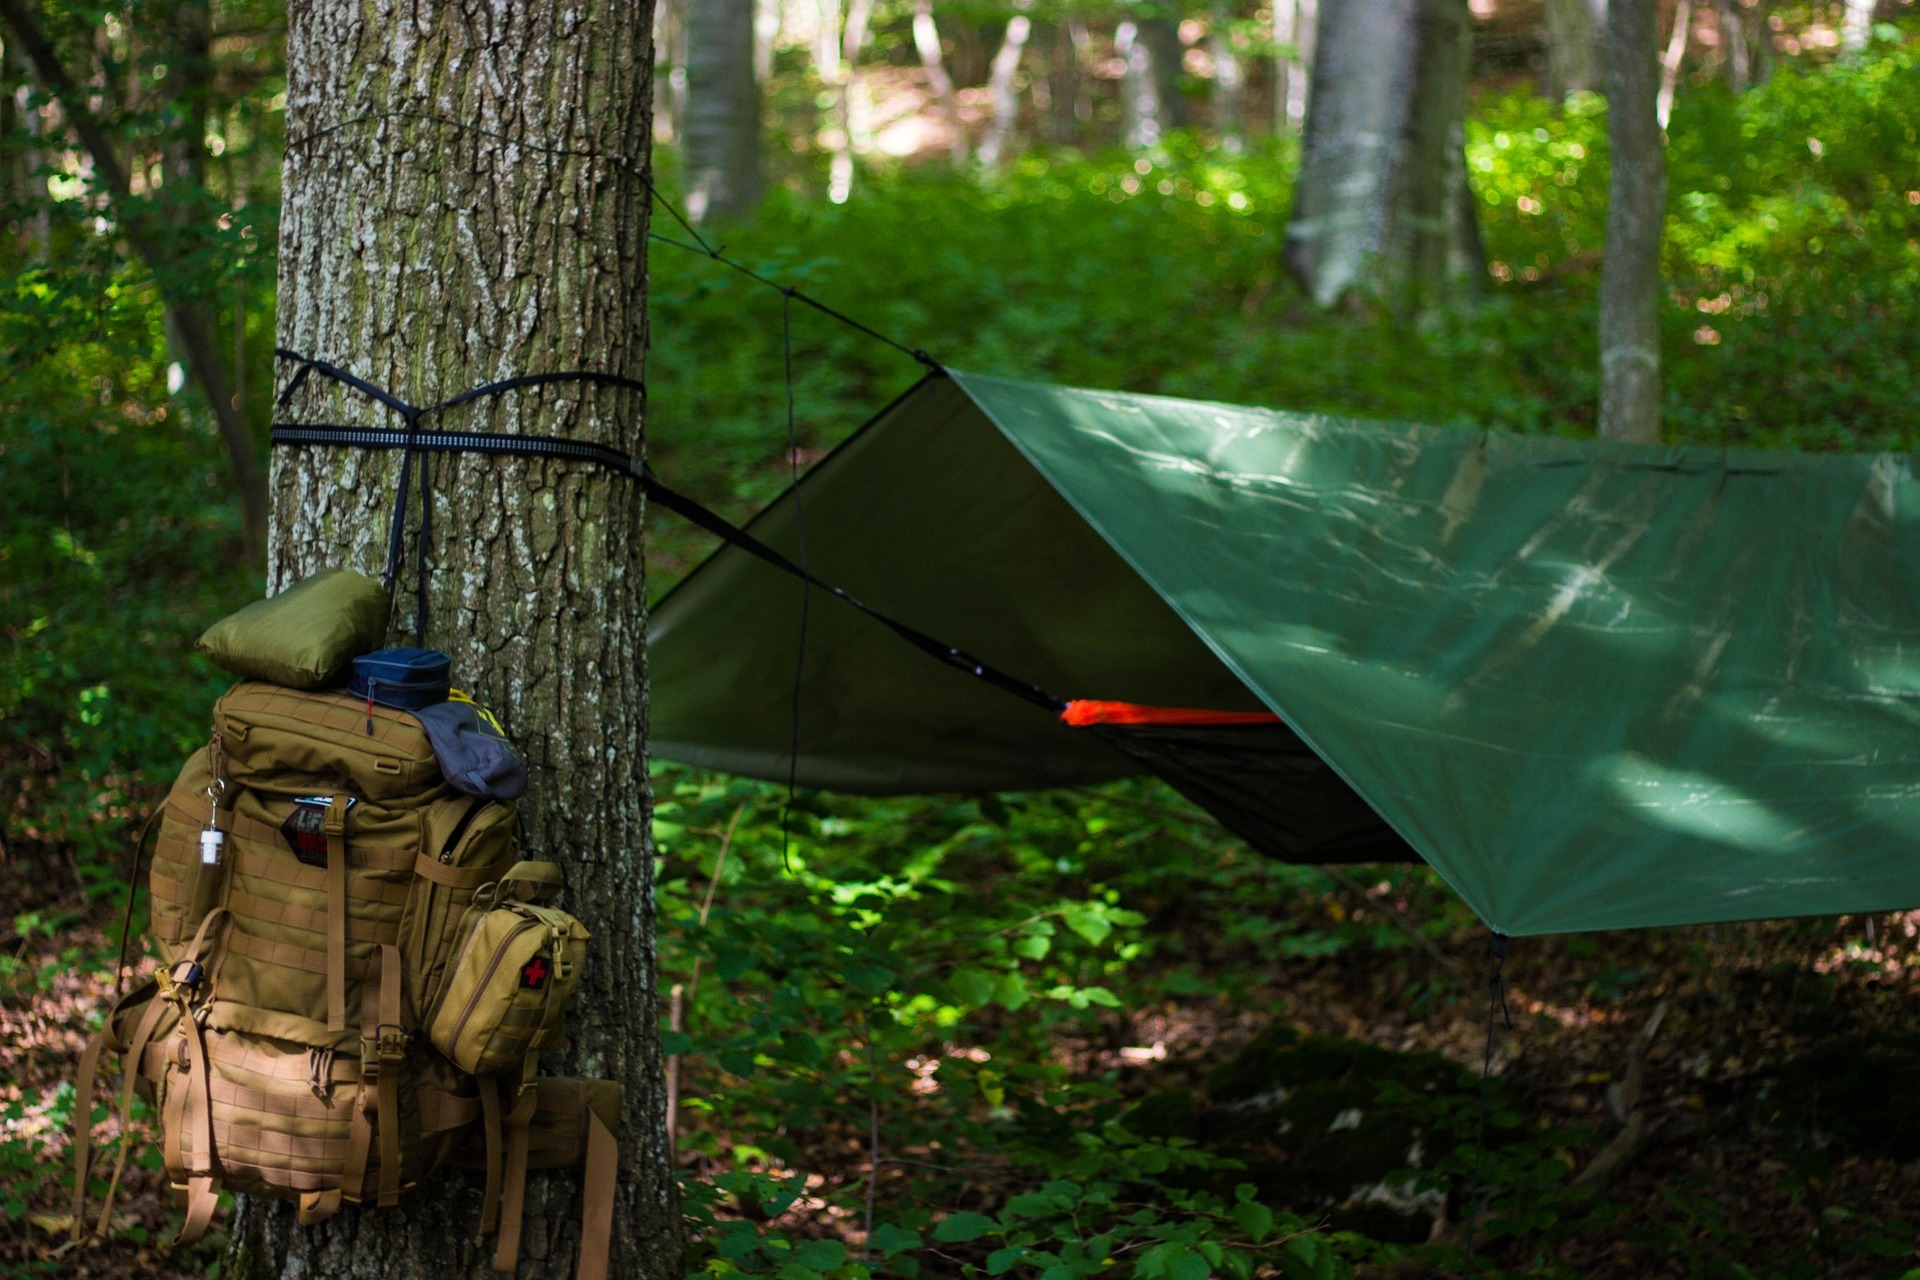
The tarp is the main part of the shelter.
A square or rectangular tarp can be used for several different shelter designs, including lean-tos, A-frames and more enclosed pitches.
For Scout activities, a tarp around 3m × 3m is a useful general-purpose size for practising shelter building, although the appropriate size depends on the number of people, the design and the activity.
When choosing a tarp, consider its:
A lightweight tarp is convenient for hiking, while a heavier tarp may be more suitable for repeated group use.
Check the Tarp Before Use
Don’t wait until you’re outdoors to discover that the tarp has a damaged corner.
Lay it out and inspect it before taking it on an activity.
Look for tears, holes, damaged stitching, stretched attachment points and signs of previous repairs.
Check the seams and corners particularly carefully.
If a tarp has serious damage, don’t simply pack it and hope it will be fine.
Take it out of service until it has been properly assessed.
Cordage and Guy Lines
Rope or cordage gives you flexibility when setting up a tarp.
It can be used for ridgelines, guy lines and attachment points depending on the shelter design.
Choose cordage that is suitable for the intended purpose.
It should be strong enough for the loads involved and in good condition.
Avoid relying on old, frayed or damaged rope simply because it happens to be available.
Carry Spare Cordage
A small amount of spare cord can be extremely useful.
A line can become damaged, lost or accidentally cut.
Having a spare length available can save considerable time when making adjustments to a shelter.
Keep spare cord neatly coiled or stored so that it doesn’t become tangled with the rest of the equipment.
Learn the Knots Before the Shelter
A tarp kit is much more useful when Scouts know how to use the cordage.
Useful knots and hitches can include those for joining ropes, creating secure attachments and adjusting tension.
The exact knots taught should match the group’s experience and the activity.
The important thing is that Scouts understand why they are using a particular knot and can tie it correctly rather than simply memorising a collection of names.
Tarp Pegs
Pegs secure the tarp and guy lines to the ground.
Different pegs work better in different types of ground.
A lightweight peg may be perfectly adequate in firm soil but perform poorly in soft or saturated ground.
Choose pegs suitable for the environment and the equipment being used.
Carry Spare Pegs
Pegs are easy to lose.
They can also bend or break.
A few spare pegs take up little space and can be extremely useful.
For group equipment, keep a few extras with the shelter kit rather than expecting every Scout to bring exactly the right number.
Peg Storage
Loose pegs can damage other equipment inside a rucksack or storage box.
Keep them together in a suitable bag or container.
Check them for sharp or damaged edges before packing them away.
Poles
Some tarp designs can be supported using trees or other suitable attachment points.
Others require poles.
Dedicated tarp poles can be useful, but suitable lightweight poles may also be available depending on the equipment and activity.
The important thing is that the support is stable, appropriate for the load and suitable for the shelter design.
Pole Safety
A pole should not be placed where it can easily fall onto people.
Check the ground around the base.
Make sure the pole isn’t likely to slip.
Don’t allow Scouts to climb on poles or use them as play equipment.
Long poles also need careful handling when being carried.
Watch for people, branches and other obstacles.
Tree Attachment Equipment
Trees can sometimes provide convenient attachment points for tarp shelters.
However, not every tree is suitable.
Never attach a tarp to a dead, damaged or unstable tree.
Check the area above the shelter for falling branches and other hazards.
Where tree attachment is permitted, use appropriate tree-friendly methods that avoid unnecessarily damaging the bark.
Webbing Slings
Webbing slings can be useful for creating temporary attachment points around suitable trees.
They can spread the load over a larger area than thin cord.
Use equipment designed for the intended purpose and follow its instructions.
Don’t improvise with unsuitable straps or materials.
Ridgeline
A ridgeline is useful for many tarp shelter designs.
It provides the central support from which the tarp can be positioned.
The ridgeline needs to be properly secured and tensioned without placing unnecessary stress on the tarp.
Check both attachment points before putting the tarp over the line.
Adjustable Guy Lines
Adjustable guy lines make it easier to fine-tune the shelter.
They allow Scouts to increase or reduce tension without repeatedly retying the entire system.
They can also make shelter adjustment easier when weather conditions change.
This is a useful skill for Scouts because it demonstrates that outdoor equipment can be adjusted rather than simply set up once and forgotten.
Repair Kit
A small tarp repair kit can be worth carrying on longer activities.
It might include suitable outdoor repair tape, repair patches and spare cordage.
The contents should match the tarp material and the type of activities being undertaken.
Repair materials should be stored somewhere dry and easy to find.
Don’t Rely on Improvisation
Being resourceful is a valuable outdoor skill.
However, there’s a difference between sensible improvisation and relying on unsuitable equipment.
A damaged plastic bag might temporarily protect something inside a rucksack.
It isn’t necessarily an appropriate structural repair for a tarp.
Teach Scouts to understand the limitations of improvised solutions.
Groundsheet
A tarp forms the roof of a shelter, but it doesn’t necessarily provide comfortable or dry ground.
A separate groundsheet can help keep equipment and people away from damp ground.
Make sure the groundsheet is not so large that rain runs from the tarp onto it and underneath the shelter.
If the groundsheet extends beyond the shelter footprint, water can sometimes collect underneath.
Sleeping Mat
For overnight activities, a sleeping mat provides insulation from the ground.
A tarp itself provides very little insulation.
If Scouts are learning about lightweight shelter systems, explain that staying warm involves more than simply having something overhead.
Ground insulation can be particularly important in cold conditions.
Sleeping Bag
A sleeping bag appropriate for the expected conditions may be required for overnight activities.
Choose equipment based on the actual environment rather than simply assuming a sleeping bag labelled for camping is suitable for every season.
Follow the manufacturer’s temperature guidance and consider the limitations of the rating system.
Rucksack
A shelter kit needs to fit into the wider equipment system.
For hiking activities, think carefully about where each item is packed.
The tarp should be accessible.
There is little benefit in placing it at the very bottom of a rucksack when rain is already starting.
Pack the Shelter for Quick Access
Keep frequently needed shelter equipment together.
A practical arrangement might place the tarp and primary cordage near the top of the pack, with pegs and other components together in a small bag.
The exact arrangement is personal.
The important principle is knowing where everything is.
Waterproof Storage
Even waterproof equipment can benefit from sensible storage.
Cordage, repair materials and spare clothing should be protected from unnecessary moisture.
A waterproof stuff sack can also help keep the shelter kit together.
Remember that a stuff sack isn’t automatically waterproof simply because it looks water-resistant.
Gloves
Gloves aren’t essential for every tarp activity, but they can be useful in cold or wet conditions.
They can also provide some protection from rough cordage and equipment.
However, gloves should never be treated as a substitute for safe handling.
Scouts still need to understand how to manage ropes, pegs and poles properly.
Head Torch
For activities that may continue into low light, a head torch can be very useful.
It leaves both hands free for handling equipment.
Make sure batteries are charged and consider carrying spare batteries or an appropriate backup light.
Don’t rely on a mobile phone as the only source of light.
Waterproof Clothing
A tarp doesn’t eliminate the need for suitable clothing.
Scouts should still dress appropriately for the expected conditions.
A waterproof jacket, suitable footwear and additional layers may be needed depending on the activity.
Good shelter and good clothing work together.
Navigation and Emergency Equipment
A tarp kit is only one part of outdoor equipment.
Depending on the activity, Scouts may also need appropriate navigation equipment, first-aid provision, communication equipment, food and water and other emergency items.
Don’t let the excitement of shelter building distract from the wider activity plan.
A Simple Tarp Shelter Kit
For a basic Scout shelter exercise, a useful starting kit could include:
One suitable tarp
Cordage or guy lines
Appropriate pegs
Suitable supports or poles where required
A small repair kit
The exact equipment should be adjusted for the shelter design and environment.
A Hiking Tarp Kit
For a Scout carrying a shelter as part of a hike, keeping weight down becomes more important.
A compact tarp, lightweight cordage, a small number of suitable pegs and a minimal repair kit may be enough for the intended design.
Avoid carrying equipment simply because you might possibly use it.
Every additional item adds weight and takes up space.
A Group Tarp Kit
A leader organising a group activity may need more equipment.
Carry enough tarps, cordage, pegs and supports for the planned activity.
Spare equipment can be particularly useful because group activities have a habit of producing unexpected problems.
A simple equipment inventory can prevent items from disappearing between sessions.
Label Group Equipment
If your Scout group owns multiple tarps or shelter kits, label them.
This makes it easier to identify missing equipment and keep sets together.
Numbering tarps, pole sets or equipment bags can also make post-activity checks much quicker.
Equipment Checks Before an Activity
Before leaving, check that:
The tarp is intact.
The attachment points are secure.
Cordage is in good condition.
Pegs are usable.
Poles are not damaged.
Repair materials are present.
Everything needed for the planned shelter design is included.
The equipment is appropriate for the expected weather.
These checks should become routine.
Equipment Checks After an Activity
The job isn’t finished when the shelter comes down.
Inspect the tarp again.
Remove mud and debris as appropriate.
Allow wet equipment to dry properly.
Check for new damage.
Count the pegs.
Inspect the ropes.
Store everything correctly.
This helps ensure the kit is ready for the next activity.
Don’t Store a Wet Tarp
One of the simplest ways to damage outdoor equipment is to put it away wet and forget about it.
Whenever conditions allow, dry the tarp thoroughly before long-term storage.
Follow the manufacturer’s cleaning and storage instructions.
If the tarp has been used in particularly dirty or muddy conditions, clean it appropriately before storing it.
Build a Kit Around the Activity
Not every Scout needs the same equipment.
A short supervised shelter-building session at a campsite may require a different kit from a multi-day hike.
Think about:
The environment.
The weather.
The number of people.
The shelter design.
The distance from help.
The amount of equipment that can reasonably be carried.
The level of experience within the group.
Good equipment planning starts with the activity rather than a generic checklist.
Leader Notes
Use the equipment checklist as a starting point rather than a fixed packing rule.
Different tarp designs require different equipment, and lightweight hiking setups will naturally differ from group shelter-building sessions.
Encourage Scouts to understand what each item does.
A Scout who knows why they are carrying four pegs is developing a more useful outdoor skill than someone who simply knows that “four pegs go in the bag”.
It’s also worth teaching Scouts to inspect equipment before and after use.
Equipment responsibility should become part of the routine rather than something the leader does entirely on their behalf.
Safety
All shelter equipment should be checked before use.
Do not use tarps, ropes, poles or attachment equipment that is damaged or whose strength is uncertain.
Use equipment only for its intended purpose and follow the manufacturer’s instructions.
Take particular care with pegs, poles and other items that have sharp or pointed ends.
Carry long poles carefully and keep them under control.
Don’t attach tarps to dead, damaged or unstable trees.
Check for overhead branches before using any tree as an attachment point.
Use suitable tree-friendly attachment methods where tree attachment is appropriate.
Keep guy lines and ropes positioned to reduce trip hazards.
Do not allow Scouts to climb on shelters, poles or guy lines.
Never use a naked flame, stove, candle or fire inside a normal tarp shelter.
If weather conditions become dangerous, stop the activity and move to an appropriate safe location.
Equipment that develops significant damage during an activity should be taken out of service until it has been properly inspected.
Learning Outcomes
By learning how to select and manage tarp shelter equipment, Scouts can:
Final Thought for Scouts
Good outdoor equipment isn’t necessarily the most expensive or the most complicated.
The best kit is equipment that is suitable, reliable, looked after and understood.
A Scout should know what is in their shelter kit, why it’s there and how to use it safely.
Taking care of equipment also means knowing when something is no longer safe to use.
Look after your kit before, during and after every adventure, and it will be much more likely to look after you when you need it.
🔒Ready to test your survival skills?
Join Survival Guides UK for free, complete challenges, earn badges and increase your Survival Level.
JOIN FREE →
CRAIG BURR
FOUNDER · SURVIVAL GUIDES UK
I'm Craig, the person behind Survival Guides UK. I created SGUK because I wanted somewhere people could learn real outdoor skills in a practical, straightforward way — from lighting a fire and tying knots to navigation, campcraft and everything in between.
You can read more about the story behind SGUK here as well as our approach here.