How to Run a Scout Briefing UK
Activity Overview
Difficulty: Easy
Time: 10–20 minutes
Location: Scout hut, campsite, field or meeting point
Best for: Cubs, Scouts, Explorers, Patrol Leaders and adult volunteers
Skills: Communication, leadership, listening, planning, teamwork and situational awareness
Quick Answer
A good Scout briefing makes sure everyone knows what is happening, where they need to be, what they need to do and what to do if something goes wrong.
Keep the briefing short and relevant. Explain the plan in simple language, make sure everyone understands their role, highlight the important safety points and give Scouts an opportunity to ask questions.
For a simple activity, a briefing might only take five minutes. A hike, expedition or camp may require considerably more detail.
The key is not to give people every piece of information you know. Give them the information they need to make the activity safe and successful.
What You’ll Learn
This guide explains how to prepare and deliver a Scout briefing, how to decide what information needs to be included and how to check that everyone has actually understood it.
It also covers the difference between a useful briefing and simply talking at a group of Scouts.
🟢 SAFETY – LOW RISK
Running a briefing is low risk, but the briefing itself may be an important part of controlling the risks of the activity that follows.
For a hike, for example, Scouts should understand the route, boundaries, hazards, group arrangements and what to do if they become separated.
For an activity involving water, fire, tools, heights or other significant hazards, the briefing should clearly explain the relevant safety procedures and who is responsible for what.
Don’t assume that silence means everyone understands. Encourage questions and check understanding, particularly with younger Scouts or unfamiliar activities.
Equipment
For a basic briefing, you may only need the information you’re planning to explain.
For outdoor activities, useful equipment can include a map, route card, timetable, activity plan or visual demonstration of equipment.
A whiteboard can be useful for larger groups, while a Patrol Leader might simply use a notebook to make sure they don’t forget an important point.
Prerequisites
Before giving a briefing, the person leading it should understand the activity themselves.
Know the route, timings, equipment, meeting points, likely hazards and emergency arrangements. If you’re a Patrol Leader briefing your Patrol, you don’t need to know everything about the activity, but you should know what you are responsible for communicating.
Prepare the important information beforehand rather than trying to remember everything while standing in front of the group.
Instructions
1. Get Everyone’s Attention
Don’t start talking while people are still chatting, putting equipment away or walking around.
Bring everyone together and wait until you have their attention.
For a small Patrol, this can be as simple as asking everyone to gather around. For a larger group, use whatever attention signal your group normally uses.
The first few seconds matter. If people miss the beginning, they may miss information that makes the rest of the briefing difficult to understand.
2. Explain What Is Happening
Start with the big picture.
Tell everyone what the activity is, where it is happening and roughly how long it will take.
For example:
“We’re going on a two-hour hike this afternoon. We’ll be travelling as Patrols, stopping at three points along the route and returning here before 4pm.”
This gives everyone a framework for the information that follows.
3. Explain Who Is Responsible for What
Make sure everyone knows their role.
If you’re working in Patrols, explain who is leading each group and whether anyone has a specific responsibility such as navigation, equipment or first aid.
Don’t create unnecessary jobs just for the sake of having jobs. Give people responsibilities that actually help the activity.
4. Explain the Important Safety Points
This is the part that should never be rushed.
Focus on the hazards that are actually relevant to the activity.
If you’re walking near roads, explain the road arrangements. If you’re near water, explain the boundaries and what to do if someone falls in. If you’re using stoves, explain where they can be used and what happens if there is a problem.
Avoid giving a long list of generic warnings that everyone will forget five minutes later.
5. Explain Boundaries
Scouts need to know where they can and cannot go.
This is particularly important at campsites, activity centres, woods and large outdoor areas.
Explain physical boundaries where appropriate and make sure everyone knows whether they must remain with a Patrol, buddy or designated group.
If there is a meeting point or assembly area, make sure everyone knows exactly where it is.
6. Explain What to Do If Something Goes Wrong
Every Scout should know what to do if they become separated, get injured or encounter a problem.
Keep this simple.
For example:
“If you become separated from your Patrol, stop where you are and wait for a leader rather than continuing on.”
The correct procedure will depend on the activity, location and group’s emergency arrangements.
The important thing is that Scouts shouldn’t have to invent a response during an emergency.
7. Check Equipment
Before setting off, make sure everyone has what they need.
For a hike this could include suitable clothing, water, food, navigation equipment and any other activity-specific kit.
Don’t assume that because equipment was listed beforehand, everyone actually has it with them.
A quick check can prevent a surprisingly large number of problems later.
8. Ask Questions
Give Scouts a chance to ask questions.
Don’t simply say “Any questions?” and immediately move on.
Ask something specific if necessary:
“Which way do we go if we get separated?”
or
“Where is our meeting point?”
This can reveal whether people were actually listening.
9. Check Understanding
For an important activity, ask a few Scouts to explain the key points back to you.
You don’t need to turn this into a test.
A quick question such as:
“Who can remind me what we do if we lose sight of our Patrol?”
can confirm that the most important instruction has been understood.
10. Keep the Briefing Short
A briefing is not a lecture.
If you find yourself talking for twenty minutes about an activity that could have been explained in five, you’re probably including too much information.
Give the essential information first.
If some Scouts need more detailed instructions, deal with those separately afterwards.
11. Give the Final Instruction
Finish by making it clear what happens next.
For example:
“You’ve got ten minutes to get your waterproofs on, fill your water bottles and meet back here with your Patrol. We leave at 2pm.”
Everyone should know exactly what they need to do immediately after the briefing.
Briefing for a Hike
A hiking briefing should normally cover the route, expected duration, group arrangements, navigation responsibilities, clothing and equipment, relevant hazards and what to do if someone becomes separated or has a problem.
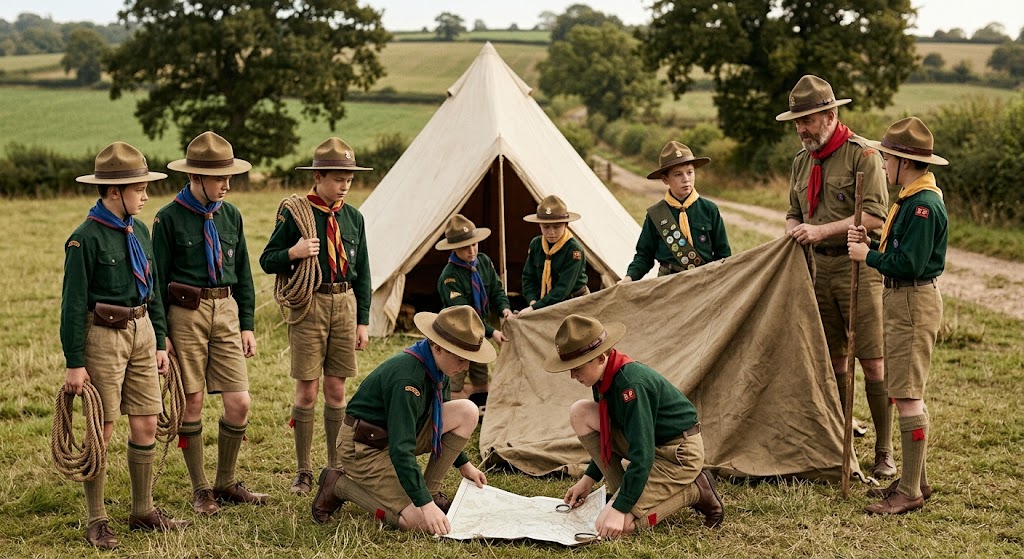
If you’re using a map, show the group the route rather than simply describing it verbally. A Scout is much more likely to remember a route after seeing it on the map.
Briefing for a Camp
A camp briefing is usually longer because there is more information to cover.
Explain the campsite boundaries, toilets and washing facilities, where equipment is kept, meal arrangements, activity areas, quiet times and what to do in an emergency.
Don’t try to explain every campsite rule in one enormous speech. Give people the essential information when they arrive and reinforce specific instructions as activities take place.
Briefing Before a Practical Activity
Before starting a practical activity, demonstrate what you expect people to do.
For example, before cooking on a camping stove, show Scouts where the stove will be used, how the working area is arranged and what the emergency procedure is.
A demonstration can often communicate something more effectively than several minutes of explanation.
Briefing Younger Scouts
Cubs and younger Scouts generally benefit from shorter briefings and simple instructions.
Give them a few important things to remember rather than a long list.
You can also use questions, demonstrations and repetition to reinforce key information.
For example:
“Where do we stop?”
“Who do we stay with?”
“What do we do if we can’t see our leader?”
This makes the briefing interactive and helps check understanding.
Briefing as a Patrol Leader
A Patrol Leader doesn’t need to copy the style of an adult leader.
Your job is to make sure your Patrol knows what it needs to know.
Speak clearly, look at the people you’re talking to and don’t be afraid to stop and explain something again if someone looks confused.
Good Patrol Leaders also recognise when a question is beyond their responsibility. If you don’t know the answer, say so and ask an adult rather than guessing.
Final Tip
A good briefing can be remembered in five words:
What? Where? Who? Risks? Next?
Explain what you’re doing, where you’re going, who is responsible, the important risks, and what everyone should do next.
Keep it clear, keep it relevant and make sure people have understood. That’s far more effective than giving a long speech that everyone has forgotten before they’ve reached the gate.
🔒Ready to test your survival skills?
Join Survival Guides UK for free, complete challenges, earn badges and increase your Survival Level.
JOIN FREE →
CRAIG BURR
FOUNDER · SURVIVAL GUIDES UK
I'm Craig, the person behind Survival Guides UK. I created SGUK because I wanted somewhere people could learn real outdoor skills in a practical, straightforward way — from lighting a fire and tying knots to navigation, campcraft and everything in between.
You can read more about the story behind SGUK here as well as our approach here.