Campfire Reflector Cooking
Activity Overview
Difficulty: Intermediate
Time: 1–2 hours
Location: Suitable campfire or outdoor cooking area
Best for: Scouts and Explorers
Skills: Camp cooking, fire management, heat control, food preparation, pioneering
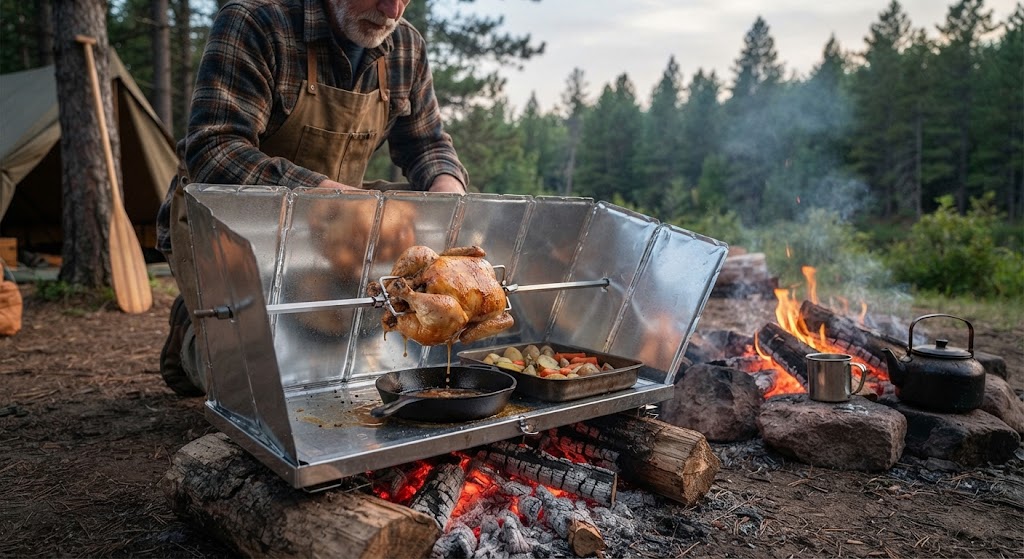
Campfire reflector cooking uses a reflective surface positioned beside a campfire to direct radiant heat towards food. It can be used for baking bread, bannock, potatoes and other foods without placing them directly into the flames.
A reflector oven works by redirecting heat from the fire towards the food, so the fire and cooking area remain separate. The reflector needs to be positioned correctly and the fire kept at a steady temperature for successful cooking.
What You’ll Learn
You’ll learn how to set up a simple reflector cooking arrangement, position the reflector safely and create a steady heat source.
You’ll also learn how to judge cooking temperature, rotate or reposition food when necessary and use indirect heat to bake rather than relying on direct flames.
Reflector cooking is a useful Scout campcraft skill because it combines fire management, cooking and practical problem-solving.
🟡 SAFETY – MODERATE RISK
Reflector cooking involves an open fire, hot metal and hot cooking equipment. Set up the cooking area on stable ground and make sure the reflector cannot fall towards the fire or people.
Use suitable heat-resistant equipment when handling the reflector or cookware, and be aware that metal surfaces can remain extremely hot after cooking has finished.
Keep Scouts clear of the immediate fire area and never leave the fire unattended. Ensure clothing, tents and other flammable materials are kept well away from the reflector and flames.
Follow good food hygiene practices and make sure food, particularly meat and other high-risk foods, is thoroughly cooked before eating.
Equipment
You’ll need a suitable campfire, a reflector made from appropriate heat-resistant material and suitable cookware or a baking tray.
You’ll also need the food and ingredients for your chosen recipe, cooking utensils and suitable heat protection for handling hot equipment.
A reflector can be purpose-made or constructed from suitable metal sheets, provided it is stable and designed to withstand the heat involved.
Prerequisites
Scouts should already understand basic campfire safety and have some experience cooking outdoors.
They should know how to work safely around an open fire and understand basic food hygiene.
Instructions
1. Choose the cooking area
Select a clear, level area where the fire can be safely contained.
Position the cooking area away from tents, equipment and normal camp traffic.
2. Prepare the fire
Build a steady cooking fire rather than a large, uncontrolled blaze.
A good bed of glowing embers with manageable flames will provide useful, consistent heat.
3. Set up the reflector
Place the reflector between the fire and the food.
It should stand securely and face the fire so that heat is reflected towards the cooking area.
Make sure it cannot easily tip, slide or be knocked over.
4. Prepare the food
Prepare your recipe before placing anything near the fire.
Bread, bannock, potatoes and similar foods work particularly well because they can cook gradually using indirect heat.
5. Position the cookware
Place the food in suitable cookware and position it in front of the reflector.
Leave enough space around the food for the heat to circulate.
6. Adjust the heat
Watch how quickly the food is cooking.
If it is cooking too quickly, move it further away or reduce the fire. If it is too slow, carefully increase the heat or move the cookware slightly closer.
Small adjustments are usually better than making major changes to the fire.
7. Rotate the food
Depending on the shape of the reflector and the food, one side may receive more heat than another.
Rotate the cookware or food during cooking to encourage more even cooking.
8. Check the food
Check the food regularly without constantly opening or disturbing it.
Bread and bannock should be cooked through rather than remaining doughy in the centre. Foods such as meat should be thoroughly cooked before serving.
9. Remove the food
Once cooked, carefully remove the cookware using appropriate heat protection.
Place the food onto a clean surface and allow it to cool before serving.
10. Clear and extinguish
Remove the cookware and allow the reflector to cool safely.
When cooking is finished, extinguish the fire properly and check that the embers are completely out before leaving the area.
Final Tip
Let the reflector do the work. You don’t need a huge fire to cook successfully. A steady fire, a correctly positioned reflector and patience will give you much more controllable heat.
🔒Ready to test your survival skills?
Join Survival Guides UK for free, complete challenges, earn badges and increase your Survival Level.
JOIN FREE →
CRAIG BURR
FOUNDER · SURVIVAL GUIDES UK
I'm Craig, the person behind Survival Guides UK. I created SGUK because I wanted somewhere people could learn real outdoor skills in a practical, straightforward way — from lighting a fire and tying knots to navigation, campcraft and everything in between.
You can read more about the story behind SGUK here as well as our approach here.