What to Include in a Safety Briefing
A good safety briefing should tell everyone what they need to know to take part safely.
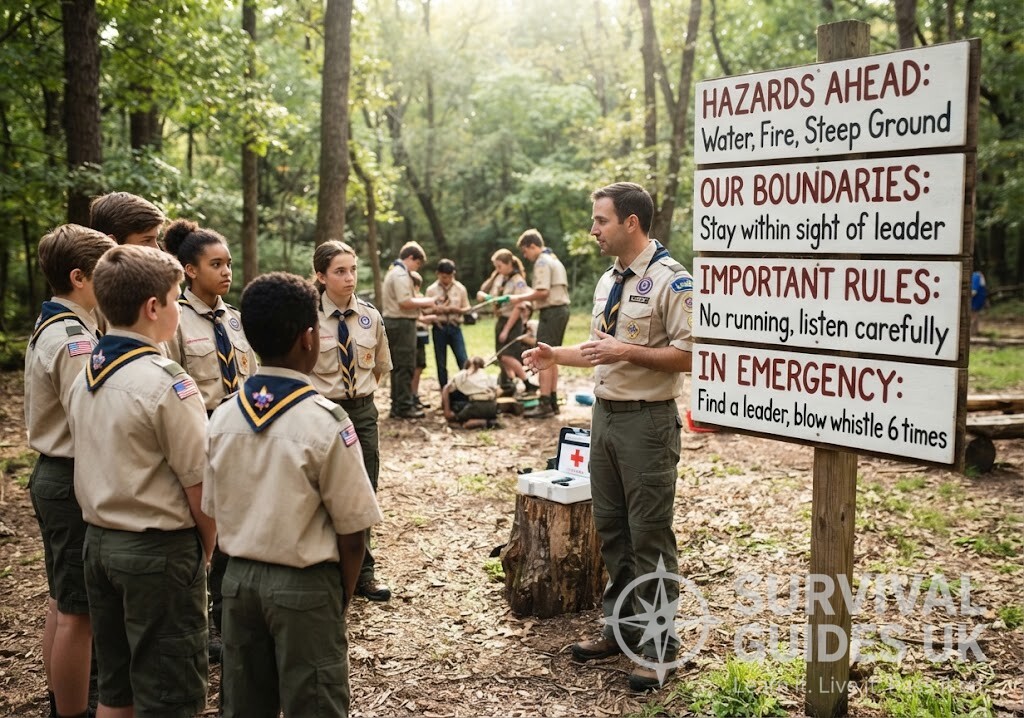
Before starting, explain the main hazards, where people can and cannot go, the important rules, what to do if something goes wrong and who they should speak to if they need help.
Keep the briefing short, clear and appropriate for the age of the group.
What You’ll Learn
In this guide, you will learn what to include in a safety briefing, including:
Equipment
No specialist equipment is required.
Depending on the activity, you may want a map, whistle, first aid kit or other safety equipment available so you can point out where it is kept and explain how it will be used.
Prerequisites
No previous experience is needed.
Before giving your briefing, the leader should be familiar with the activity, location, planned route and the main risks that have been identified.
Instructions
1. Explain what is happening
Start by briefly explaining the activity.
Tell the group where they are going, what they will be doing and roughly how long the activity will last.
This helps everyone understand what to expect.
2. Explain the main hazards
Point out the hazards that are relevant to the activity.
These might include roads, water, steep ground, fire, tools, wildlife, weather or other environmental hazards.
Avoid overwhelming the group with a long list. Concentrate on the things they genuinely need to know.
3. Set clear boundaries
Make sure everyone knows where they are allowed to go.
For example, you might identify:
If possible, physically point out important boundaries rather than simply describing them.
4. Explain the important rules
Give the group a small number of clear rules that directly relate to the activity.
For example, during an activity near water, this might include staying within the agreed area and not approaching the water’s edge without permission.
During a campfire activity, the rules would be different.
Make sure the rules are simple enough for everyone to remember.
5. Explain what to do if someone gets separated
Everyone should know what to do if they become separated from the group.
Give clear instructions about where they should go or who they should contact.
For younger groups, it can be useful to establish a simple meeting point that everyone knows.
6. Explain what to do in an emergency
Tell everyone how an emergency will be dealt with.
Depending on the activity, this could include:
Young people do not need a complicated emergency procedure. They need simple instructions they can remember.
7. Check that everyone understands
Before starting, ask if anyone has questions.
You can also ask a few quick questions to check understanding.
For example:
“Where do we meet if we need to stop the activity?”
“What should you do if you cannot find your group?”
This is often more useful than simply asking, “Does everyone understand?”
8. Give a final reminder
Just before the activity starts, repeat the most important instruction or two.
Keep it brief and positive.
A good safety briefing should make people feel prepared rather than worried.
Final Tip
A safety briefing is not a competition to see how many rules you can give people.
Focus on the few things they really need to remember, make the instructions clear and check that everyone understands them.
If the activity changes, give another short briefing rather than assuming the original instructions still apply.
🔒Ready to test your survival skills?
Join Survival Guides UK for free, complete challenges, earn badges and increase your Survival Level.
JOIN FREE →
CRAIG BURR
FOUNDER · SURVIVAL GUIDES UK
I'm Craig, the person behind Survival Guides UK. I created SGUK because I wanted somewhere people could learn real outdoor skills in a practical, straightforward way — from lighting a fire and tying knots to navigation, campcraft and everything in between.
You can read more about the story behind SGUK here as well as our approach here.