How to Run a Fire Lighting Activity for Scouts
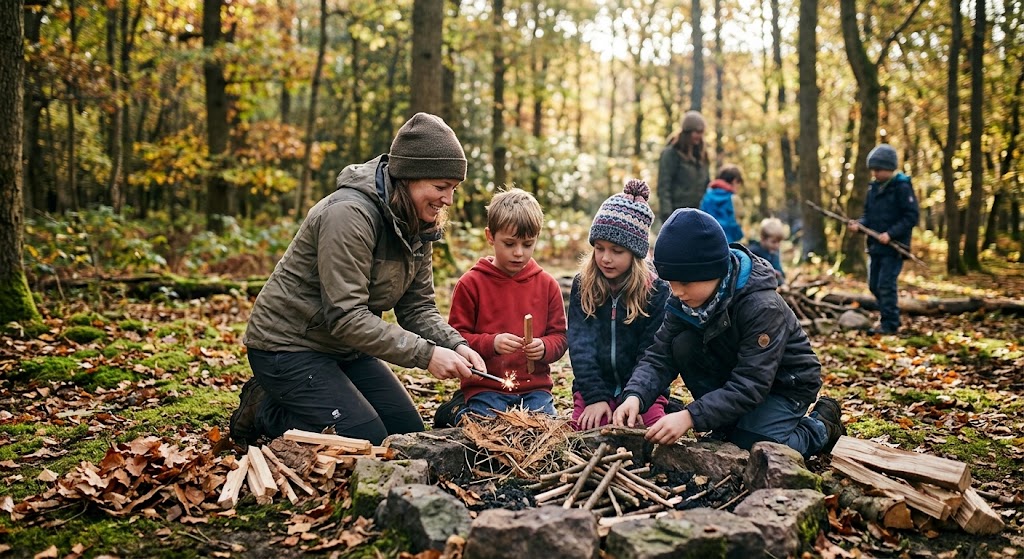
Fire lighting is a classic outdoor skill, but it should never be treated as simply a race to get a flame. A well-planned fire lighting activity can teach Scouts about preparation, responsibility, teamwork, fire safety and how to make sensible decisions outdoors.
For younger or less experienced groups, the activity can focus on recognising equipment, preparing materials and building a safe fire structure. More experienced Scouts can progress to supervised fire lighting where appropriate.
The aim is to create a controlled learning activity where safety comes before speed.
What Scouts Can Learn
A fire lighting activity can develop several useful outdoor skills, including:
It also provides an opportunity to discuss why fire can be useful outdoors while also explaining how quickly an uncontrolled fire can become dangerous.
Activity Overview
Difficulty: Intermediate
Time: 45–60 minutes
Location: Suitable outdoor area
Group size: 4-24
Skills: Fire safety, preparation, teamwork and outdoor skills
The exact setup should be adjusted to the group, location, weather conditions and the experience of the adults supervising the activity.
Equipment
Depending on how you run the session, you may need:
For a beginner session, you can remove the need for a live fire altogether and make the activity about planning and fire construction.
Start With a Safety Briefing
Before anyone handles equipment, establish the rules.
Explain where Scouts can and cannot go, where equipment will be placed and who is responsible for controlling the fire.
Make it clear that nobody should light or alter a fire unless they have been specifically told to do so by the supervising adult.
Discuss the biggest hazards, including burns, sparks, smoke, loose clothing, trip hazards and the possibility of fire spreading.
Everyone should know how the activity will be stopped and what to do if something goes wrong.
The fire area should have a clearly defined boundary, with spectators and unused equipment kept at a safe distance.
Teach the Fire Triangle
A simple way to introduce the subject is with the fire triangle.
A fire needs three things:
Heat + Fuel + Oxygen
Remove one of those elements and the fire cannot continue.
This gives Scouts a useful framework for understanding what they are doing rather than simply memorising a sequence of actions.
You can turn this into a quick team quiz before moving on to the practical part.
Activity 1: Fuel Sorting
Before lighting anything, give each team a collection of suitable materials.
Ask them to organise the materials according to their intended purpose.
For example, they might identify materials suitable for:
The important lesson is that preparation happens before the match or lighter comes out.
A poorly prepared fire is much harder to manage safely.
Activity 2: Build Without Lighting
Give each team a defined fire area and suitable materials.
Ask them to create a fire structure without lighting it.
The supervising adult can then inspect each team’s setup.
Look at questions such as:
This is an excellent activity for beginners because Scouts can practise the process without the immediate risk of a live flame.
Activity 3: The Fire Safety Inspection
Turn the inspection into a game.
Give teams a fictional campsite containing a series of deliberate mistakes.
For example, you could place equipment too close to the proposed fire area, create an unsuitable layout or provide an unsafe scenario on a card.
Teams have to identify the problems and explain what they would change.
Award points for correctly identifying hazards and, more importantly, explaining how they could be controlled.
Activity 4: Supervised Fire Lighting
If the group is experienced enough and the location, conditions and supervision make a live-fire session appropriate, move on to the practical element.
Only the supervising adult should determine whether the fire is lit and how the activity is conducted.
Give each team a clearly defined task and make sure everyone understands their role.
Avoid allowing several uncontrolled fires to be started at once. A single supervised fire can make it much easier for an adult to monitor what is happening.
Scouts should be encouraged to concentrate on preparation, observation and control, rather than simply producing the biggest flame.
Make It a Team Game
Give everyone a role.
Possible roles include:
Rotate the roles so that everyone gets involved.
Instead of awarding the most points to the fastest team, score areas such as:
Safety: 10 points
Preparation: 10 points
Teamwork: 10 points
Fire structure: 10 points
Clean-up: 10 points
This changes the focus from competition to good outdoor practice.
The Extinguishing Stage
Don’t treat extinguishing the fire as the end of the activity. Make it part of the learning.
The fire should be completely extinguished using the method planned for the activity and checked by the supervising adult.
Scouts can then inspect the area and make sure there are no remaining hot materials, embers or other hazards.
The session isn’t finished until the fire area has been made safe.
Add a Survival Scenario
Once Scouts understand the basics, introduce a fictional situation.
For example:
Your team is preparing a cooking fire at an outdoor campsite. The weather has changed, the ground is damp and you have limited fuel. What would you change about your plan?
Teams can discuss their decisions before carrying out any practical activity.
Other scenarios could involve strong wind, limited equipment, an unsuitable location or having to abandon the fire.
This teaches Scouts an important principle: sometimes the safest decision is not to light a fire at all.
Indoor Alternative
You don’t need a real fire to teach fire skills.
For an indoor session, use photographs, diagrams, equipment cards and model materials.
Teams can:
- Identify different pieces of equipment.
- Sort fuel into categories.
- Build a model fire structure.
- Identify hazards in a fictional campsite.
- Explain the fire triangle.
- Decide whether different scenarios are suitable for a fire.
- Create a safe extinguishing plan.
This can be particularly useful during poor weather or when a live fire isn’t appropriate.
Adapting the Activity
For younger Cubs or beginners, keep the session simple and concentrate on safety, equipment recognition, fuel preparation and building a model fire.
For older Scouts, introduce planning exercises, more detailed safety inspections and team-based scenarios.
You can also remove the competitive element completely and make the session a practical demonstration followed by supervised participation.
The difficulty should come from thinking and planning, not from creating a larger or hotter fire.
Fire Safety
Fire lighting requires careful planning and appropriate adult supervision.
Before running the activity, consider the location, weather, ground conditions, surrounding vegetation, equipment, group behaviour and how the fire will be extinguished.
Follow any local restrictions or site rules, and don’t proceed if conditions make a fire inappropriate.
Keep a suitable safety boundary around the fire and ensure appropriate firefighting equipment is immediately available.
Scouts should never be left responsible for an uncontrolled fire. The supervising adults remain responsible for deciding whether the activity can continue and when the fire needs to be extinguished.
If there is any doubt about whether the activity can be run safely, use the build-and-inspect version without lighting a fire.
Reflection Questions
Finish the activity with a short discussion.
Ask:
These questions help turn the activity from simply making a fire into a genuine outdoor-skills lesson.
Final Thoughts
A good fire lighting activity isn’t about producing the biggest flame or finishing first.
It’s about teaching Scouts that fire requires planning, preparation, respect and control.
By starting with equipment and safety, progressing to fuel preparation and fire construction, and only introducing a live fire when it is appropriate, you can create a useful and engaging outdoor activity.
The most important skill Scouts can learn may be knowing when not to light a fire.
🔒Ready to test your survival skills?
Join Survival Guides UK for free, complete challenges, earn badges and increase your Survival Level.
JOIN FREE →
CRAIG BURR
FOUNDER · SURVIVAL GUIDES UK
I'm Craig, the person behind Survival Guides UK. I created SGUK because I wanted somewhere people could learn real outdoor skills in a practical, straightforward way — from lighting a fire and tying knots to navigation, campcraft and everything in between.
You can read more about the story behind SGUK here as well as our approach here.