How to Light a Fire in the Rain
Lighting a fire in the rain is less about having a special firelighting trick and more about preparation. If you simply collect a pile of wet wood, strike a match and hope for the best, you’re likely to end up cold, frustrated and surrounded by smoke.
The secret is to find the driest material you can, prepare it properly and build the fire in a way that gives the first flame plenty of protection. Once you understand how to do that, rain becomes an obstacle rather than an automatic reason that a fire won’t work.
Choose a Good Fire Site
Start by finding somewhere suitable for the fire. You want a safe, stable area where a fire is permitted and where water isn’t running directly through the site.
Look for natural protection from the rain and wind, such as the sheltered side of a large fallen log or a suitable overhang, but don’t build directly underneath unstable branches or anything that could catch fire.
If you’re using a designated fire pit or campsite fire area, use it rather than creating a new fire site.
Get the Tinder Ready First
Don’t light anything until your tinder and kindling are prepared.
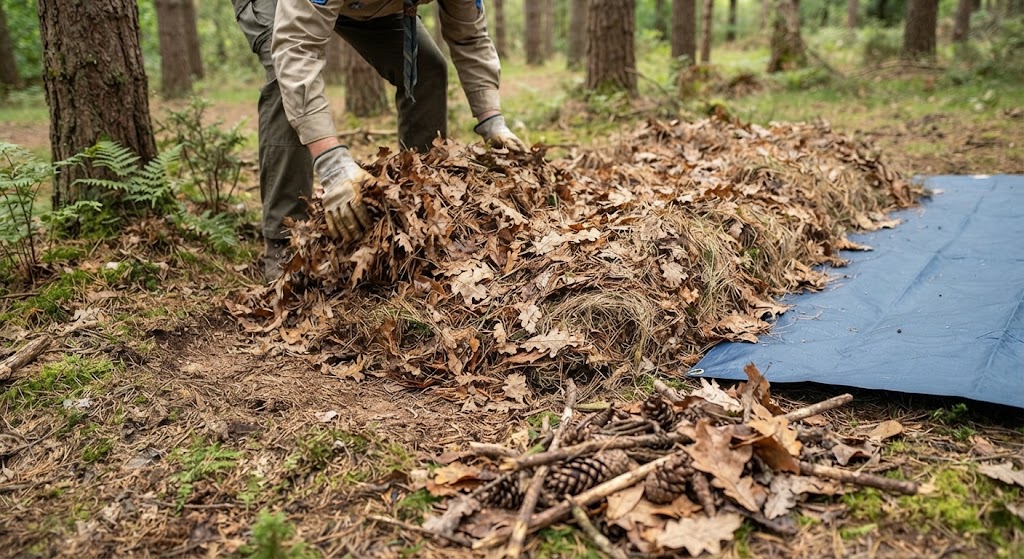
In the rain, this matters even more because once you’ve created a flame you don’t want to start searching around for the next piece of material. Have your tinder bundle, fine kindling and progressively larger pieces of wood ready before you strike the first spark.
The tinder needs to be able to catch a small flame or spark and keep burning long enough to ignite the next stage.
Look for Dry Material
Rain doesn’t necessarily make every piece of wood completely wet.
Look underneath fallen branches, inside sheltered areas and beneath the bark of suitable dead wood. The outside of a branch may be soaked while the material underneath remains considerably drier.
Dead standing wood can sometimes provide useful dry material, but only take material that you can safely collect. Never climb or cut dangerous branches simply to find dry wood.
Split Wood to Find the Dry Inside
One of the most useful wet-weather firelighting skills is learning to expose the dry interior of wood.
A branch that is wet on the outside can contain much drier material inside. If you have the appropriate equipment and know how to use it safely, split suitable dead wood and use the inside pieces for your kindling.
Feather sticks are particularly useful because thin shavings can catch and burn more easily than a solid wet stick.
Make Fine Kindling
The first pieces of wood that catch the flame need to be small.
Think of the fire as a progression. Your tinder catches first, then very fine kindling, then slightly larger sticks and eventually the main fuel. If you try to jump straight from tinder to thick logs, the flame will often disappear.
Prepare plenty of small material before you start. In wet conditions, you’ll probably need more kindling than you would on a dry day.
Protect the First Flame
Rain can extinguish a tiny flame before it has a chance to develop.
Use a natural windbreak or a suitable shelter to protect the fire from direct rain, while still allowing plenty of air to reach it. You can also use a tarp positioned safely above the fire area if it is designed and positioned appropriately.
Never put a normal tarp or tent directly over a fire. Sparks and heat can damage or ignite many synthetic materials.
Build a Small Fire First
It can be tempting to build a large fire immediately because you know you’ll eventually need plenty of heat.
Start small instead.
A small, concentrated fire is easier to protect and easier to keep hot enough to dry the next pieces of wood. Once you have a reliable flame and a bed of hot embers, you can gradually increase the size.
Use the Heat to Dry Your Fuel
Once the fire is established, you can use its heat to help dry additional wood.
Place damp pieces around the outside of the fire rather than directly on top of the flames. As they warm and dry, they can be moved closer and eventually added to the fire.
Don’t pile wet wood directly onto a small flame. It can produce a lot of smoke and smother the fire before it has developed enough heat.
Keep Feeding It Gradually
A wet-weather fire needs attention.
Add fuel gradually and keep the fire hot enough to dry and ignite the next pieces. Avoid adding more wood simply because there is space on the fire; each piece should have a purpose.
As the fire grows, you should be able to move towards larger pieces of fuel that are less affected by surface moisture.
Don’t Give Up on a Smoking Fire Too Quickly
A fire in wet conditions may smoke considerably more than a fire built in dry weather.
Smoke doesn’t necessarily mean that the fire is failing. Damp wood can produce smoke while it dries, but you still need enough heat and airflow for proper combustion.
If the fire is producing smoke but very little flame, look at what is happening underneath. You may need more dry tinder, smaller fuel or better airflow rather than simply adding another large log.
Use a Firesteel or Matches Carefully
Your ignition method is only one part of the process.
A firesteel is particularly useful in wet weather because the rod itself can still produce hot sparks when exposed to rain, but your tinder needs to be protected and prepared properly.
Waterproof matches or a lighter can also work well. Whatever method you use, keep your ignition equipment dry and accessible rather than buried at the bottom of a wet rucksack.
Safety When Lighting a Fire in the Rain
Only light a fire where fires are permitted and follow any campsite, landowner or local restrictions.
Rain doesn’t remove the risk of fire. Dry vegetation, tents, tarps and clothing can still catch, and smoke can be hazardous in enclosed areas. Never light a fire inside a tent or other enclosed shelter.
Keep the fire under control, don’t leave it unattended and make sure it is completely extinguished before leaving. Pour water onto the fire, stir the ashes and continue adding water until everything is cold rather than simply assuming that the rain has put it out.
Practise in Wet Conditions
If you only practise firelighting on a warm, dry day, you’ll learn very little about lighting a fire in the rain.
When conditions are safe and fires are permitted, practise finding dry material, splitting suitable wood, making feather sticks and protecting a small flame from the weather. You’ll quickly learn which materials work best in your local area.
The aim isn’t to become someone who can magically light a fire from soaking-wet wood. It’s to become someone who knows how to find the driest available material and build a fire that can gradually deal with the conditions.
Preparation Makes the Difference
A rain-soaked campsite can make firelighting look almost impossible, but the basic principles remain the same. Start with good tinder, use the driest material you can find, expose the dry interior of suitable wood and keep the first flame protected.
Most importantly, don’t rush the process. A few minutes spent preparing your tinder and kindling can make the difference between a fire that catches and one that disappears in a cloud of smoke.
🔒Ready to test your survival skills?
Join Survival Guides UK for free, complete challenges, earn badges and increase your Survival Level.
JOIN FREE →
CRAIG BURR
FOUNDER · SURVIVAL GUIDES UK
I'm Craig, the person behind Survival Guides UK. I created SGUK because I wanted somewhere people could learn real outdoor skills in a practical, straightforward way — from lighting a fire and tying knots to navigation, campcraft and everything in between.
You can read more about the story behind SGUK here as well as our approach here.