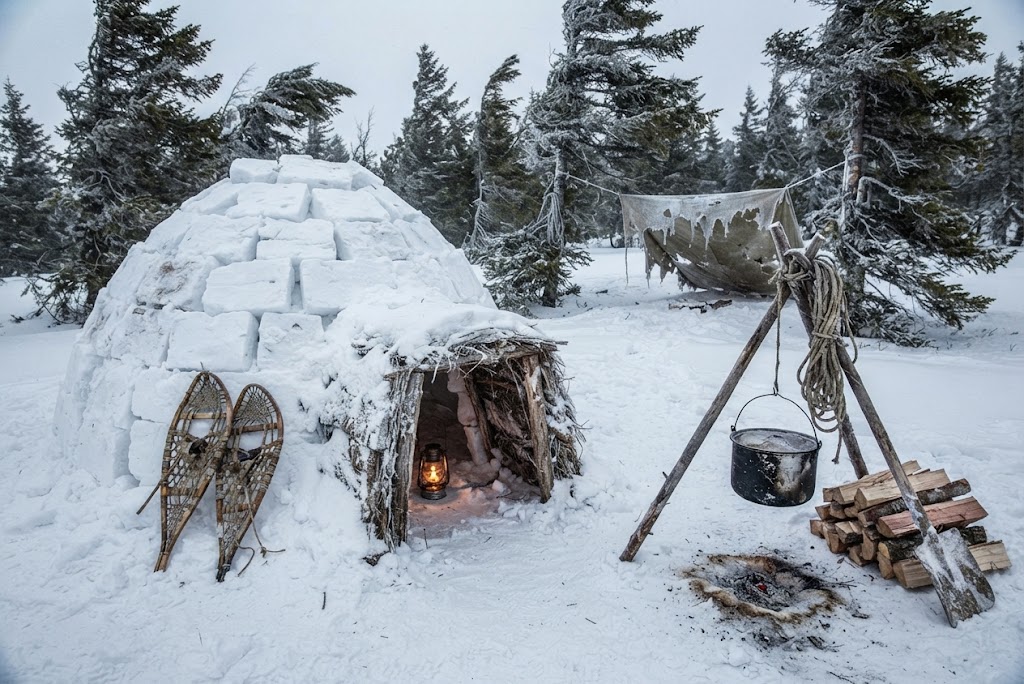
How to Build a Snow Shelter
Snow can look like one of the least useful materials for building a shelter, but when it is deep enough and properly packed, it can provide surprisingly good insulation. A well-built snow shelter can block wind and trap warmth far more effectively than you might expect for something so cold.
There are several types of snow shelter, from a simple snow trench to a more enclosed shelter built into a large bank of snow. The basic principle is the same: create a small enclosed space, insulate yourself from the cold ground and keep the wind outside.
Building one is physically demanding, though, and snow conditions matter enormously. Loose, shallow or unstable snow may not be suitable for a snow shelter at all.
Choose a Safe Location
Before you start digging or piling snow up, look carefully at the surrounding area.
You need to avoid any slopes where there is a risk of avalanche or falling snow, and stay away from cornices, steep banks and areas where snow could collapse onto the shelter. You also need to avoid places where melting snow or surface water could collect.
A relatively flat area with deep, stable snow is usually much easier to work with. If you’re practising the skill rather than dealing with an emergency, choose a safe location and check the conditions before you begin.
Check the Snow
Not all snow behaves in the same way and not all snow is good for making a snow shelter.
Fresh, loose powder can be difficult to build with because it doesn’t hold its shape particularly well. More compacted snow can be easier to cut, stack or shape, depending on its condition.
If you cannot make a stable structure from the available snow, don’t keep digging simply because you have started. A shelter that collapses is more dangerous than having no shelter at all and you will be surprised at how heavy snow can actually be if it were to fall on top of you.
Keep the Shelter Small
A snow shelter should be only as large as you need it to be.
A smaller internal space is easier to warm with body heat, while a large shelter takes considerably more effort and loses heat more quickly. You need enough room to sit or lie down comfortably without creating unnecessary empty space.
Think of it as creating a protected sleeping space rather than building a snow room.
Build a Snow Trench Shelter
One relatively simple design is a snow trench shelter.
Dig a trench into sufficiently deep, stable snow, making it long enough for you to lie down. The sides should be strong enough to support the roof, and you need enough snow above the trench to create an insulating layer.
Once the trench is deep enough, cover it with poles, branches, skis or another suitable framework if available. Add a thick layer of snow over the top, leaving a small ventilation opening.
The covering needs to be strong enough that it will not collapse onto you.
Build a Quinzhee
Another option is a quinzhee, which is made by piling snow into a mound and allowing it to settle before hollowing out the inside.
Build a compact mound of snow large enough to contain the shelter. Place sticks of a known length into the mound at intervals. These can act as depth markers when you begin hollowing out the interior.
Allow the snow to settle and harden before digging into it. The exact time required depends on the snow and weather conditions, so don’t assume that a freshly built mound is ready simply because it looks firm.
Once the structure has hardened, carefully hollow out the inside while leaving a substantial layer of snow forming the roof and walls.
Leave a Thick Roof
The roof is one of the most important parts of a snow shelter.
You need enough compacted snow above you to provide insulation and strength, but not so much that the structure becomes unstable.
If you’re hollowing out a shelter, work carefully and use your depth markers rather than guessing how thick the roof is. Never deliberately make the roof as thin as possible just to create more internal space.
Make a Small Entrance
A small entrance helps reduce heat loss and provides some protection from wind.
Depending on the design, the entrance can be positioned lower than the sleeping area. Cold air can settle in the lower part of the shelter while warmer air remains higher up.
Don’t make the entrance so small that you cannot get in and out quickly. You should always be able to leave the shelter easily.
Create Ventilation
Ventilation is essential in an enclosed snow shelter.
Your breathing produces carbon dioxide and moisture, and an enclosed shelter can become dangerous if there isn’t enough fresh air inside. Make sure there is a ventilation opening to the outside and check it regularly because drifting or falling snow can block it.
Never assume that because snow is porous you automatically have enough ventilation.
If you are using any stove, candle or other combustion source inside a snow shelter, the need for adequate ventilation becomes even more important because combustion can consume oxygen and produce dangerous gases.
Insulate Yourself From the Ground
The snow underneath you can still be extremely cold, even inside a well-built shelter.
Create a thick insulating layer between yourself and the snow. A sleeping mat is ideal if you have one, but suitable dry insulating materials can also provide some separation from the ground.
Your sleeping system should be designed for the conditions. A snow shelter can reduce wind and help retain heat, but it does not magically make an inadequate sleeping bag warm enough.
Keep the Shelter Dry
Warm air inside the shelter can cause snow to melt slightly and then refreeze.
Try to avoid touching the walls and roof unnecessarily, as this can damage the surface and increase dripping. Keep wet clothing organised so that it doesn’t soak your sleeping system.
Ventilation also helps reduce the amount of condensation that builds up inside.
Don’t Build Near Running Water
A snow-covered stream or frozen river can look like a convenient flat place to build, but it can be extremely dangerous.
Water may be flowing underneath apparently solid ice, and conditions can change rapidly. Similarly, avoid depressions where melting snow could drain towards your shelter.
Choose stable ground away from watercourses and think about what the area will look like if temperatures rise.
Be Careful With Fire and Stoves
An enclosed snow shelter is not a safe place for careless use of fire.
Never light an open fire inside a snow shelter. Apart from the obvious fire risk, heating the structure can cause melting and weakening.
If you are using a stove designed for use in a winter shelter, follow the manufacturer’s instructions carefully and make sure there is adequate ventilation and a safe way for combustion gases to escape.
Safety When Building a Snow Shelter
Building a snow shelter can be exhausting, particularly in deep snow and freezing temperatures. Take breaks before you become exhausted or soaked with sweat, and protect yourself from getting wet while digging.
Always consider avalanche conditions before working on or below a snowy slope. Never build underneath unstable snow formations, and don’t enter a shelter if you suspect the roof or walls are collapsing.
If you’re practising this skill with children, keep it as a supervised activity and choose conditions where there is no risk of them becoming dangerously cold.
Know When Not to Build One
A snow shelter isn’t automatically the best choice just because there is snow on the ground.
If the snow is too shallow, unstable or unsuitable for building, use another form of shelter. In an emergency, getting out of the wind with an appropriate emergency shelter may be safer and much quicker.
The ability to recognise when a technique won’t work is just as important as knowing how to perform it.
Practise in Safe Conditions
If you want to learn snow shelters, practise when you have plenty of time, suitable clothing and a safe route back to warmth.
Start with a simple structure rather than attempting a complicated snow cave. Learn how different types of snow behave and pay attention to how much material and effort a shelter actually requires.
Never treat a practice session as an opportunity to deliberately put yourself into a survival situation.
Snow Is an Insulator, Not a Magic Solution
A properly constructed snow shelter can provide excellent protection from wind and cold, but its effectiveness depends on the snow, the construction and the person using it.
Keep the space small, build a strong structure, insulate yourself from the ground and maintain ventilation. Most importantly, keep checking the shelter and the weather around you.
In winter, staying warm isn’t about finding one piece of equipment or one clever trick. It is about reducing heat loss wherever you can while avoiding the hazards that come with cold, snow and exhaustion.
🔒Ready to test your survival skills?
Join Survival Guides UK for free, complete challenges, earn badges and increase your Survival Level.
JOIN FREE →
CRAIG BURR
FOUNDER · SURVIVAL GUIDES UK
I'm Craig, the person behind Survival Guides UK. I created SGUK because I wanted somewhere people could learn real outdoor skills in a practical, straightforward way — from lighting a fire and tying knots to navigation, campcraft and everything in between.
You can read more about the story behind SGUK here as well as our approach here.