How to Baton Wood Safely
Batoning is one of those bushcraft skills that looks fairly simple when you first see it. You put a knife into a piece of wood and use another piece of wood to tap the knife through it. In practice, there is a little more to it than that. The choice of wood, the knife you use and the way you position yourself all make a difference.
Done properly, batoning is a useful way of splitting small pieces of firewood and getting at the dry wood inside a damp-looking log. It can also save you from carrying a large axe when all you really need is a few smaller pieces for a fire. The important word, though, is properly. A knife is being subjected to quite a lot of force, so this is a skill where taking your time matters.
What Is Batoning?
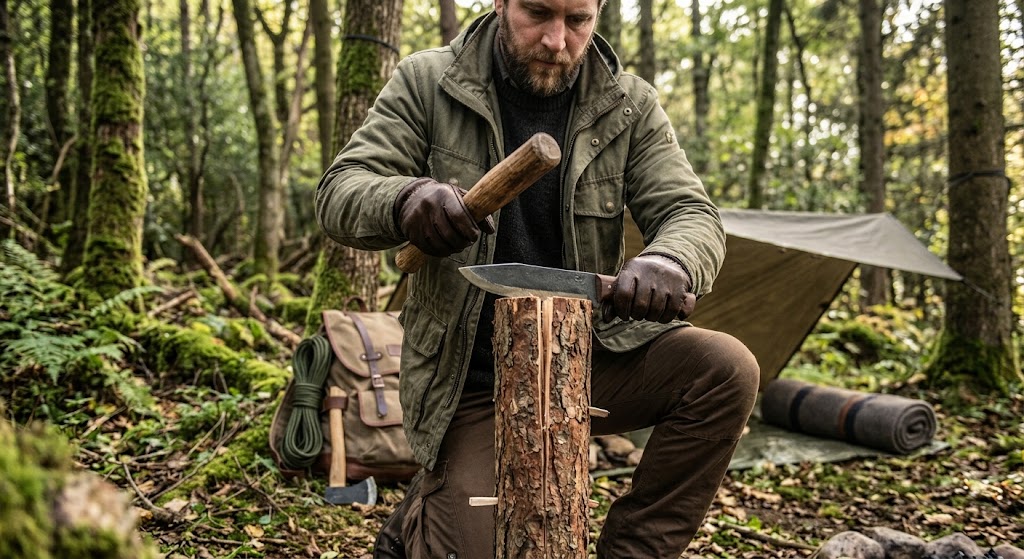
Batoning is the technique of splitting wood with a knife by striking the back of the knife with a wooden baton.
Rather than swinging the knife at the wood, you place the blade where you want the split to start and gradually drive it through the piece. The baton gives you the force needed to push the blade into the wood while allowing you to keep much more control over the process.
It is particularly useful for splitting small logs into smaller pieces of firewood or kindling. You can also use it to expose the dry inner wood of a branch when the outside has become damp.
Batoning isn’t a substitute for an axe when you’re processing large amounts of firewood. It is a useful technique for smaller jobs around camp though.
Start With the Wood
The easiest way to make batoning unnecessarily difficult is to choose a poor piece of wood.
For learning, look for a fairly straight piece of wood without large knots, splits or obvious signs of decay. A straight-grained piece is much more predictable than something twisted and full of knots. You don’t need a huge log either. Something small enough to handle comfortably is a much better place to start.
Have a look at the ends of the wood before you begin. You can often see the direction of the grain, and this gives you an idea of where the wood is likely to split. If there is already a natural crack, you may be able to use it rather than starting a completely new split.
If the wood is covered in mud or grit, clean it first. Dirt and grit can quickly damage a knife edge.
Use a Knife That Is Suitable for Batoning
Not every knife is designed to be hit with a piece of wood.
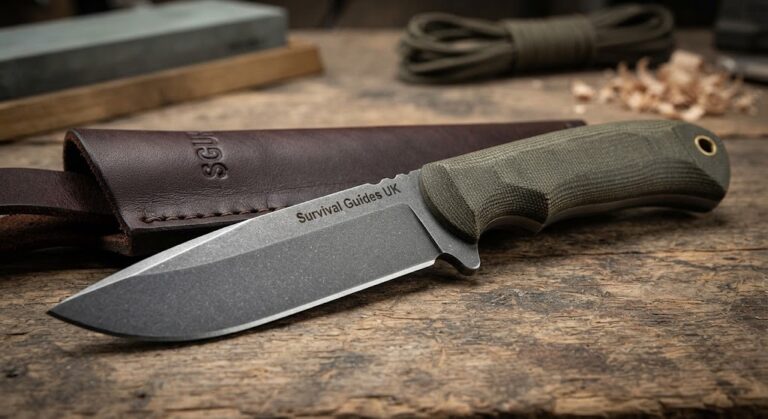
A sturdy fixed-blade bushcraft knife is the usual choice. It should be strong enough for the work and have a handle that gives you a secure grip. A full-tang construction is generally preferable for this sort of heavy use.
A folding knife is not something to use for batoning unless the manufacturer specifically says that it is suitable. The forces involved can damage the locking mechanism or the knife itself.
The knife should also be reasonably sharp. This might sound surprising when you’re going to hit it with a baton, but a sharp blade will enter the wood more readily. A blunt knife can encourage you to use more force than necessary.
Set Yourself Up Before You Start
Find a stable place to work. A solid log or chopping block makes a much better working surface than trying to hold the wood against your boot or between your legs.
This is one of the most important parts of the technique. If the wood moves around every time you strike the knife, you’re going to compensate by hitting harder, and that is exactly what you don’t want.
Think about where the knife could go if something slipped. Your hands, legs and feet should not be in that path. Give yourself enough room that you can work without another person standing immediately beside you.
It is worth taking thirty seconds to get this right before you start. Most of the safety of the technique comes from what you do before the first strike.
How to Baton Wood Safely
Stand or kneel in a comfortable, stable position and place the wood securely on your working surface.
Put the knife across the end of the wood, with the cutting edge where you want the split to begin. Ideally, start reasonably close to the outside edge rather than trying to drive the knife through the very centre of a large piece.
Hold the knife securely and use a separate wooden baton to strike the spine of the knife. The baton should be a sturdy piece of wood with enough length for you to hold it comfortably.
Start with smaller controlled taps. You are trying to persuade the blade into the wood rather than smashing it through in one hit.
As the blade begins to enter, keep an eye on the split. The wood may start opening naturally as the blade moves downwards. Continue tapping the spine, keeping the knife aligned with the split.
If the wood begins to split unevenly, slow down and reassess. Sometimes changing the position of the blade is enough. Don’t simply start hitting harder.
Once the blade has travelled a reasonable distance into the wood, you may be able to continue the split by working the blade further along the piece. With smaller pieces, the split may run all the way through quite quickly.
Let the Wood Do Some of the Work
One of the biggest lessons with batoning is that more force isn’t always the answer.
Wood has a grain and tends to split along it. If you’ve chosen a suitable piece and positioned the knife sensibly, the split will often start doing much of the work for you.
You should be able to hear and feel a difference as the wood begins to open. The knife may also start moving more easily. Pay attention to these changes rather than simply maintaining the same force throughout.
If you find yourself having to swing the baton as hard as possible, stop and work out why. The wood may be unsuitable, the knife may be poorly positioned or the piece may contain a knot.
Splitting the Wood Further
Once you’ve made your first split, you can decide what size you actually need.
For a fire, there is usually no benefit in turning everything into tiny pieces. A mixture of sizes is much more useful. Larger pieces can be kept for fuel while smaller splits can be used as kindling.
If you’re preparing wood for a fire in wet conditions, splitting it can be particularly useful because the inside of the wood may be considerably drier than the outside.
You can also split smaller pieces from the larger sections as needed rather than preparing an entire pile of kindling before you start the fire.
What If the Knife Gets Stuck?
Don’t panic and don’t start hitting harder just because the knife has stopped moving.
A knife can become stuck in a particularly tough section of wood or when it encounters a knot. If that happens, stop and look at what is happening before doing anything else.
You may be able to free the knife by carefully changing the position of the wood or by working the blade back out. If the situation becomes awkward, there is nothing wrong with abandoning that piece and choosing another one.
A piece of firewood isn’t worth risking an injury or damaging an expensive knife.
When Batoning Isn’t Appropriate
There are times when you simply shouldn’t baton a piece of wood.
Very large logs, heavily knotted pieces and badly twisted wood can make the technique unpredictable. If you don’t have a suitable knife or a stable place to work, use another method of preparing the wood.
Don’t baton rotten wood simply because it is easy to split. Pieces can break apart unexpectedly and send the knife or fragments in directions you weren’t expecting.
And never use a knife that is clearly not designed for this sort of work. A cheap or unsuitable knife can fail under the repeated impact.
A Few Simple Safety Rules
The basic rules are straightforward:
- Use a sturdy fixed-blade knife designed for outdoor use.
- Use a separate wooden baton.
- Keep your hands and legs away from the path of the blade.
- Work on a stable surface.
- Start with small, straight-grained pieces of wood.
- Use controlled strikes rather than excessive force.
- Never hold the wood in your hand while striking the knife.
- Stop if the knife, wood or baton starts behaving unpredictably.
- Keep other people well clear of the working area.
- Never use a damaged knife.
Children should only learn batoning under close adult supervision, using equipment and pieces of wood that are appropriate for their age and experience.
A Useful Skill Around Camp
Batoning is worth learning because it gives you another option when preparing firewood. You don’t need to carry an axe for every small job, and splitting a piece of wood can reveal a useful dry surface when you’re trying to get a fire going.
The trick is not to treat the knife like an axe. Good batoning is controlled and deliberate. Choose the wood carefully, give yourself a stable working position and let the grain of the wood help you.
Once you’ve got the technique, you’ll probably find that you use far less force than you expected. That’s a good sign. If the job requires you to hit the knife as hard as you possibly can, it’s usually time to stop and reconsider what you’re doing.
🔒Ready to test your survival skills?
Join Survival Guides UK for free, complete challenges, earn badges and increase your Survival Level.
JOIN FREE →
CRAIG BURR
FOUNDER · SURVIVAL GUIDES UK
I'm Craig, the person behind Survival Guides UK. I created SGUK because I wanted somewhere people could learn real outdoor skills in a practical, straightforward way — from lighting a fire and tying knots to navigation, campcraft and everything in between.
You can read more about the story behind SGUK here as well as our approach here.