SGUK Outdoor Skills Challenge 36: Learn How to Read the Surface of Water
Water can look calm from the bank and still be moving with surprising force beneath the surface. A smooth patch might indicate deeper water, a line of bubbles may reveal the direction of a current, and a patch of swirling water can show where the flow of the water meets an obstacle. Learning to notice these details is a useful outdoor skill, whether you’re walking beside a river, exploring a stream, fishing from the bank or planning a route through unfamiliar countryside.
For this challenge, you are going to learn how to read the surface of water. You’ll spend time observing water rather than entering it. The aim is to work out what the surface is telling you, make a few predictions about how the water is moving and check how accurate your observations are.
Your Challenge
Find a safe place beside a river, stream, canal or other body of moving water. Spend at least 15 minutes studying the surface and identify several signs of water movement.
Look for currents, ripples, eddies, areas of turbulence and places where the surface changes around rocks, bends or other obstacles. Choose a few features and explain what you think is happening beneath or around them.
You don’t need to know every answer straight away. The important part is learning to observe carefully, make sensible predictions and recognise when the surface doesn’t tell you enough to be certain.
Your goal: identify at least five surface features, explain what each might indicate and record your observations in a notebook or on your phone.
What You’ll Need
- A safe viewing spot beside the water, well back from the edge.
- A notebook and pencil, or a phone for notes.
- Binoculars, if you have them and want to examine features further away.
- A watch or timer to help you complete your observation period.
You won’t need to touch the water, throw anything into it or get close to the bank to complete this challenge. Choose a spot with firm, stable ground and a clear view. Avoid slippery rocks, undercut banks, steep edges and places where rising water could trap you.
Take the Challenge
1. Start by looking at the whole stretch
Before concentrating on individual ripples, stand back and look at the water as a whole. Notice which direction it appears to be travelling and whether the surface moves at a similar speed across the entire stretch.
Water rarely flows evenly. The middle of a channel may move differently from the edges, while bends, narrow sections and obstacles can change the direction and speed of the flow. Even a small stream can contain several different patterns within a short distance.
Watch floating leaves or naturally occurring foam from your safe viewing position. Their movement can help you estimate the direction of the surface current. Avoid assuming that everything you see is travelling at the same speed, and never lean over the bank to follow an object downstream.
Write down your first impression of the water. Does it appear slow, fast, smooth, broken or turbulent? You’ll return to that impression at the end.
2. Look for smooth patches
A section of water with a relatively smooth surface can be worth investigating with your eyes. It may indicate deeper water, a change in the riverbed or a sheltered area where the wind has less effect on the surface.
However, smooth water isn’t automatically deep, slow or safe. A fast current can sometimes have a deceptively smooth surface, particularly where the flow is relatively uniform. Water depth and speed cannot be judged reliably from appearance alone.
Look at the smooth patch in relation to the surrounding water. Is it in the middle of the channel, beside the bank or just downstream of an obstacle? Does it remain smooth, or does it change as the water moves?
Record what you notice and what you think might explain it. Use words such as possibly or may indicate rather than treating your first guess as a fact.
3. Study ripples and standing waves
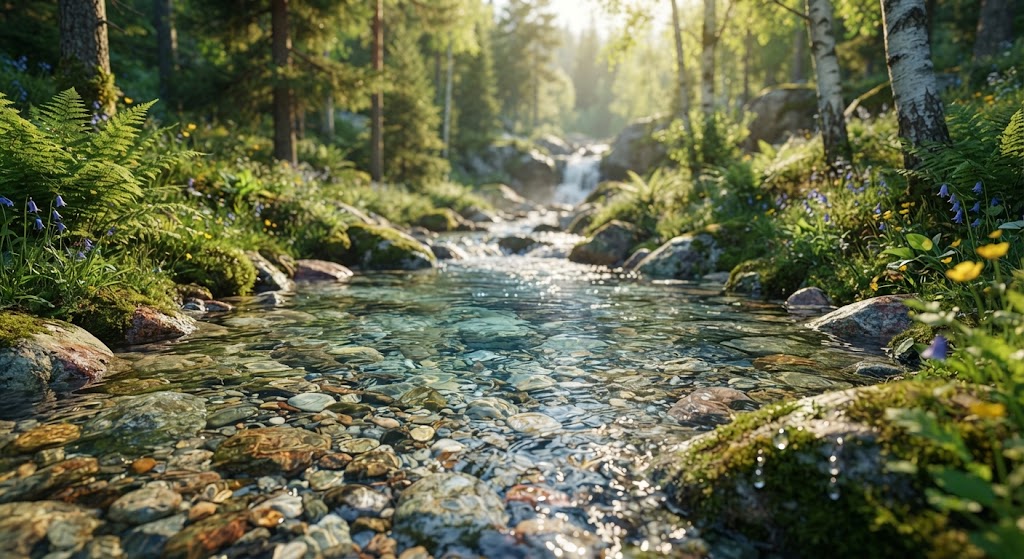
Ripples form when the water surface is disturbed by wind, changes in the riverbed or the movement of water around obstacles. In a shallow, stony stream, you may see small waves where water passes over uneven ground.
Look for places where the ripples become larger, closer together or more irregular. These changes can indicate that the water is interacting with something beneath the surface or that the flow is changing.
In faster water, a wave may appear to stay in roughly the same place even though water continues moving through it. This is known as a standing wave. It can form where flowing water passes over an obstruction or a change in the riverbed.
Don’t assume that a visible rock explains every wave. Some obstacles are submerged, and the shape of the channel can influence the pattern too. Your task is to identify the change and suggest a possible cause.
4. Find an eddy or swirling patch
An eddy is an area where water circulates rather than continuing in the main direction of flow. Eddies often form downstream of rocks, around structures or along the edges of a channel where the main current meets slower-moving water.
You might notice leaves or foam turning in a small circle, drifting upstream for a short distance or repeatedly following the same path. That movement can help you identify an eddy.
Watch how it relates to the main current. Is the swirling water just behind an obstacle? Does it appear beside the bank? Is there a clear boundary between the circulating water and the main flow?
An eddy isn’t necessarily a safe place to enter the water. Some are associated with powerful currents, obstructions or complicated flow patterns. From the bank, you can learn a great deal simply by watching how the water behaves.
5. Follow lines of foam, bubbles and floating material
Naturally occurring foam, bubbles and leaves can reveal patterns that aren’t obvious from the surface alone. They may collect along a line where currents meet, travel in a narrow stream or gather in a rotating patch.
Choose one visible piece of foam or a leaf and follow its movement with your eyes, without moving towards the water’s edge. Notice whether it travels steadily downstream, changes direction or briefly circles back.
If several pieces of floating material follow a similar route, that gives you a useful clue about the surface current. A line of foam may mark a boundary between different flows, although wind and the shape of the channel can also affect where it gathers.
Don’t throw sticks, stones or other objects into the water to test your theory. Use what is already there, and remember that surface movement doesn’t reveal every current beneath it.
6. Watch what happens around obstacles
Rocks, bridge supports, fallen branches and other obstacles can change the way water flows. From a safe viewing position, look for differences on the upstream and downstream sides.
Water may pile up or form a small wave on the upstream side of an obstacle. Behind it, you might see swirling water, disturbed foam or a relatively smooth patch. The pattern depends on the shape of the obstacle, the depth and speed of the water, and the surrounding channel.
Look for submerged hazards too. A patch of disturbed water or an unexpected ripple can suggest that something lies beneath the surface, but there may be no obvious sign at all.
Never treat a visible gap between rocks or branches as a safe passage through the water. Flow can accelerate through narrow openings, and branches or other debris can trap someone who enters. Your challenge is to recognise possible hazards, not to test them physically.
7. Compare the centre with the edges
Where the bank is safe and gives you a clear view, compare the water near the middle of the channel with the water along the edges.
The centre may carry the faster flow, while water beside the bank can appear slower. But this isn’t a rule you can rely on everywhere. Bends, narrow channels, submerged obstacles and changes in depth can produce more complicated patterns.
Notice whether floating material moves faster in one area than another. Look for small areas of circulation beside the bank, or a line where the flow appears to change direction.
If you’re watching a river bend, observe the whole curve rather than just the nearest section. Flow can behave differently on the inside and outside of a bend, and the bank itself may be undercut or unstable even when the surface looks unremarkable.
8. Watch the water for a second time
After you’ve identified your first five features, spend another few minutes watching the same stretch. Has anything changed? Is the surface pattern consistent, or does it alter as more water passes through?
Compare your observations with your original impression. Perhaps the water looked slow at first, but the movement of floating leaves suggests a stronger current than you expected. Maybe a smooth patch seemed unimportant until you noticed how it formed beside a line of turbulence.
Record what you have learned. The point isn’t to label every feature perfectly. It’s to become more observant and less likely to mistake a calm-looking surface for proof that the water is safe.
A note on water safety
Never enter moving water to check a theory or get a closer look. Water can be cold, deep or powerful enough to knock you off your feet, and the current may be stronger than it appears. Keep away from slippery edges, floodwater, weirs, sluices and other structures where water conditions can be particularly dangerous.
If you’re assessing a crossing for a walk, don’t rely on surface appearance alone to decide whether it is safe. Look for an established, appropriate crossing and use local guidance. If you’re uncertain, choose another route.
For further advice, read the RNLI’s water safety guidance.
Check Your Results
Review the five or more features you recorded. For each one, you should have a description of what you saw and a reasonable explanation of what might be causing it.
Use these questions to check your observations:
- Current: Could you identify the main direction of surface movement?
- Smooth water: Did you avoid assuming that a smooth patch must be deep or slow?
- Ripples: Could you identify where the surface changed and suggest a possible reason?
- Eddies: Did you spot any circulating movement or changes in the direction of floating material?
- Obstacles: Could you see how rocks, structures or changes in the channel affected the water?
- Uncertainty: Did you recognise features you couldn’t confidently explain?
You may not see every feature listed in this challenge at your chosen location. That’s fine. A small stream may show different patterns from a broad river, and a canal may have very little visible current. Record what is actually there rather than trying to force every observation to fit an example.
A good result is not a list of confident guesses. It’s a set of observations that distinguish what you saw from what you think it means.
Complete the Challenge
To complete Challenge 36, you must:
- Spend at least 15 minutes observing water from a safe position.
- Identify at least five surface features or changes in movement.
- Record what you observed and what each feature might indicate.
- Identify at least one possible hazard or explain why the surface alone cannot prove that water is safe.
- Take a photograph of your observation spot or your written notes as evidence.
Your photograph doesn’t need to show every feature. A picture of the location alongside your notes is enough to demonstrate that you’ve carried out the exercise. Don’t put yourself at risk to take a better photograph.
How to Submit Your Challenge
Share your evidence
- Go to your SGUK member profile.
- Open Social Activity.
- Upload a photograph of your observation notes or the location where you completed the challenge.
- Add the hashtag #SGUKChallenge36 to your post.
- Share it for verification.
You can include a short description of the surface features you identified and one thing that surprised you. That makes your submission more useful to other members who are learning the same skill.
Once you’ve shared your evidence and it has been verified, the SGUK Outdoor Skills Challenge 36 is complete and the completed challenges figure will be updated on your profile.
Challenge 36 Checklist
Use this checklist before submitting your evidence.
- I chose a safe place to observe the water.
- I spent at least 15 minutes watching the surface.
- I identified at least five surface features or changes in movement.
- I recorded what I saw and what I think it might mean.
- I considered at least one potential hazard.
- I took a photograph of my notes or observation spot.
- I uploaded my evidence to Social Activity with #SGUKChallenge36.
Want to Push Yourself?
Return to the same location on another day and compare what you see. Has recent rain changed the flow? Is the water higher, faster or more turbulent? Does the surface look different in stronger wind?
If it’s safe to observe from the same spot, make a second set of notes and compare the two visits. This helps you understand that rivers and streams are constantly changing rather than behaving like fixed features on a map.
You could also sketch the stretch of water from your viewing point, marking the main flow, visible eddies, areas of turbulence and possible obstacles. Keep your sketch simple. The aim is to represent the patterns you’ve observed, not to produce a perfect map.
What’s Next?
Reading the surface of water is one part of becoming more aware of your surroundings. The same habit of careful observation is useful when navigating, assessing terrain and making decisions outdoors.
If you haven’t tried it yet, have a look at SGUK Outdoor Skills Challenge 35: Make and Follow Trail Markers. It puts your observation skills to work in a different setting, helping you mark a short route and follow it back again.
You can complete the SGUK Outdoor Skills Challenges in any order, so choose whichever skill you’d like to practise next.
Learn. Practise. Master.
That’s what the SGUK Outdoor Skills Challenge is all about.
🔒Ready to test your survival skills?
Join Survival Guides UK for free, complete challenges, earn badges and increase your Survival Level.
JOIN FREE →
CRAIG BURR
FOUNDER · SURVIVAL GUIDES UK
I'm Craig, the person behind Survival Guides UK. I created SGUK because I wanted somewhere people could learn real outdoor skills in a practical, straightforward way — from lighting a fire and tying knots to navigation, campcraft and everything in between.
You can read more about the story behind SGUK here as well as our approach here.