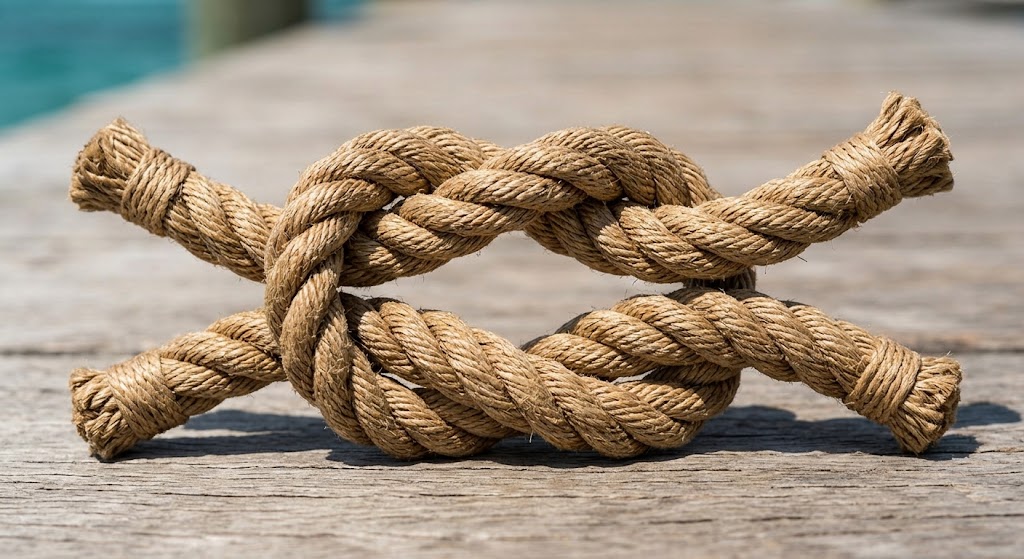
SGUK Outdoor Skills Challenge 21: Tie a Reef Knot
A good knot is one of those small outdoor skills that becomes genuinely useful once you know how to do it without thinking. The reef knot is a classic starting point: it is quick to learn, easy to check and handy when you need to tie something neatly around a bundle or package.
Your SGUK Outdoor Skills Challenge 12, is to learn how to tie a reef knot, practise it until the movements feel natural, and demonstrate that you can tie it correctly without following the instructions every time.
Your Challenge
Learn to tie a reef knot using the traditional method:
Left over right and under, then right over left and under.
You must be able to tie the knot, tighten it neatly, recognise whether it is correct and explain when it should not be used.
What You’ll Need
- A length of rope, cord or thick string, approximately 60–100 cm long.
- Two different-coloured lengths of cord, if available, to make the steps easier to follow.
- A small bundle of sticks, a rolled-up blanket or another suitable object to practise binding.
- A camera or phone to photograph your completed knot.
You do not need specialist equipment. A piece of ordinary cord is enough to get started.
Take the Challenge
Step 1: Understand the knot
A reef knot, sometimes called a square knot, is a binding knot. It is designed to hold the ends of a line together when binding something, rather than to act as a dependable knot for joining two ropes under tension.
You might use it to tie a parcel, hold a light bundle of sticks together or secure a rolled groundsheet temporarily. Its main advantage is that, when tied correctly, it lies fairly flat and can usually be untied without much difficulty.
Step 2: Tie your first reef knot
Lay your cord out so you have one end in each hand. If you are using two different colours, keep one colour in your left hand and the other in your right.
Follow these steps slowly:
- Left over right: Cross the left-hand end over the right-hand end.
- Tuck it under: Pass that end underneath the other cord and pull it through.
- Right over left: Now cross the end that is in your right hand over the other end.
- Tuck it under: Pass it underneath and pull it through.
- Tighten: Pull the two standing parts and the two short ends gently until the knot sits neatly.
The key is changing direction between the two halves. You are tying one half-knot, followed by its opposite. If you repeat the same crossing direction twice, you will usually create a granny knot instead.
Step 3: Check your knot
Before moving on, look closely at what you have tied.
A correctly tied reef knot should lie relatively flat and look balanced, with the two short ends emerging on the same side of the knot and the two standing parts emerging on the opposite side. The knot should look neat rather than twisted or lopsided.
If it looks wrong, undo it and start again. This is a skill worth learning properly rather than simply pulling the cord tighter and hoping for the best.
Step 4: Practise until you can tie it from memory
Untie your knot and repeat the process at least five times. Say the rhyme aloud as you work:
“Left over right and under, right over left and under.”
Once you can do this reliably, try tying it without saying the words. You could also practise with a friend, taking turns to tie a knot and check each other’s work.
The aim is not speed alone. A quickly tied incorrect knot is less useful than a correctly tied one that you can recognise and inspect.
Step 5: Put it to practical use
Find a suitable object, such as a small bundle of dry sticks or a rolled blanket, and practise binding it with your reef knot. The cord should be snug enough to hold the bundle together without forcing the knot or damaging the material.
Check that the knot remains tidy and that you can undo it afterwards. This gives you a simple way to practise the skill in a realistic setting.
Safety
Never rely on a reef knot for climbing, securing a person, supporting body weight, lifting heavy loads or any situation where failure could cause injury. It can slip or come undone under an unsuitable load, especially when used to join two ropes under tension.
For your practical test, use only a light bundle or another harmless object. Keep cord away from your neck and avoid pulling it tightly around fingers or limbs.
For further guidance, the Scouts website has a useful illustrated explanation: How to tie a reef knot.
Check Your Results
Before submitting your evidence, check that you can:
- Tie the two halves in opposite directions.
- Produce a neat, recognisable reef knot.
- Explain the difference between a reef knot and a granny knot.
- Give one appropriate use for a reef knot.
- Explain why it must not be relied upon for safety-critical loads.
If any of these steps are difficult, practise again before taking your evidence photograph. There is no need to rush; the purpose is to develop a skill you can use confidently.
Complete the Challenge
To complete this challenge, you must successfully tie a reef knot and provide photographic evidence showing your finished work.
Your photograph should clearly show the knot itself. If you have practised binding a bundle of sticks or a rolled blanket, you can photograph the knot in place, provided it is easy to see.
How to Submit Your Challenge
- Go to your SGUK member profile.
- Open the Social Activity area.
- Upload a photograph of your completed reef knot to your activity wall.
- Add the hashtag #SGUKChallenge21 to your post.
- Share your post for evidence verification.
Once you’ve shared your evidence and it has been verified, the SGUK Outdoor Skills Challenge 21 is complete and the completed challenges figure will be updated on your profile.
Challenge 21 Checklist
Want to Push Yourself?
Once you can tie a reef knot confidently, try these extra tasks:
- Tie three reef knots in succession without looking at the instructions.
- Practise using two different colours of cord, then try again with matching cord.
- Ask someone to tie a knot and see whether you can identify a correctly tied reef knot or a granny knot.
- Learn another useful outdoor knot, such as the bowline, and compare what each knot is designed to do.
Remember that knowing a knot also means understanding its limitations. Choosing the right knot for the job is just as important as tying it correctly.
What’s Next?
Once you’ve mastered the reef knot, you can build on your knot-tying skills by revisiting SGUK Outdoor Skills Challenge 04: Tie a Bowline Knot. Compare how the two knots are formed and what each one is intended to do.
You can also explore the other SGUK Outdoor Skills Challenges to keep practising practical skills in navigation, campcraft, fire safety and outdoor awareness. Each challenge can be completed in any order, so choose whichever skill you would most like to master next.
Learn. Practise. Master.
That’s what the SGUK Outdoor Skills Challenge is all about.
🔒Ready to test your survival skills?
Join Survival Guides UK for free, complete challenges, earn badges and increase your Survival Level.
JOIN FREE →
CRAIG BURR
FOUNDER · SURVIVAL GUIDES UK
I'm Craig, the person behind Survival Guides UK. I created SGUK because I wanted somewhere people could learn real outdoor skills in a practical, straightforward way — from lighting a fire and tying knots to navigation, campcraft and everything in between.
You can read more about the story behind SGUK here as well as our approach here.