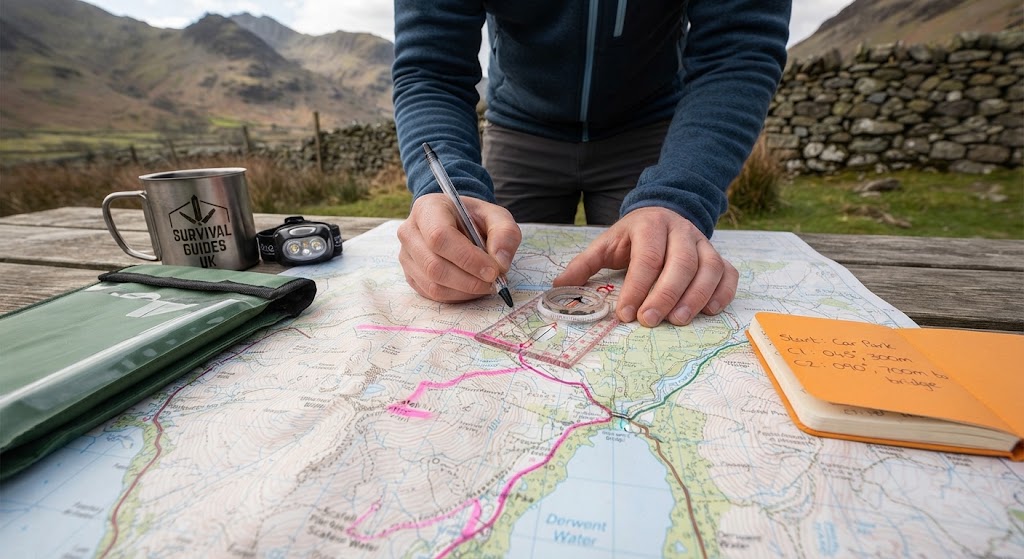
Navigation Checkpoints: How to Stay on Course
Good navigation is not simply about reaching your destination.
It is about knowing where you are throughout the journey.
A navigation checkpoint is a planned point on a route where you stop or pause to confirm your position, check your progress and prepare for the next section.
Checkpoints are particularly useful on longer or more complicated routes. They break a journey into smaller sections and give you regular opportunities to catch mistakes before they become difficult to correct.
In this guide, you will learn how to choose, use and plan effective navigation checkpoints.
What You’ll Learn
By the end of this guide, you should be able to:
- Understand what a navigation checkpoint is.
- Choose useful checkpoints on a map.
- Use landscape features to confirm your position.
- Distinguish between strong and weak checkpoints.
- Use checkpoints to monitor distance and direction.
- Build checkpoints into a complete route.
- Recognise when a checkpoint does not match your expectations.
- Use checkpoints to recover from navigation errors.
Equipment
You will need:
- A suitable map of the area.
- A baseplate compass.
- A pencil.
- A ruler or map romer if required.
- A waterproof map case if required.
- A watch or other method of monitoring time.
Prerequisites
Before attempting this lesson, you should understand:
- Basic map reading.
- Grid references.
- Map symbols.
- Contour lines.
- Taking and following bearings.
- Estimating distance.
- Using attack points.
- Using catching features.
- Planning a route.
Instructions
1. Understand what a checkpoint is
A navigation checkpoint is a location where you can confidently check that you are where you expect to be.
It might be:
- A path junction.
- A bridge.
- A road crossing.
- A distinctive building.
- A summit.
- A woodland edge.
- A stream crossing.
- A wall junction.
- A distinctive contour feature.
The best checkpoints are easy to identify both on the map and on the ground.
2. Choose checkpoints before setting off
Don’t wait until you are confused to decide where you should check your position.
Look at the route beforehand and identify useful checkpoints.
For example:
Start → track junction → bridge → woodland edge → summit
Each of these could become a checkpoint.
You can then use them to divide the route into manageable sections.
3. Choose strong checkpoints
Not all features make equally good checkpoints.
A strong checkpoint is distinctive and unlikely to be confused with something else.
For example, a clearly marked bridge over a stream may be a stronger checkpoint than an ordinary tree beside a path.
Good checkpoints often have several identifying features.
For example:
“The path crosses the stream, then continues beside the woodland.”
That is more useful than:
“There is a tree here.”
The more information you have to confirm your position, the more confidence you can have.
4. Use multiple features to confirm your position
Whenever possible, look for more than one piece of evidence.
Suppose your map shows that you should reach a path junction next to a stream with woodland to the west.
When you arrive, look for all three:
- The path junction.
- The stream.
- The woodland.
If they all match the map, your position is much easier to confirm.
This is stronger than relying on one feature alone.
5. Use checkpoints to confirm distance
A checkpoint also provides a useful distance check.
Suppose your plan says that the bridge should be approximately 700 metres from your starting point.
If you reach a bridge after only 300 metres, ask whether it is actually the bridge shown on your map.
If you have travelled approximately 700 metres and the surrounding features also match, your confidence increases.
Distance should not be used alone, but it becomes much more useful when combined with other evidence.
6. Use checkpoints to confirm direction
Your checkpoint can also confirm whether you have maintained your intended direction.
Imagine that you are travelling on a bearing towards a ridge.
When you reach the ridge, the map shows that a path should run along its top.
If you find the ridge but the path is not where you expect it to be, stop and investigate.
You may have reached the wrong ridge or approached it from the wrong direction.
7. Use attack points as checkpoints
An attack point can also serve as a checkpoint.
For example, you might navigate to a large track junction before making a short final move towards a small footbridge.
When you reach the track junction, stop and confirm your position.
You now have a reliable starting point for the next navigation section.
8. Use catching features as safety checks
A catching feature is usually beyond your intended destination.
It can therefore act as a warning that you have travelled too far.
For example:
Destination: small path junction
Catching feature: major road
If you reach the major road without finding the path junction, stop.
Don’t simply continue.
The catching feature has done its job by telling you that something needs checking.
9. Don’t make checkpoints too far apart
On easy terrain with obvious features, checkpoints may be relatively far apart.
In difficult or featureless terrain, they may need to be much closer together.
Consider using more checkpoints when:
- Visibility is poor.
- The landscape is featureless.
- There are many similar paths.
- The terrain is complex.
- You are crossing open ground.
- You are navigating through woodland.
- The consequences of an error are greater.
The harder the navigation, the more frequently you should confirm your position.
10. Use checkpoints at decision points
Some of the most useful checkpoints occur where your route changes.
For example:
- A path junction.
- A change in direction.
- The point where you leave a track.
- The point where you cross a stream.
- The point where you begin a bearing across open ground.
These are places where a navigation error can easily occur.
Stop, confirm your position and then begin the next section.
11. Check before entering difficult terrain
A checkpoint immediately before difficult terrain can be particularly valuable.
Imagine your route leaves a clear track and enters open moorland.
The track junction becomes an important checkpoint.
Before leaving the track:
- Confirm your position.
- Confirm your bearing.
- Check the distance.
- Identify the next feature.
- Identify your catching feature.
Then begin the difficult section.
This gives you a known starting point.
12. Don’t ignore a checkpoint that doesn’t match
Sometimes you will reach what you think is your checkpoint but something doesn’t look right.
For example:
- The path is in the wrong place.
- A stream is missing.
- The terrain doesn’t match.
- The distance seems wrong.
- The next feature cannot be seen where expected.
Stop.
Don’t automatically decide that the map must be wrong or that you must be nearly there.
Check your position again.
The checkpoint has identified a potential navigation problem.
13. Work backwards if necessary
If you cannot confirm your current position, think about the last checkpoint you definitely identified.
Ask:
Where was the last place I knew exactly where I was?
Then work forwards from there.
Check:
- Your bearing.
- Your distance.
- The features you passed.
- Any decisions you made.
You may discover where the error occurred.
14. Use checkpoints to manage a long route
A long journey can seem complicated if you look at it as one continuous route.
Instead, divide it into sections.
For example:
Checkpoint 1: Start
Checkpoint 2: Track junction
Checkpoint 3: Bridge
Checkpoint 4: Woodland edge
Checkpoint 5: Ridge
Checkpoint 6: Summit
You only need to solve the navigation problem between the current checkpoint and the next one.
This makes a long route much easier to manage.
How to Choose a Good Checkpoint
Before selecting a checkpoint, ask:
Can I identify it easily?
A distinctive feature is better than an ordinary one.
Can I find it on the map?
If you cannot identify it accurately on the map, it is unlikely to make a useful checkpoint.
Can I confirm it using other features?
Multiple pieces of evidence make a checkpoint stronger.
Will I know when I have reached it?
There should be a clear indication that you have arrived.
Does it matter to the route?
The most useful checkpoints are often places where you need to make a navigation decision.
Example Route
Imagine you are navigating from a campsite to a hill summit.
Your route could be planned like this:
Checkpoint 1 — Campsite
Confirm your starting position.
↓
Checkpoint 2 — Track junction
Follow the track and confirm the junction before leaving it.
↓
Checkpoint 3 — Woodland edge
Take a bearing from the track junction and navigate towards the woodland.
↓
Checkpoint 4 — Ridge
Cross the open ground and confirm the ridge using the terrain and contours.
↓
Checkpoint 5 — Summit
Follow the ridge towards the summit and confirm the final destination.
Each checkpoint gives you an opportunity to stop, check and prepare for what comes next.
Checkpoint Exercise
Choose a familiar outdoor area and plan a route containing at least five checkpoints.
For each checkpoint, record:
- The location.
- How you will recognise it.
- The approximate distance from the previous checkpoint.
- The bearing from the previous checkpoint if required.
- What other features will confirm your position.
- What lies beyond it.
- Whether it is also an attack point or catching feature.
Then walk the route.
At every checkpoint, stop and confirm your position before continuing.
Afterwards, consider which checkpoints were easy to identify and which were less useful.
Final Tip
A checkpoint is more than a place where you stop.
It is a proof point in your route.
Every time you confirm a checkpoint, you are effectively saying:
“I know where I am, I know where I’m going next, and I know how I will recognise it when I get there.”
Build that habit into your navigation and long routes become much easier to manage.
🔒Ready to test your survival skills?
Join Survival Guides UK for free, complete challenges, earn badges and increase your Survival Level.
JOIN FREE →
CRAIG BURR
FOUNDER · SURVIVAL GUIDES UK
I'm Craig, the person behind Survival Guides UK. I created SGUK because I wanted somewhere people could learn real outdoor skills in a practical, straightforward way — from lighting a fire and tying knots to navigation, campcraft and everything in between.
You can read more about the story behind SGUK here as well as our approach here.